Setting up Synology CMS
Requirements
- Two Synology devices that talk to each other on ports 5001 and 9901. Either by being on the same network, via vpn or port forwarding.
- NVR1218 and UC3200 cannot be added to the CMS Host for management. (Source)
Setting up Synology CMS
Initial Setup on Client NVR
-
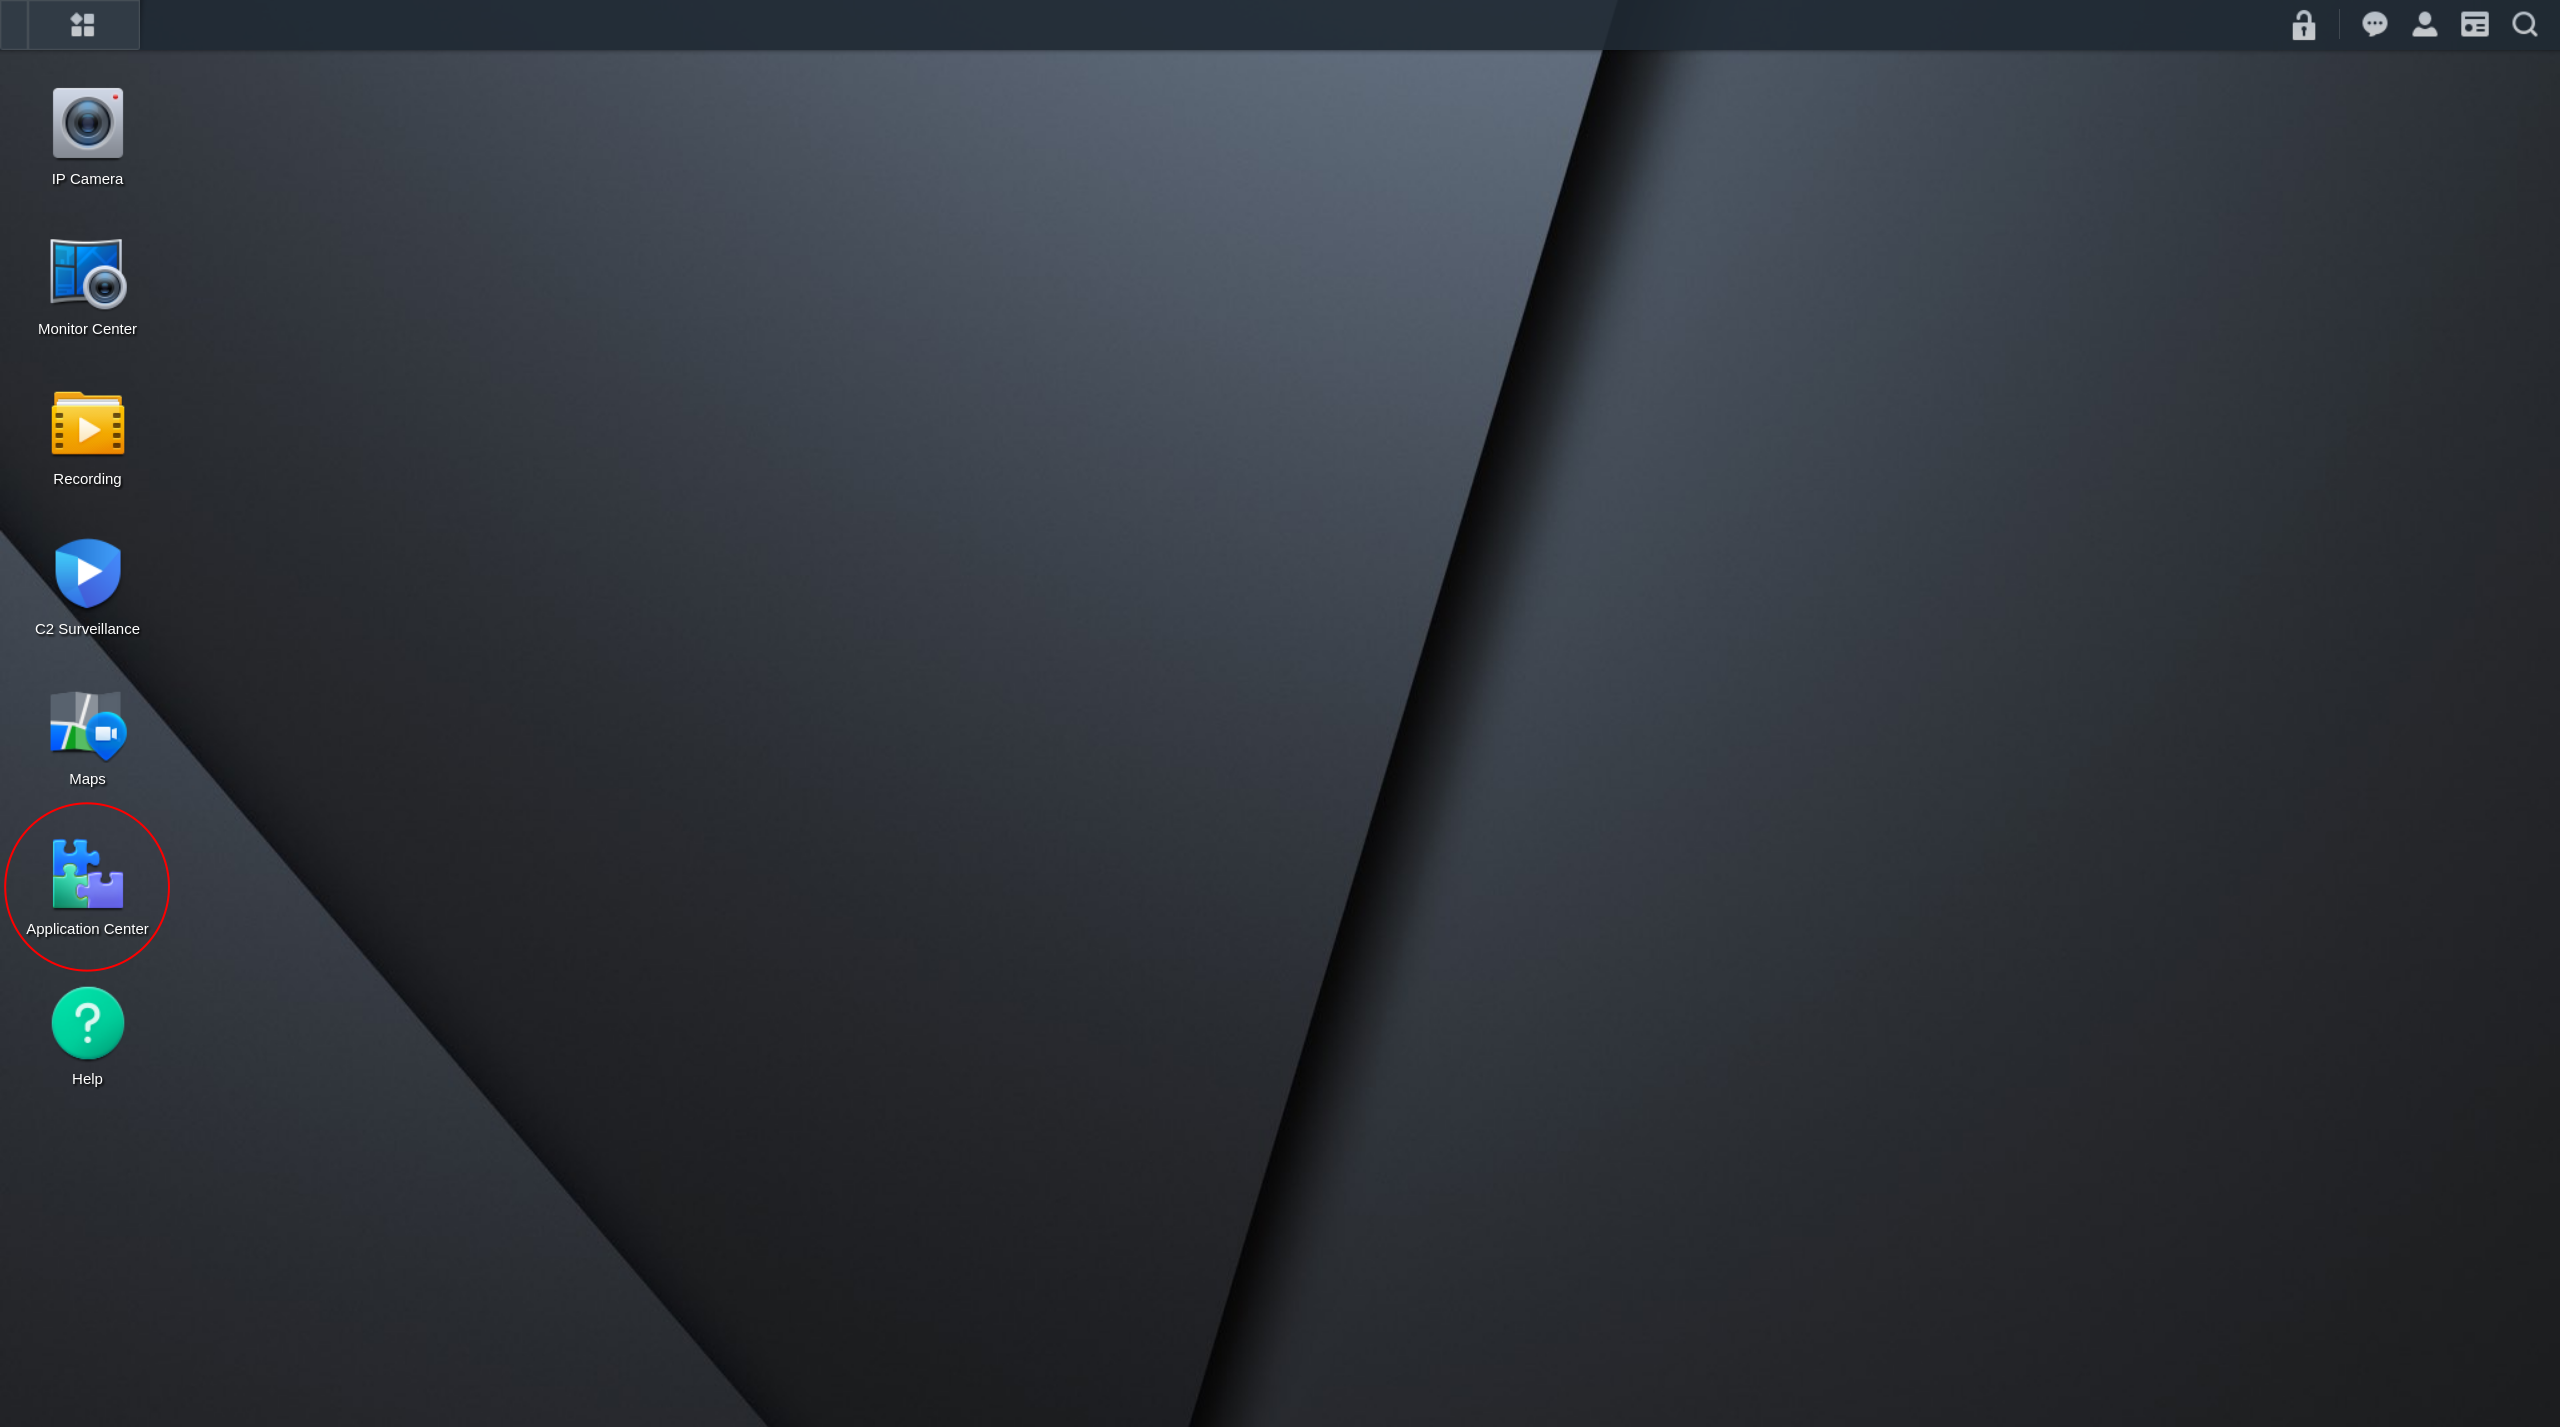
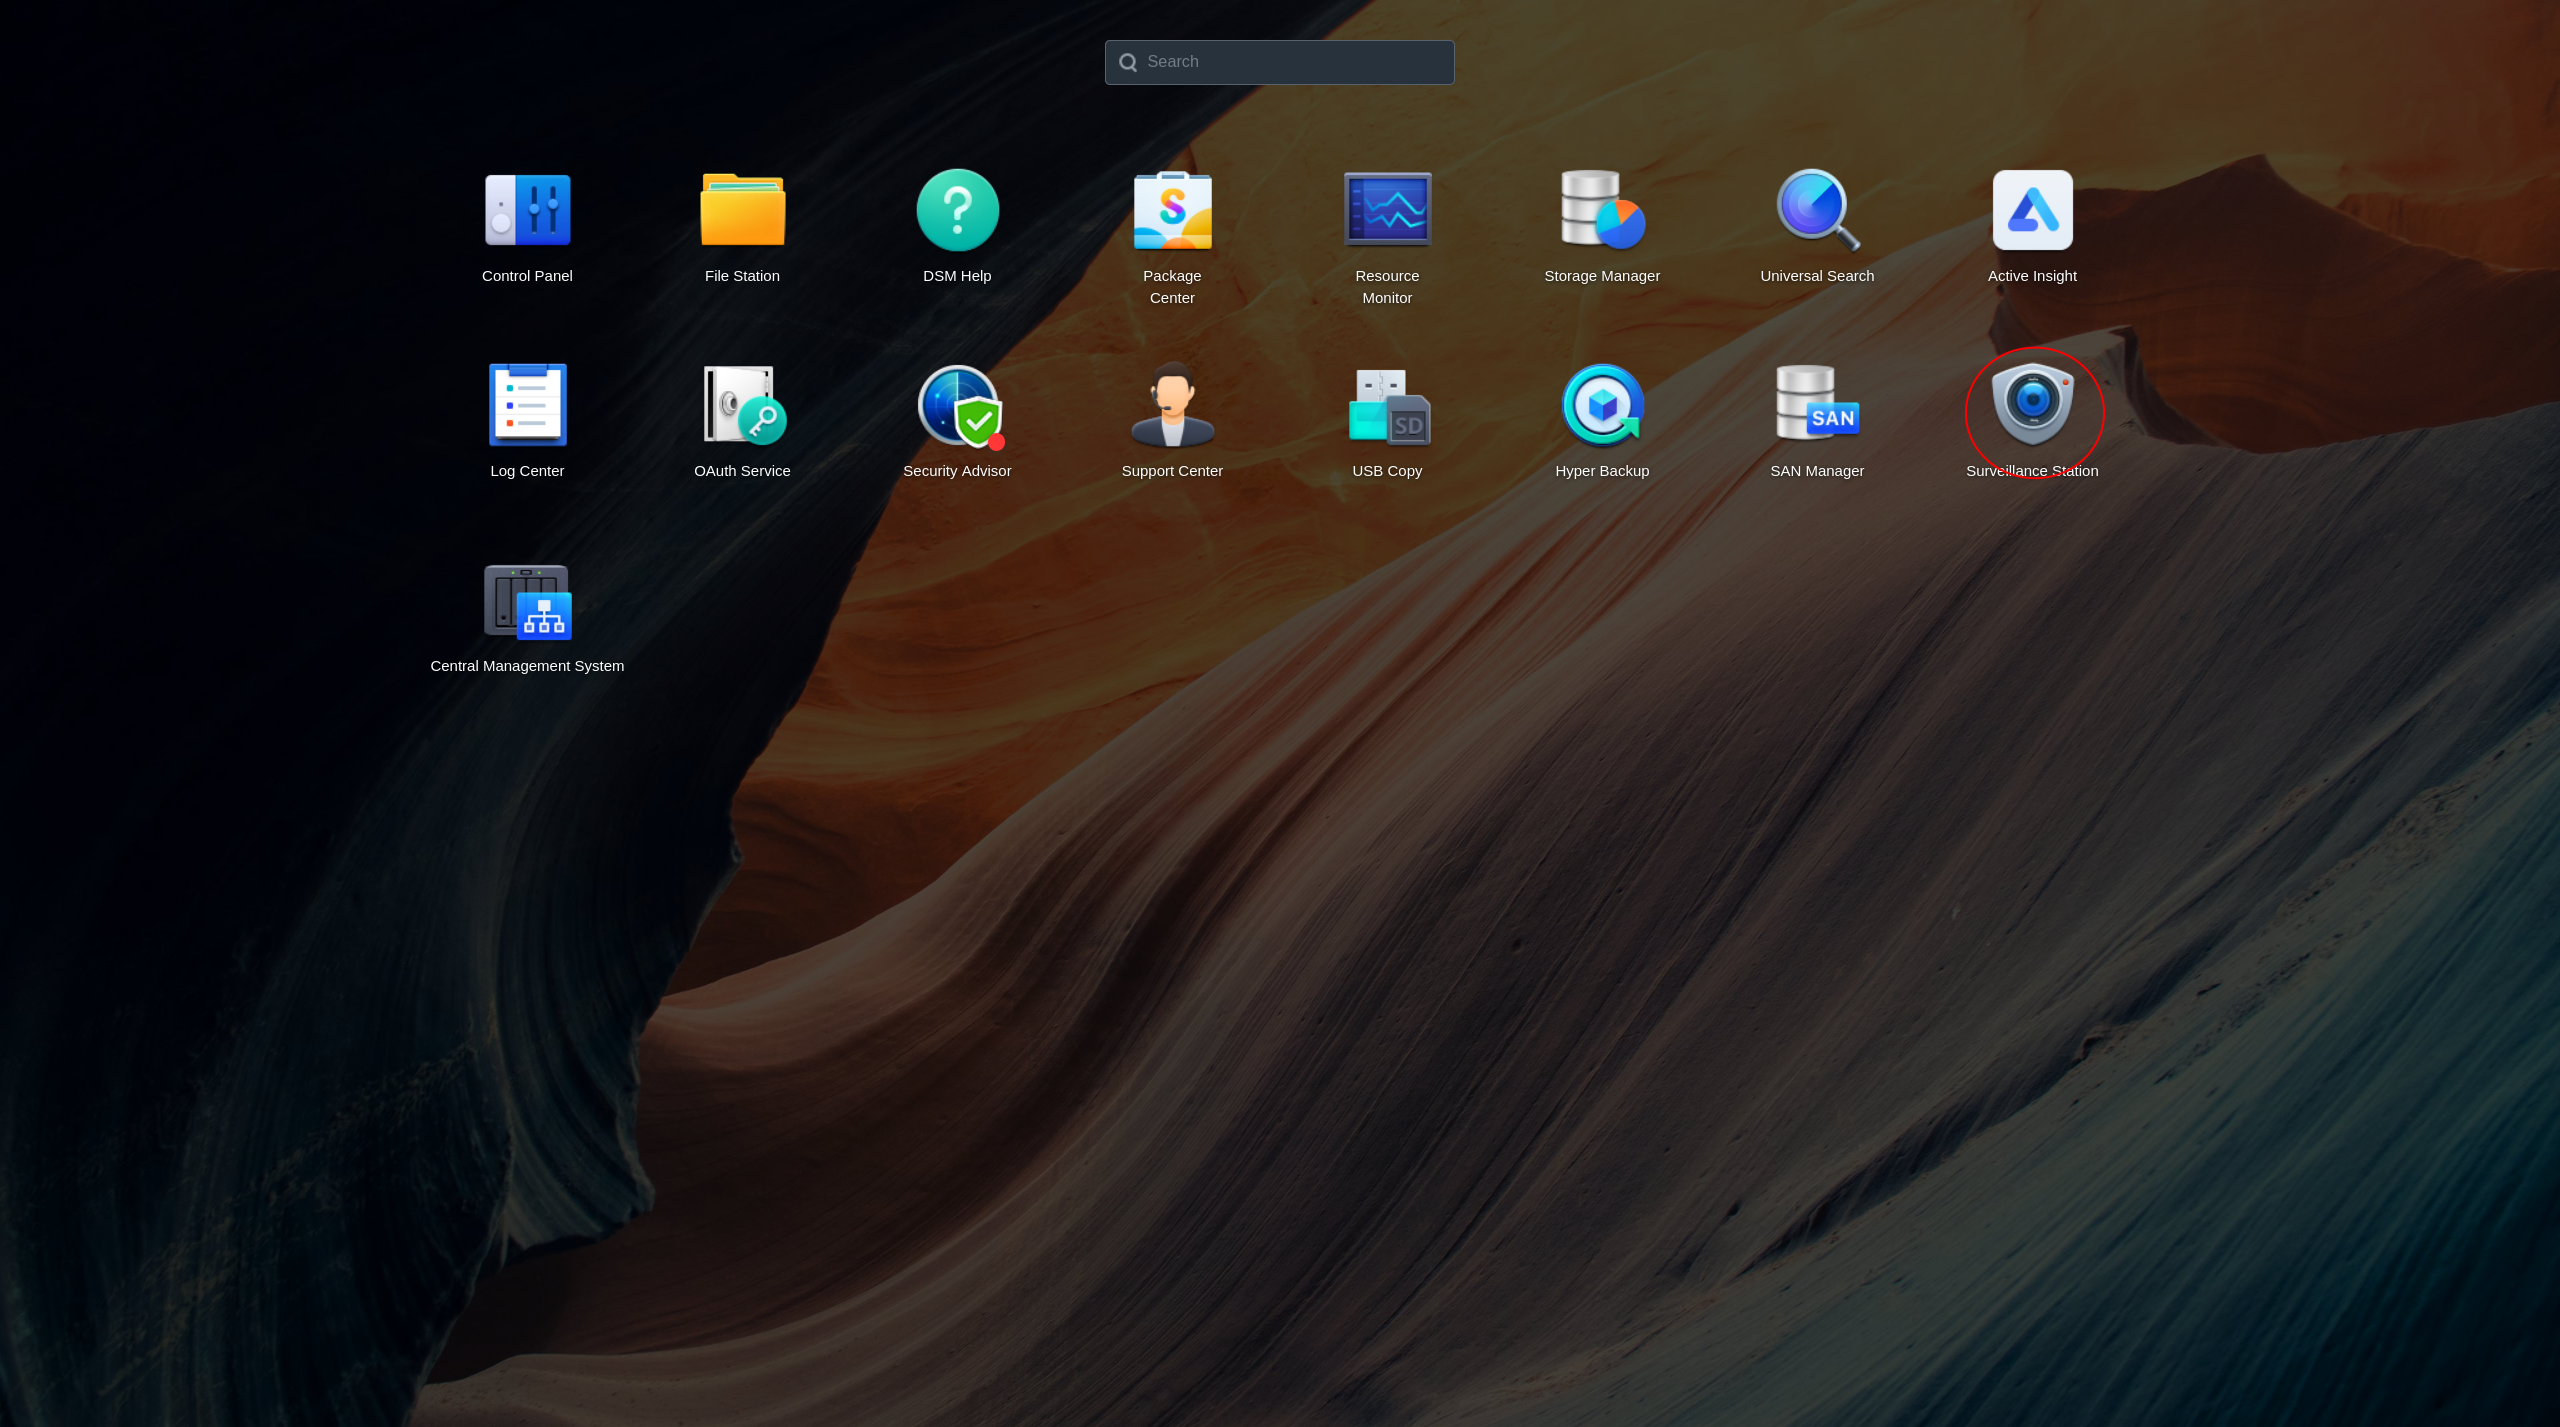
Login into the Surveillance Station on Synology device that will be the CMS client

-
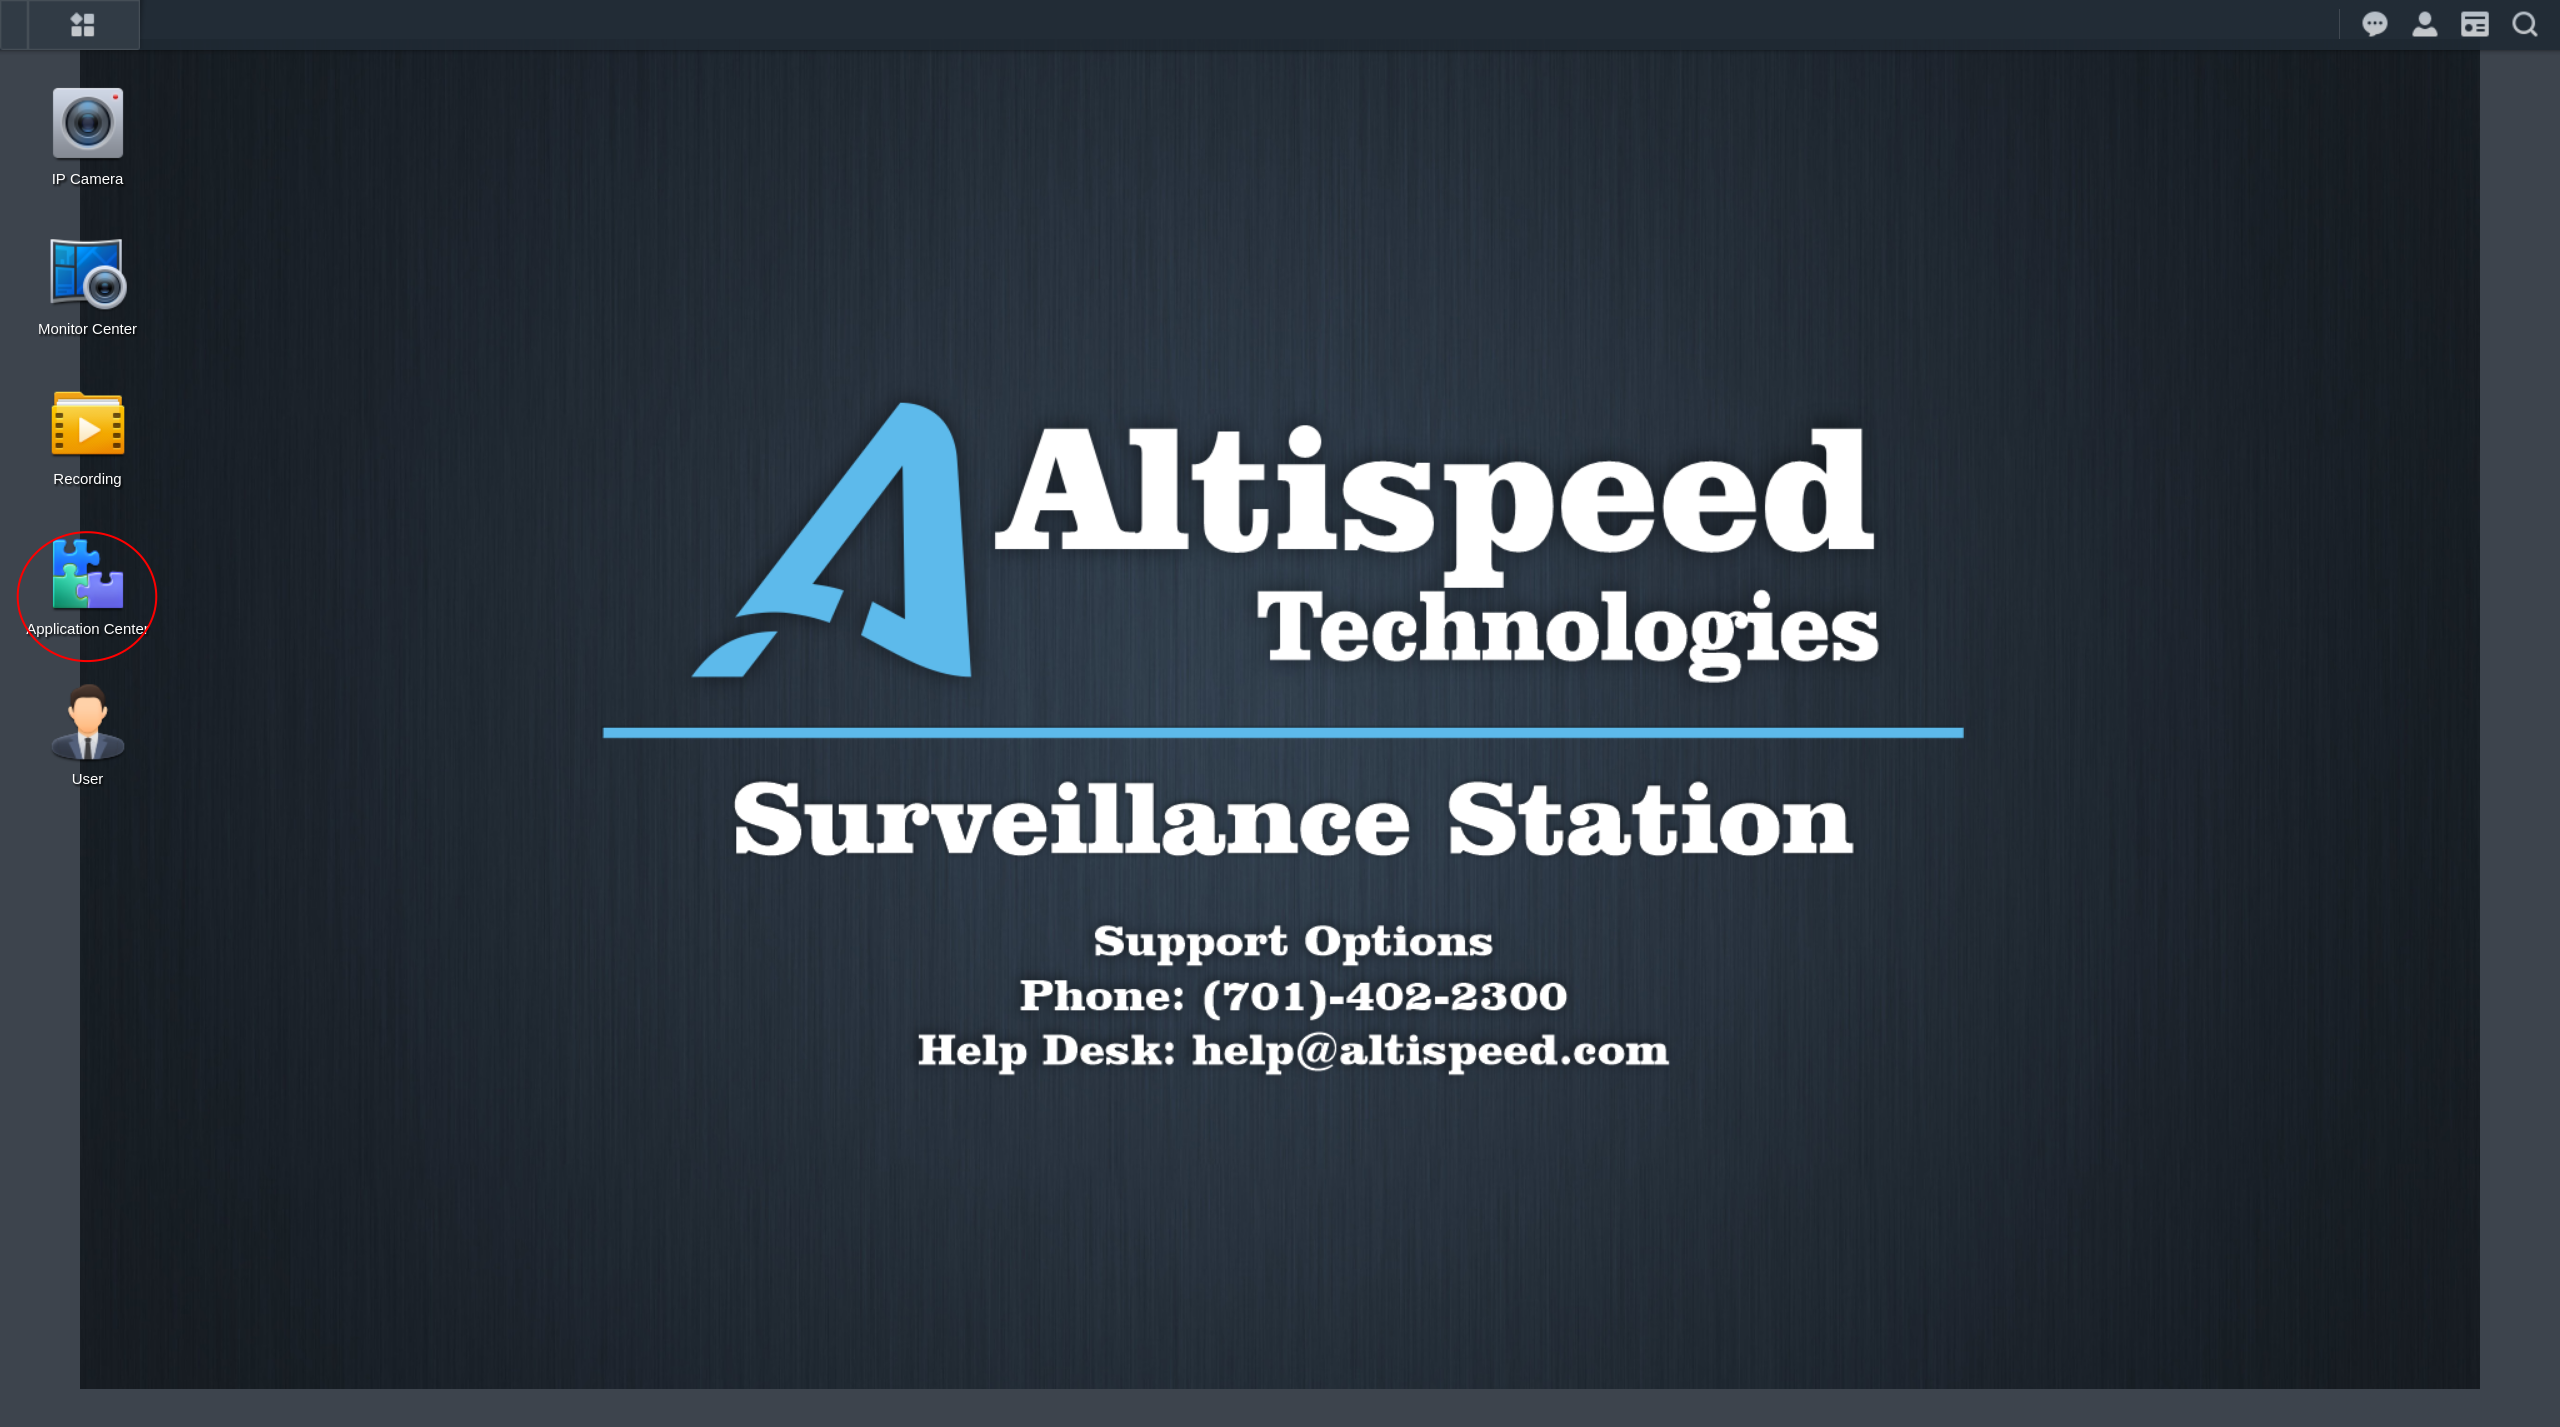
Open Application Center
-
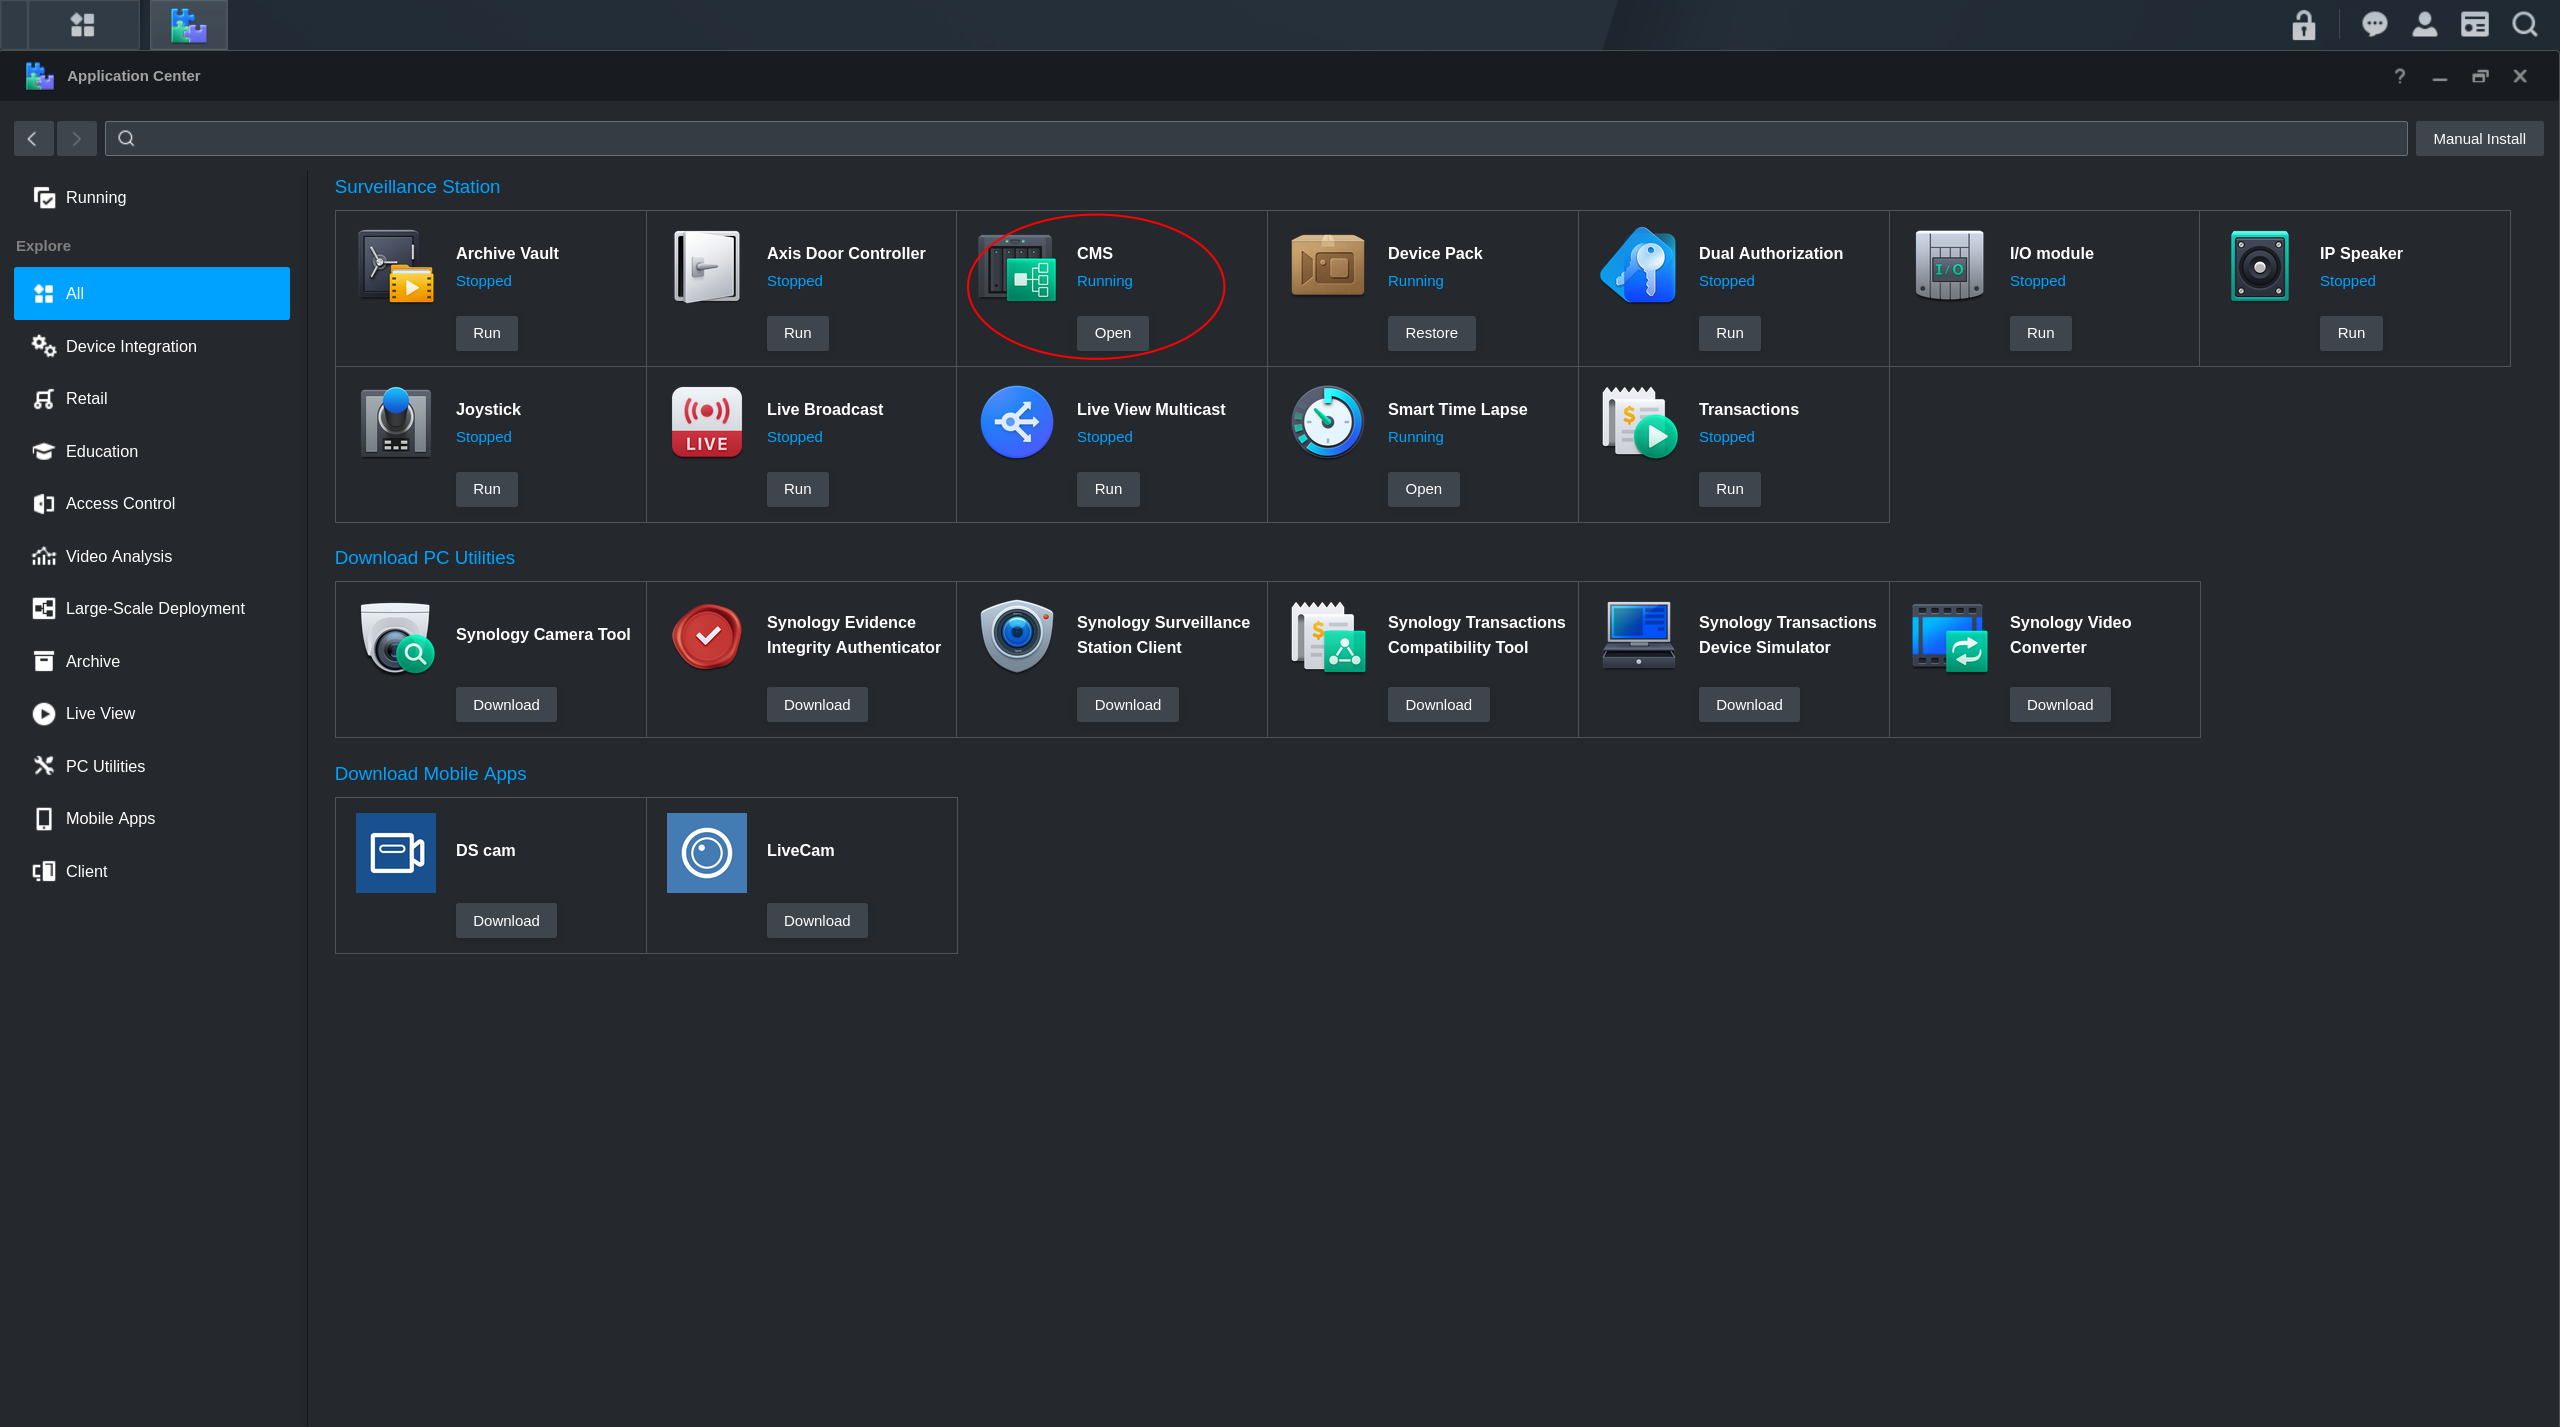
Ensure that CMS is installed and running
Setting up Host NVR
-
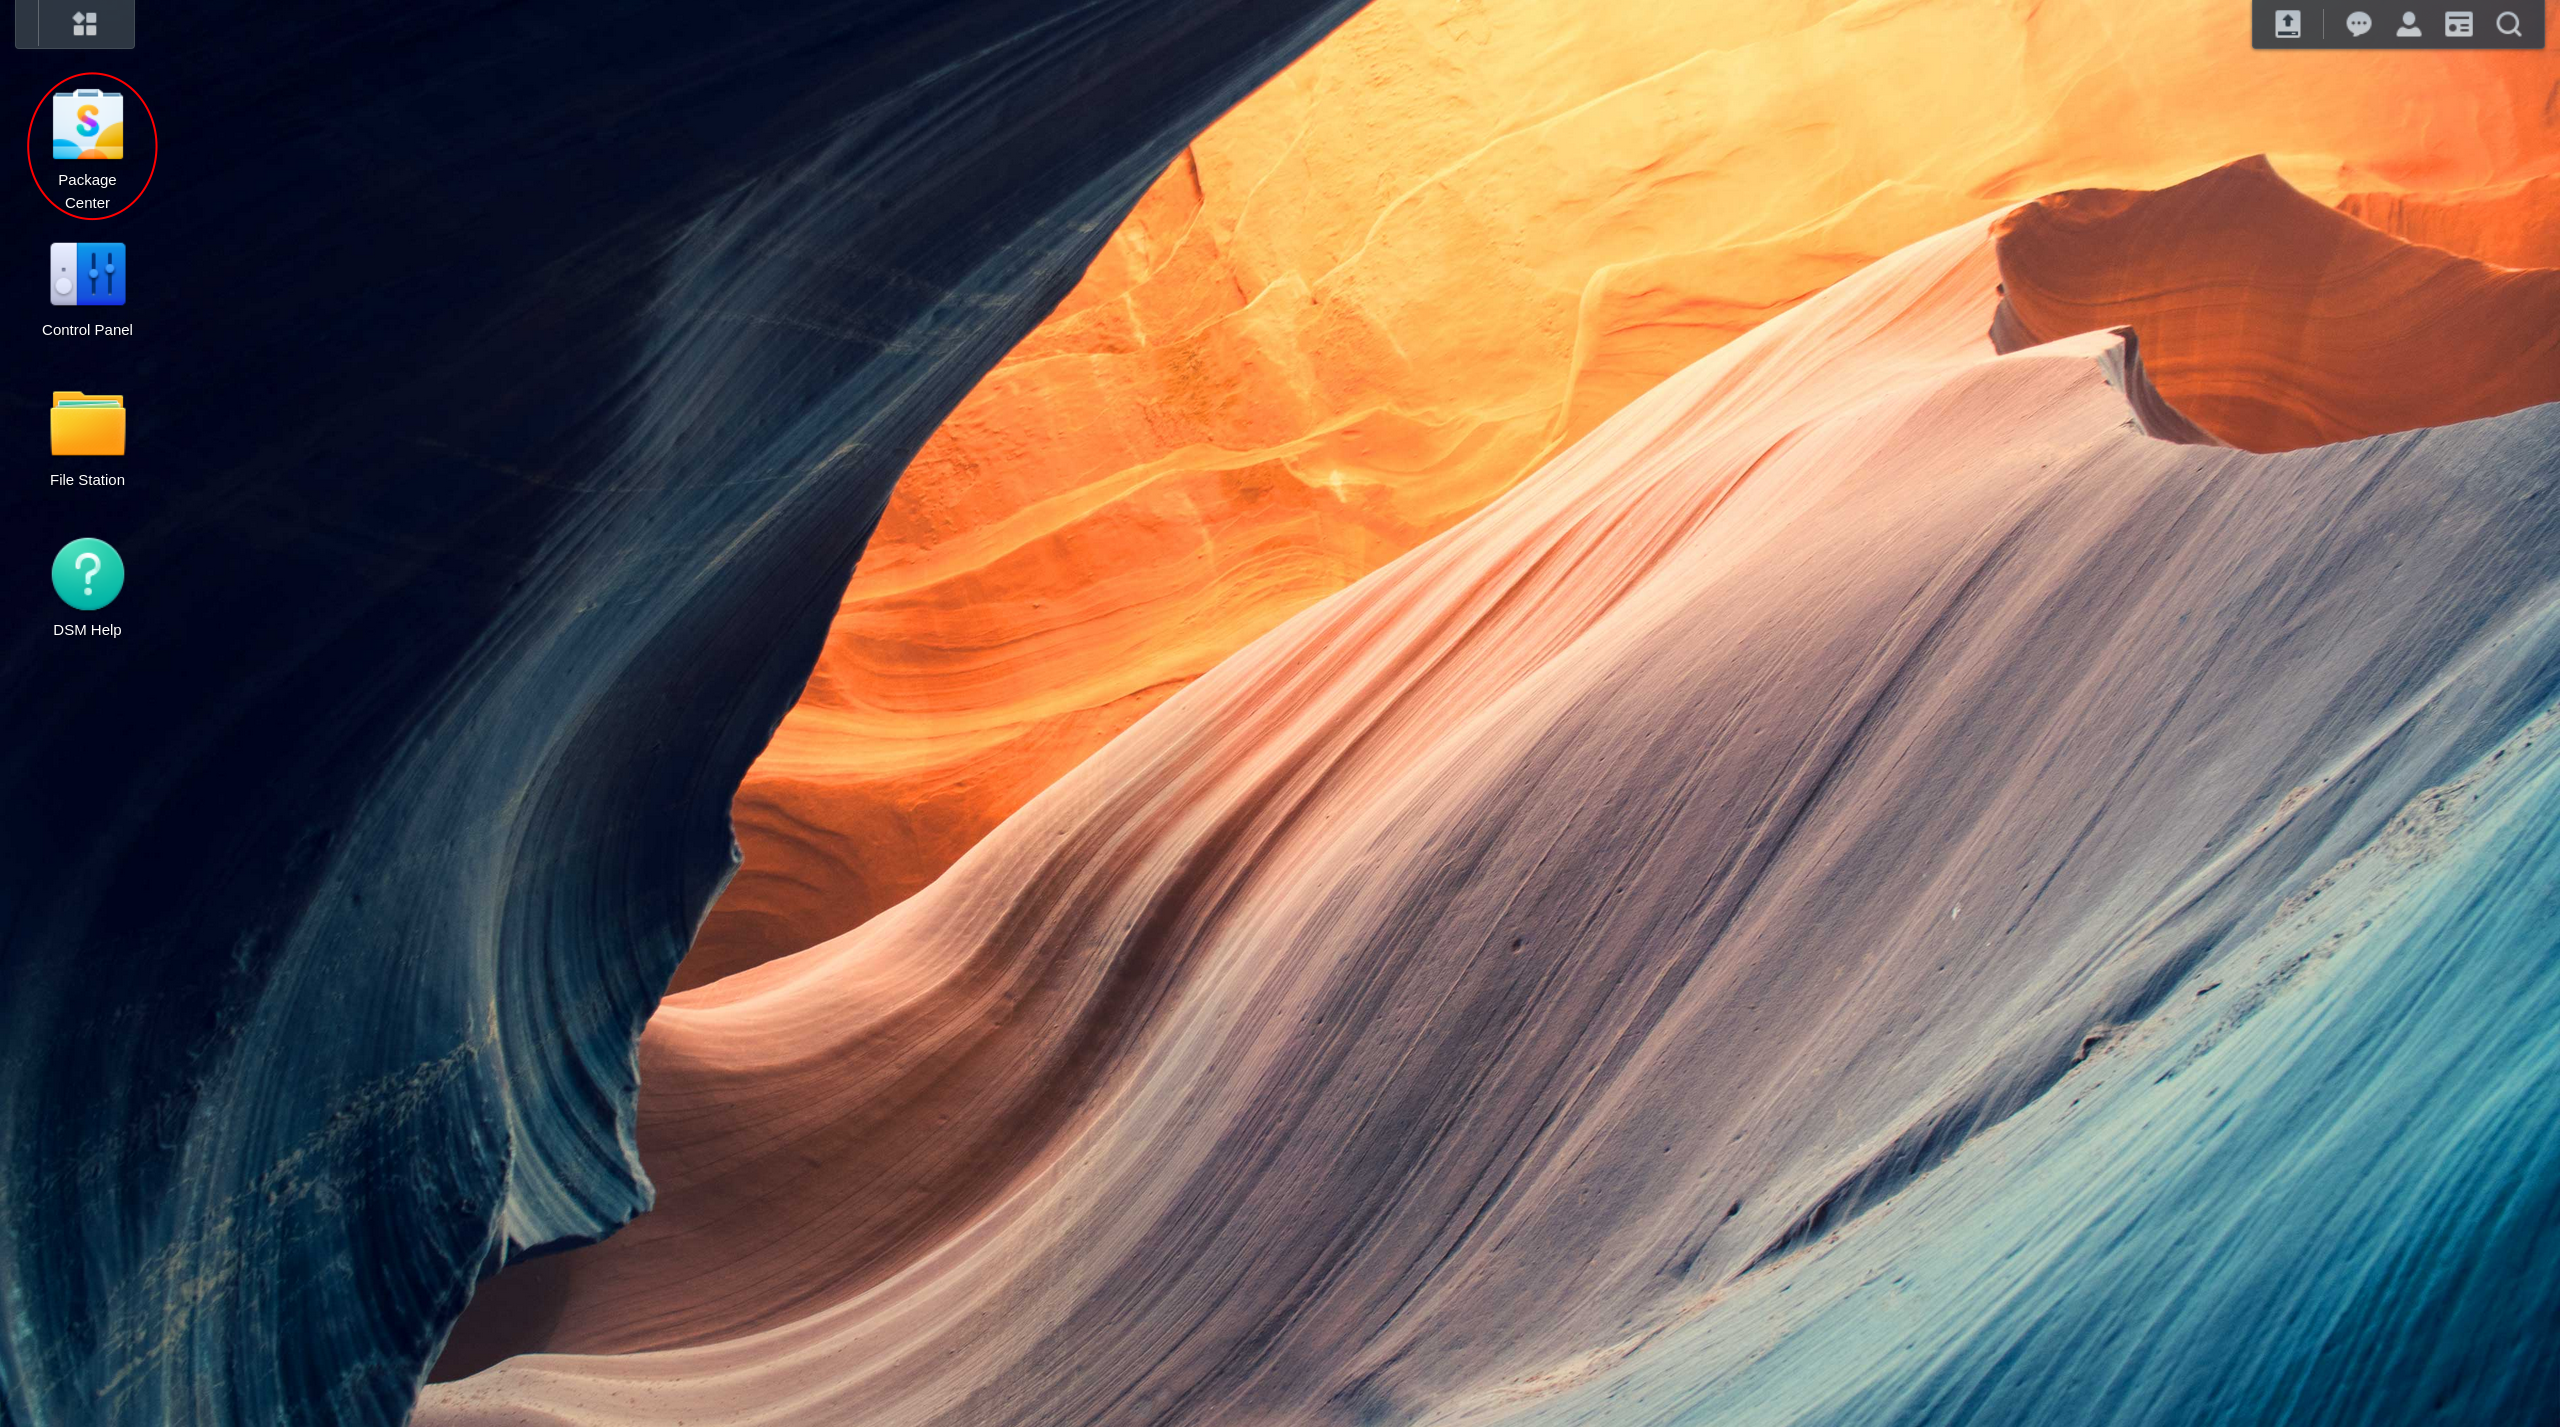
Now log into DMS on the Synology device that will be the CMS Host

-
Open Package Center
-
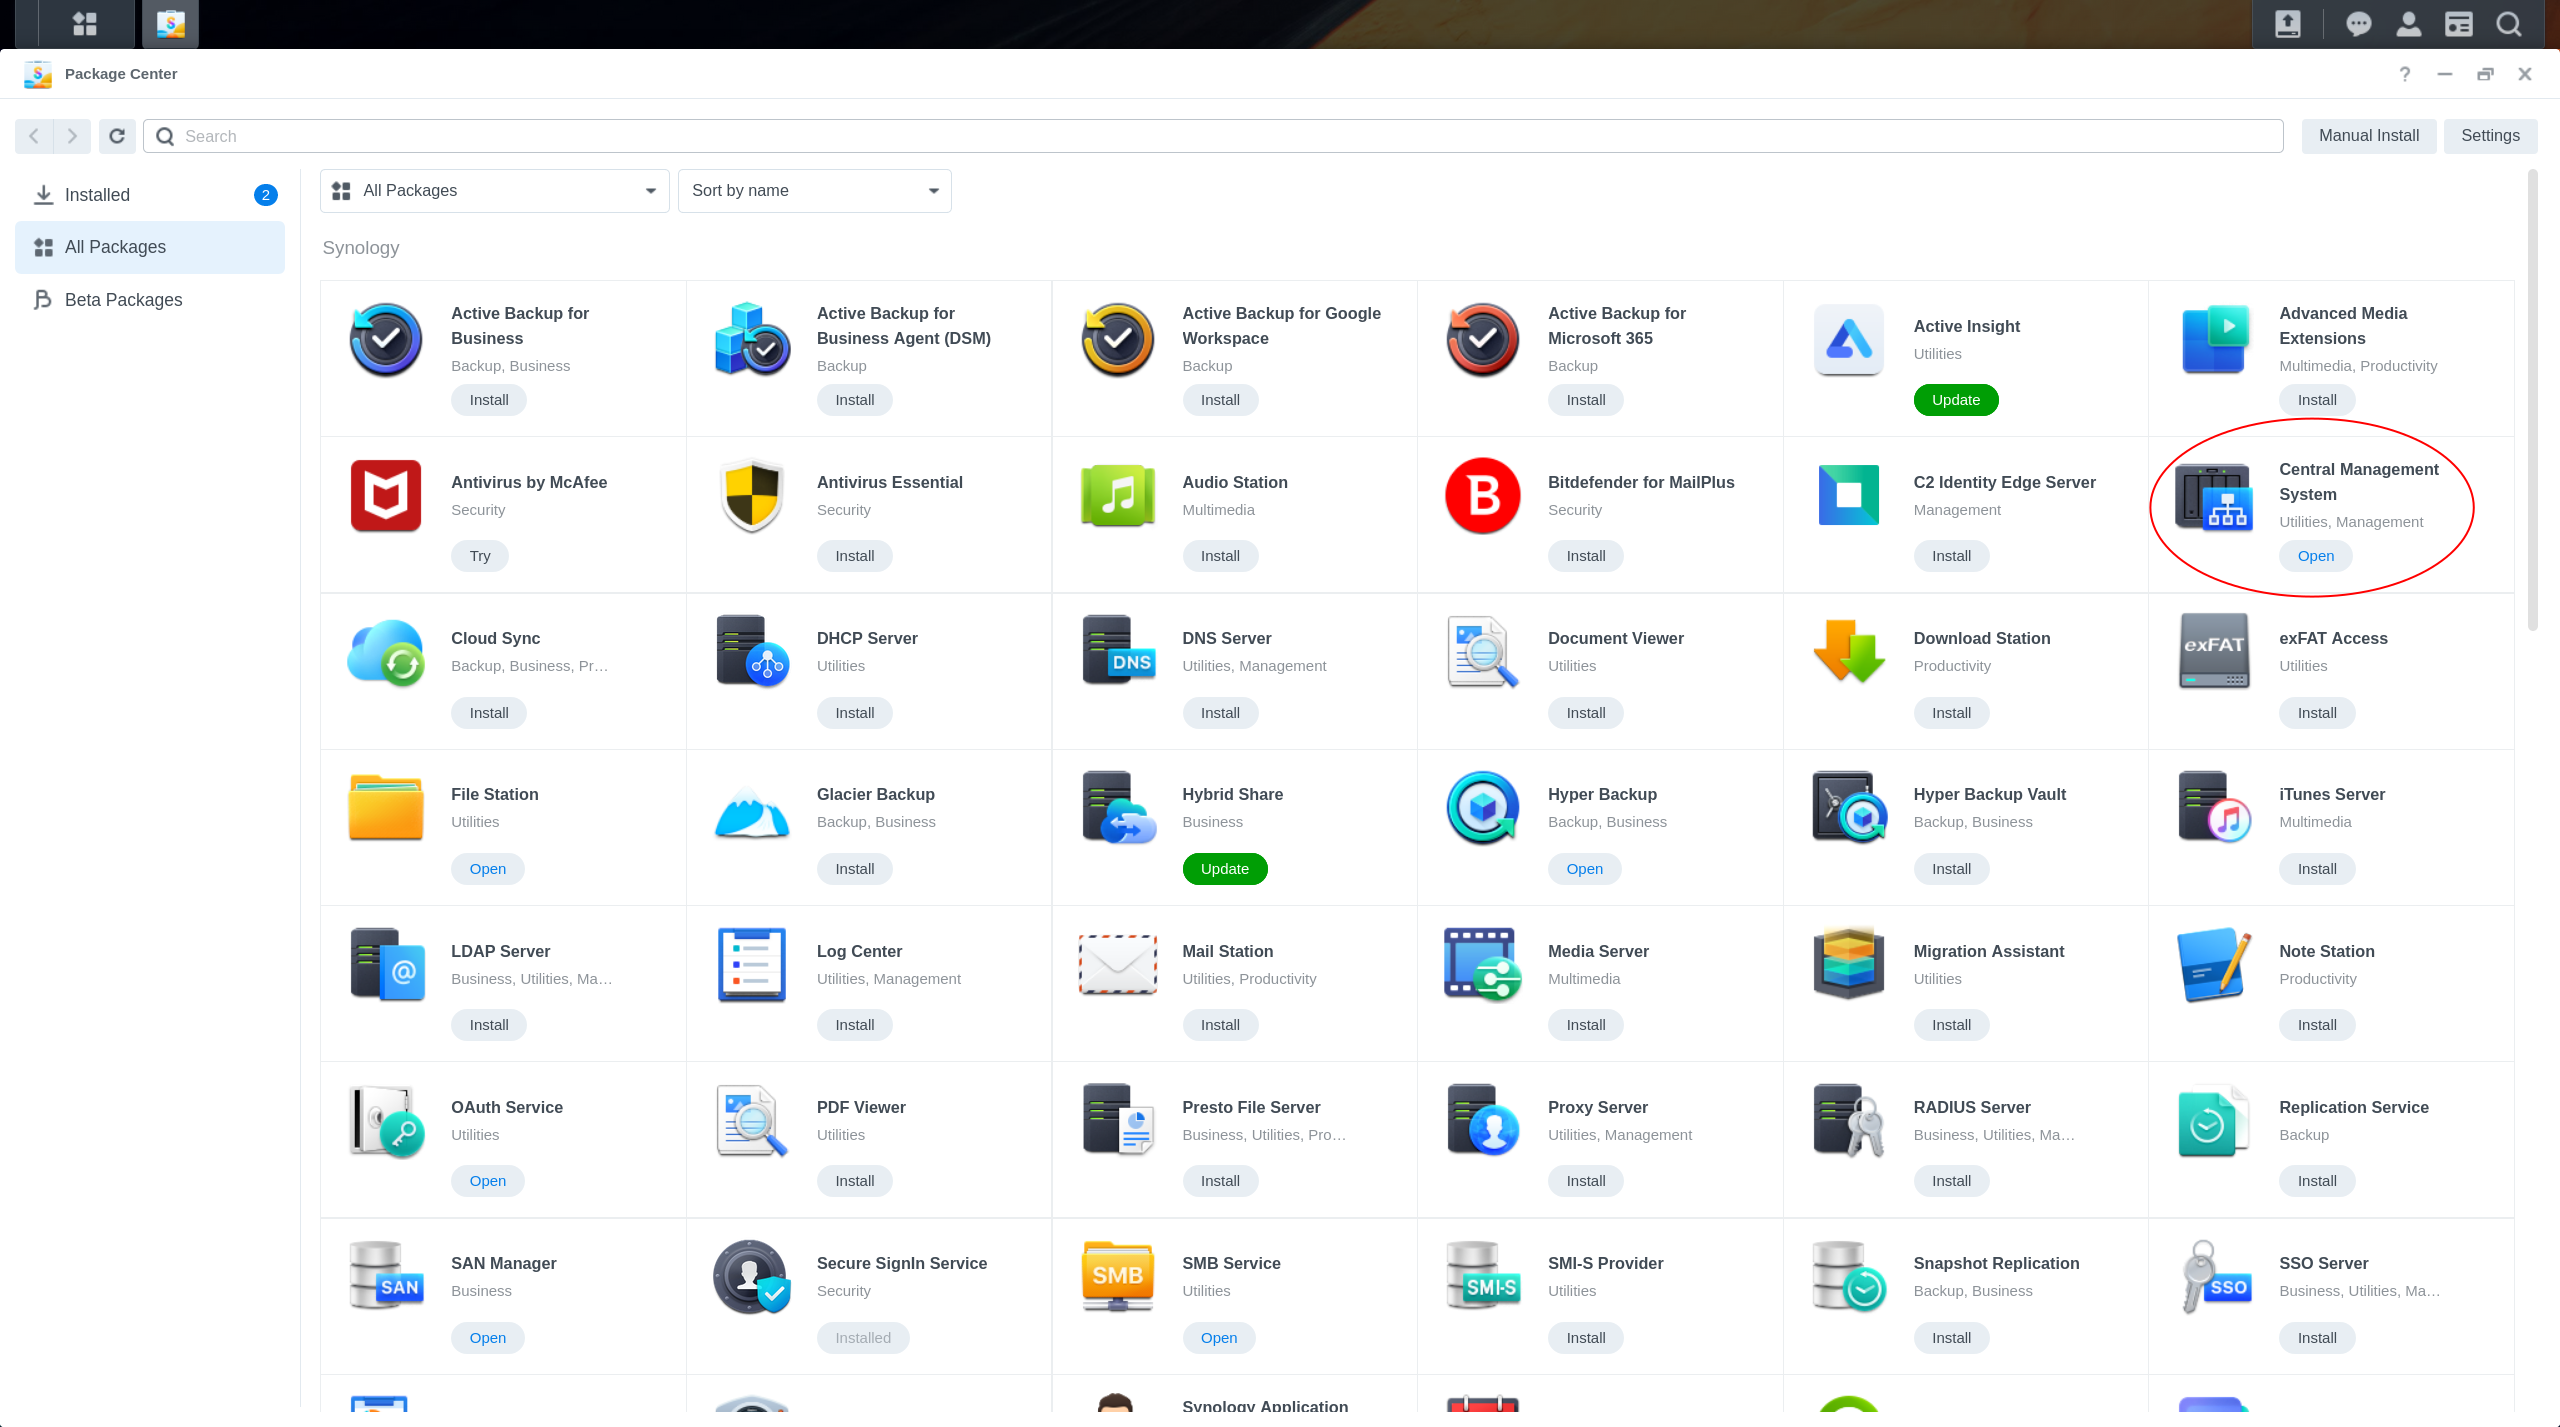
Ensure Central Management System is installed
-
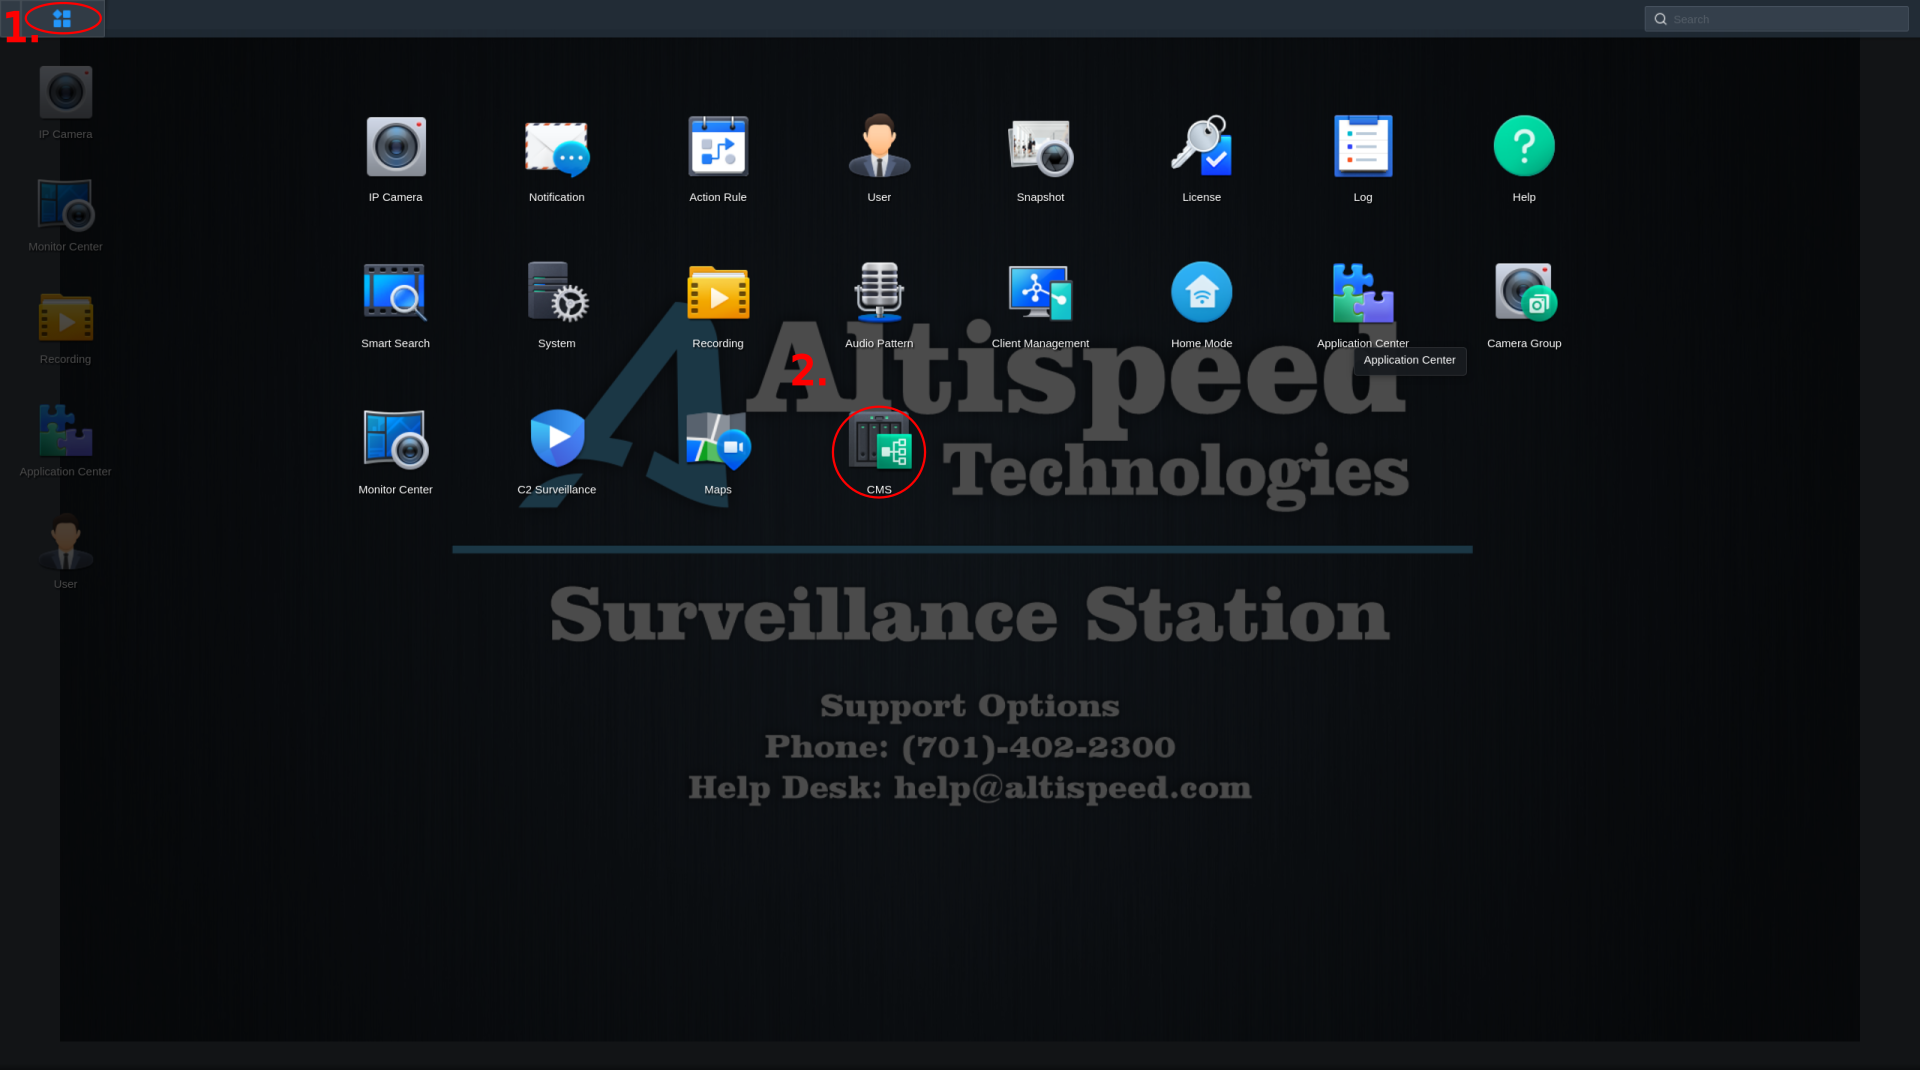
Click on application menu in the upper left hand corner

-
Select Central Management System

-
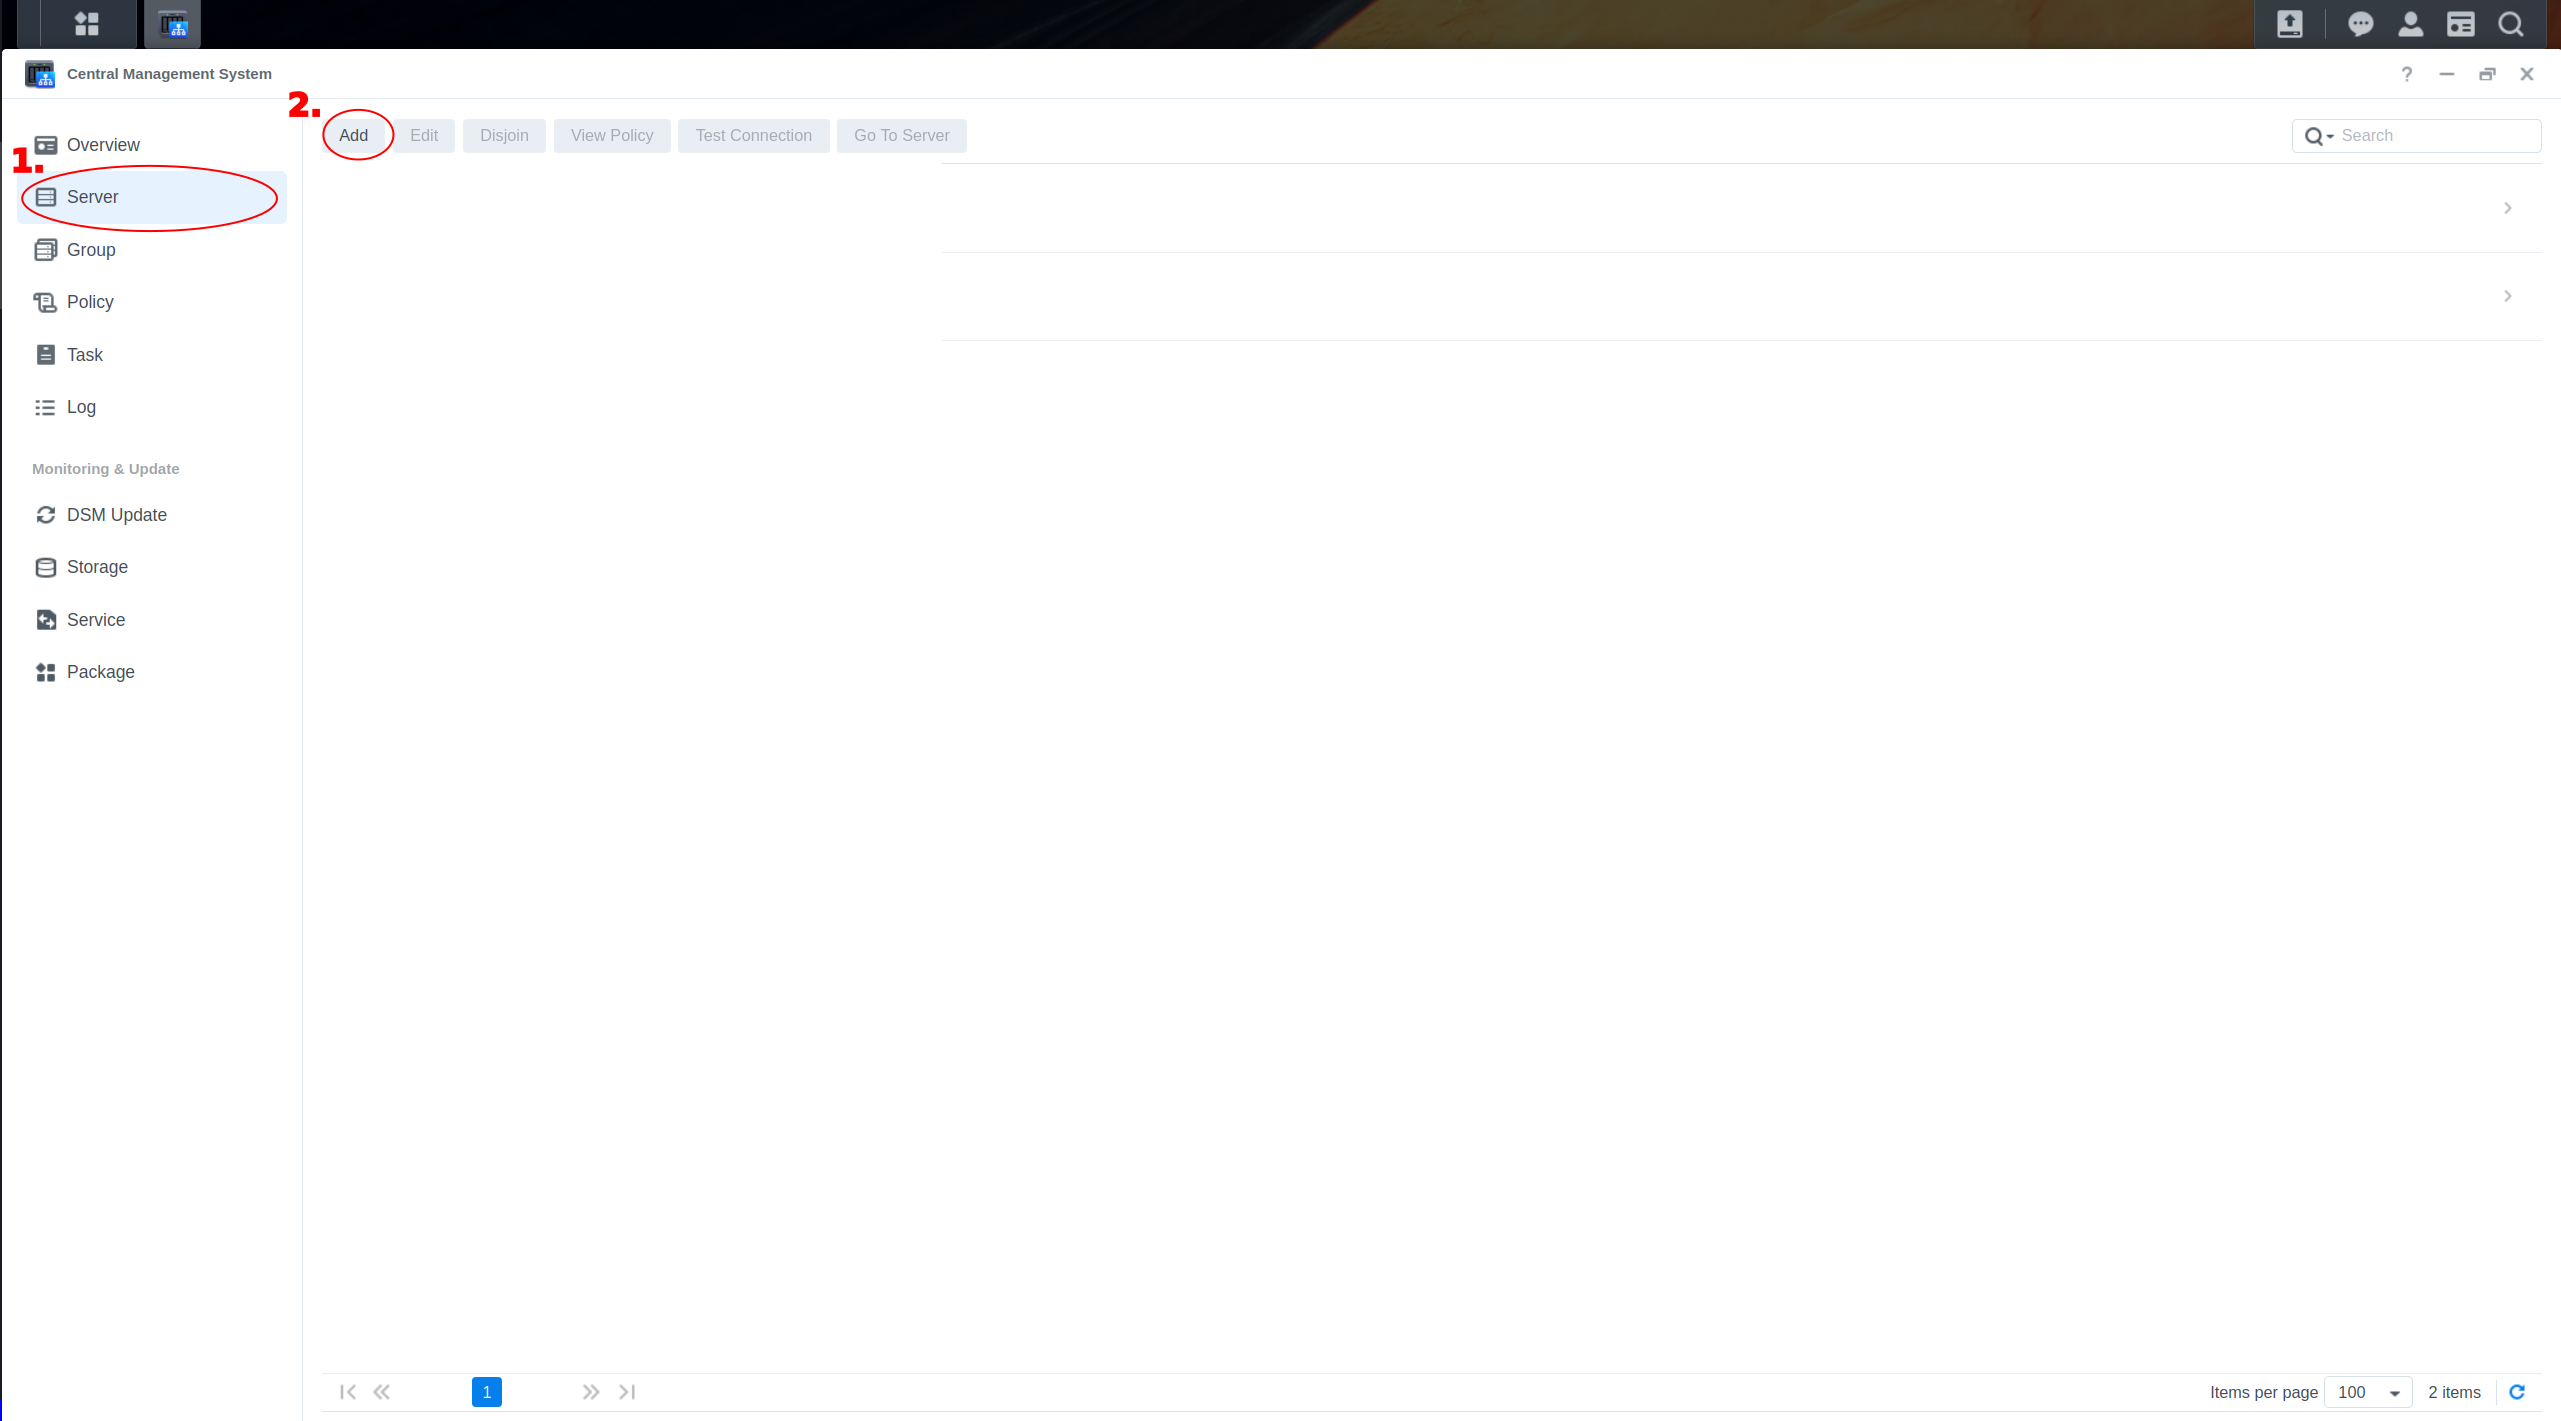
Select Server on the left menu and click Add
-
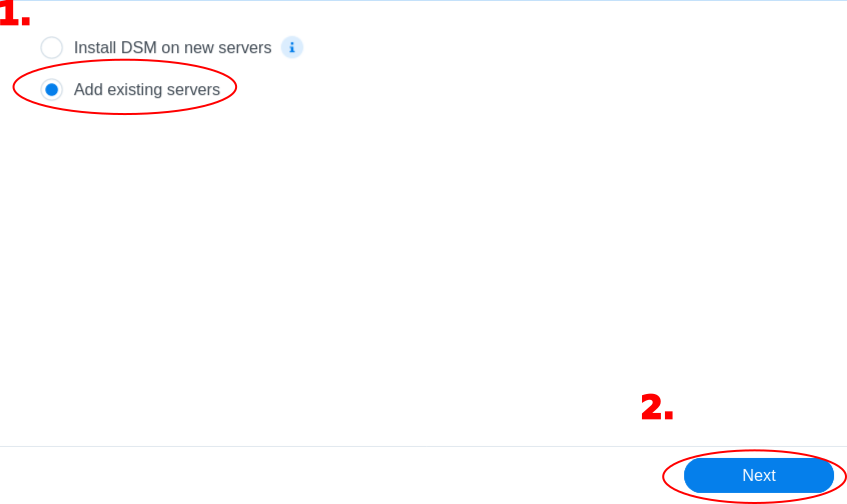
Select Add existing servers and then click Next
-
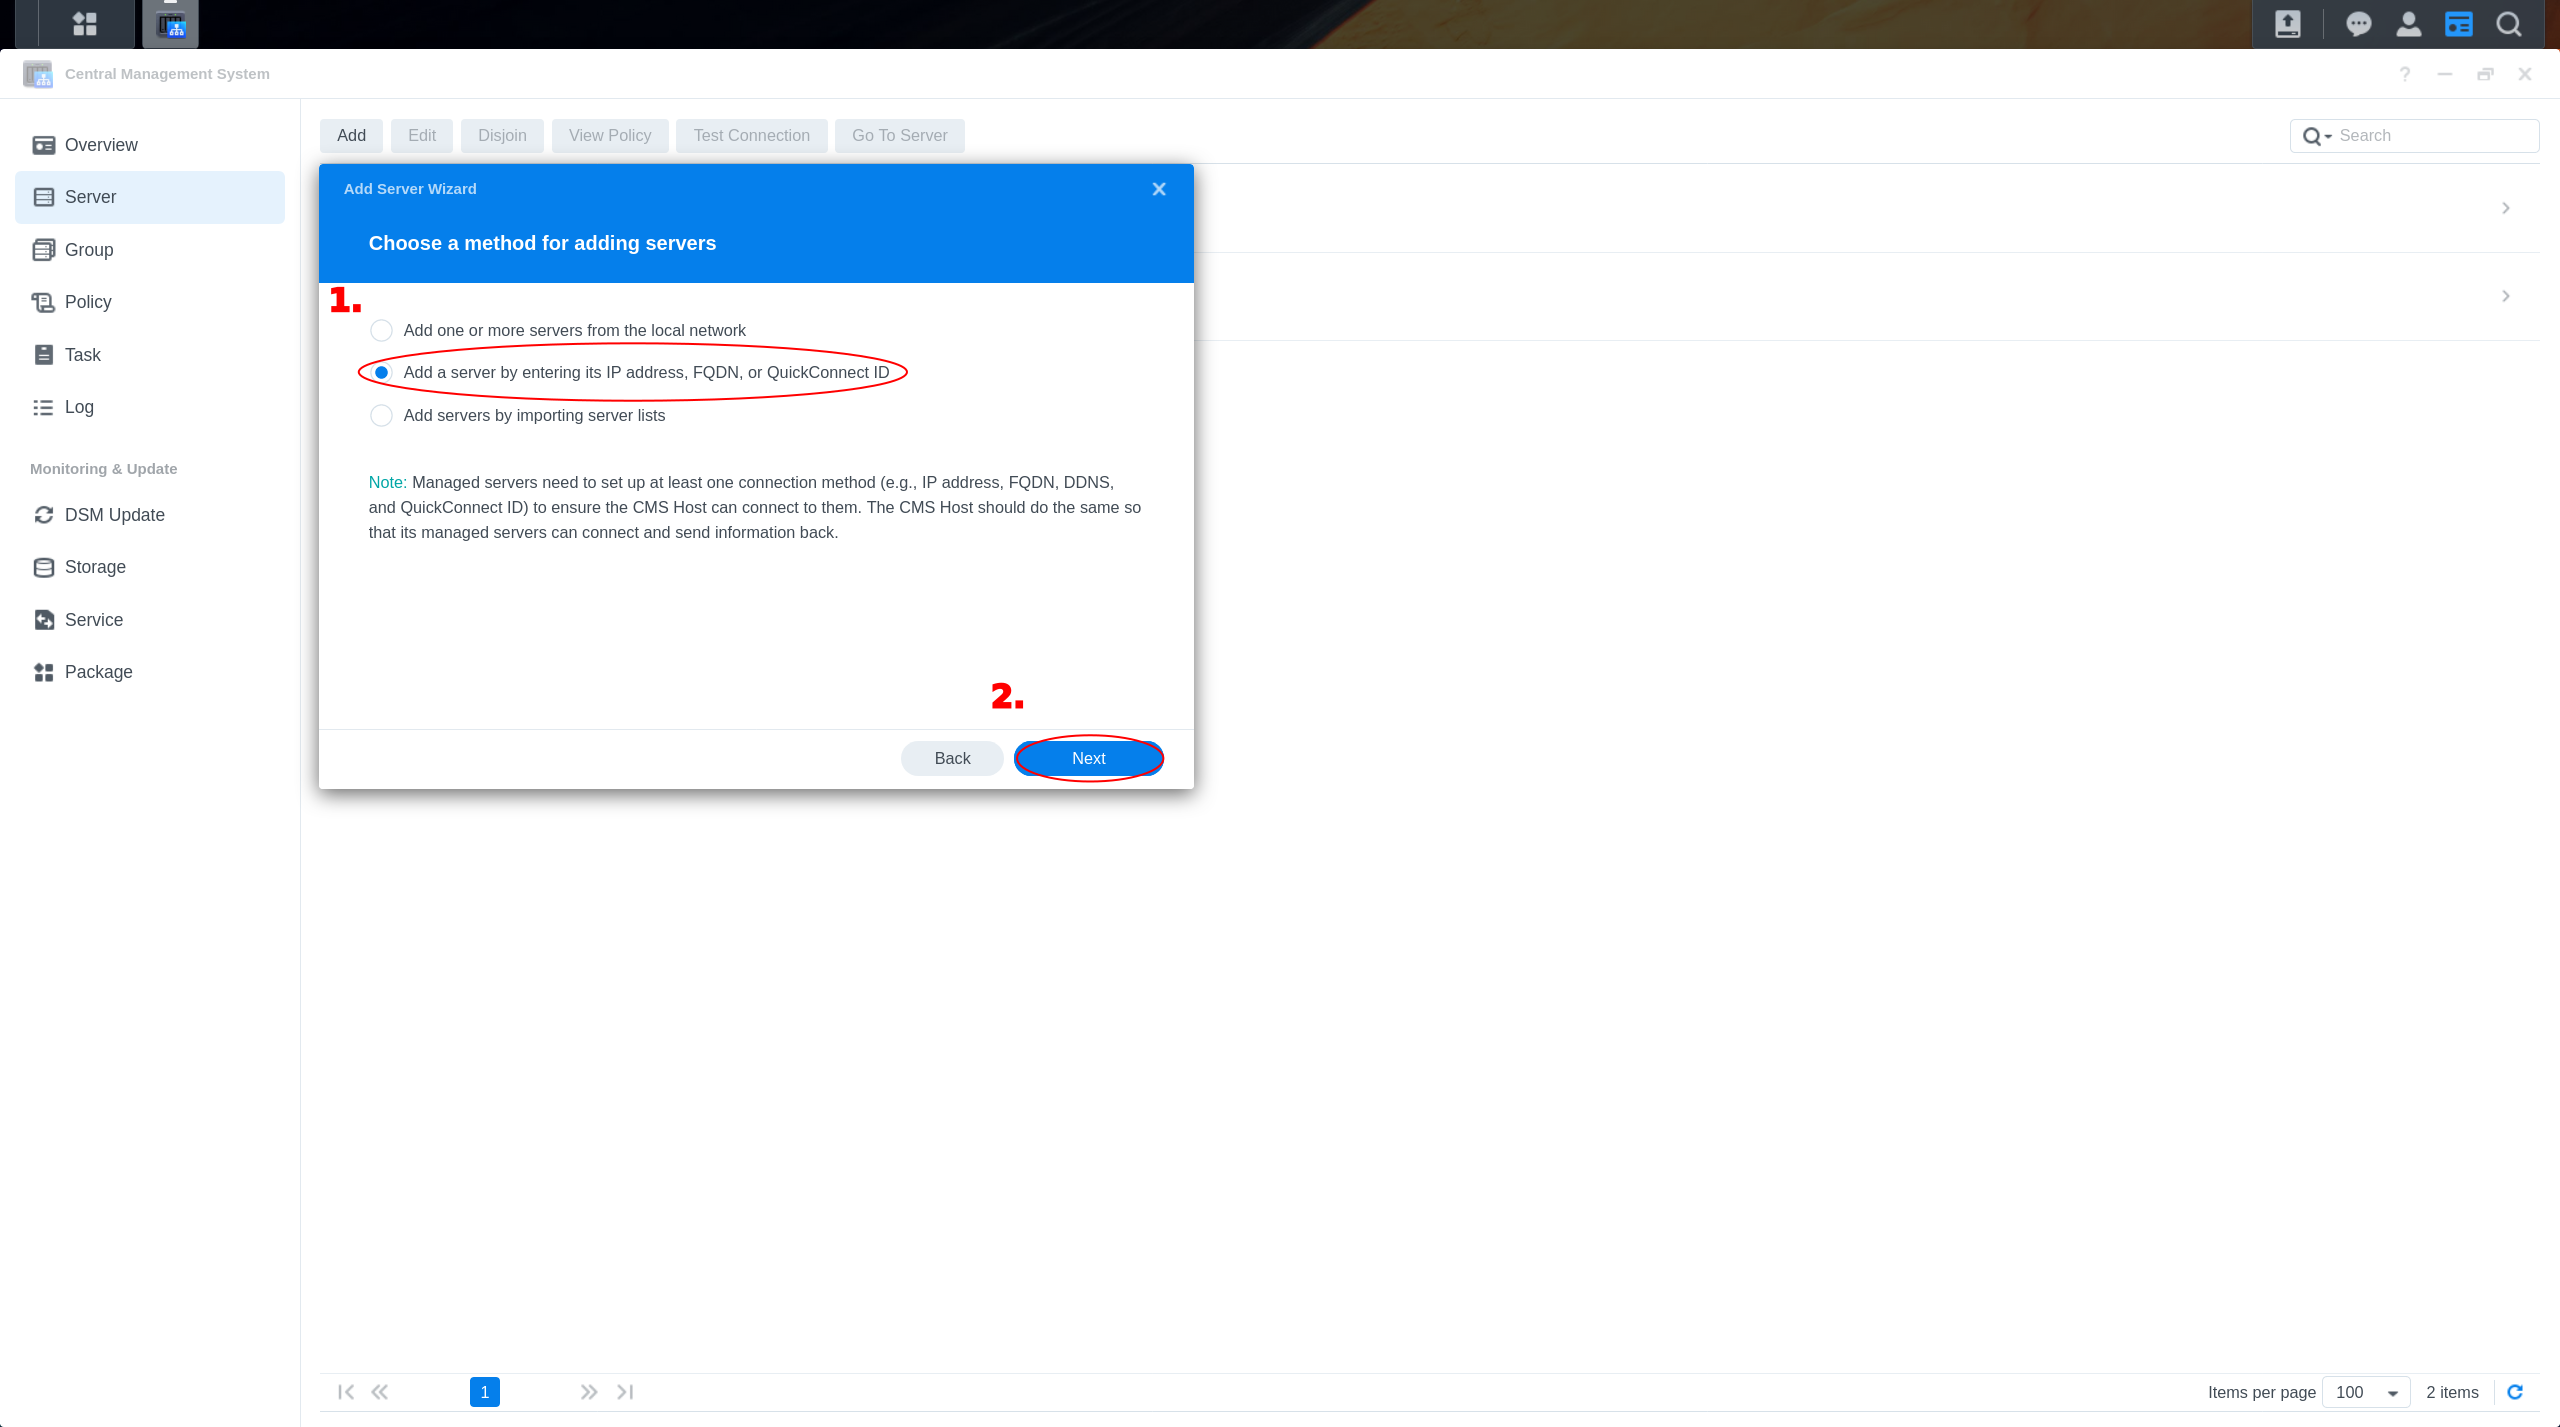
Select Add a server by entering its IP address, FQDN or QuickConnect ID and then click Next
-
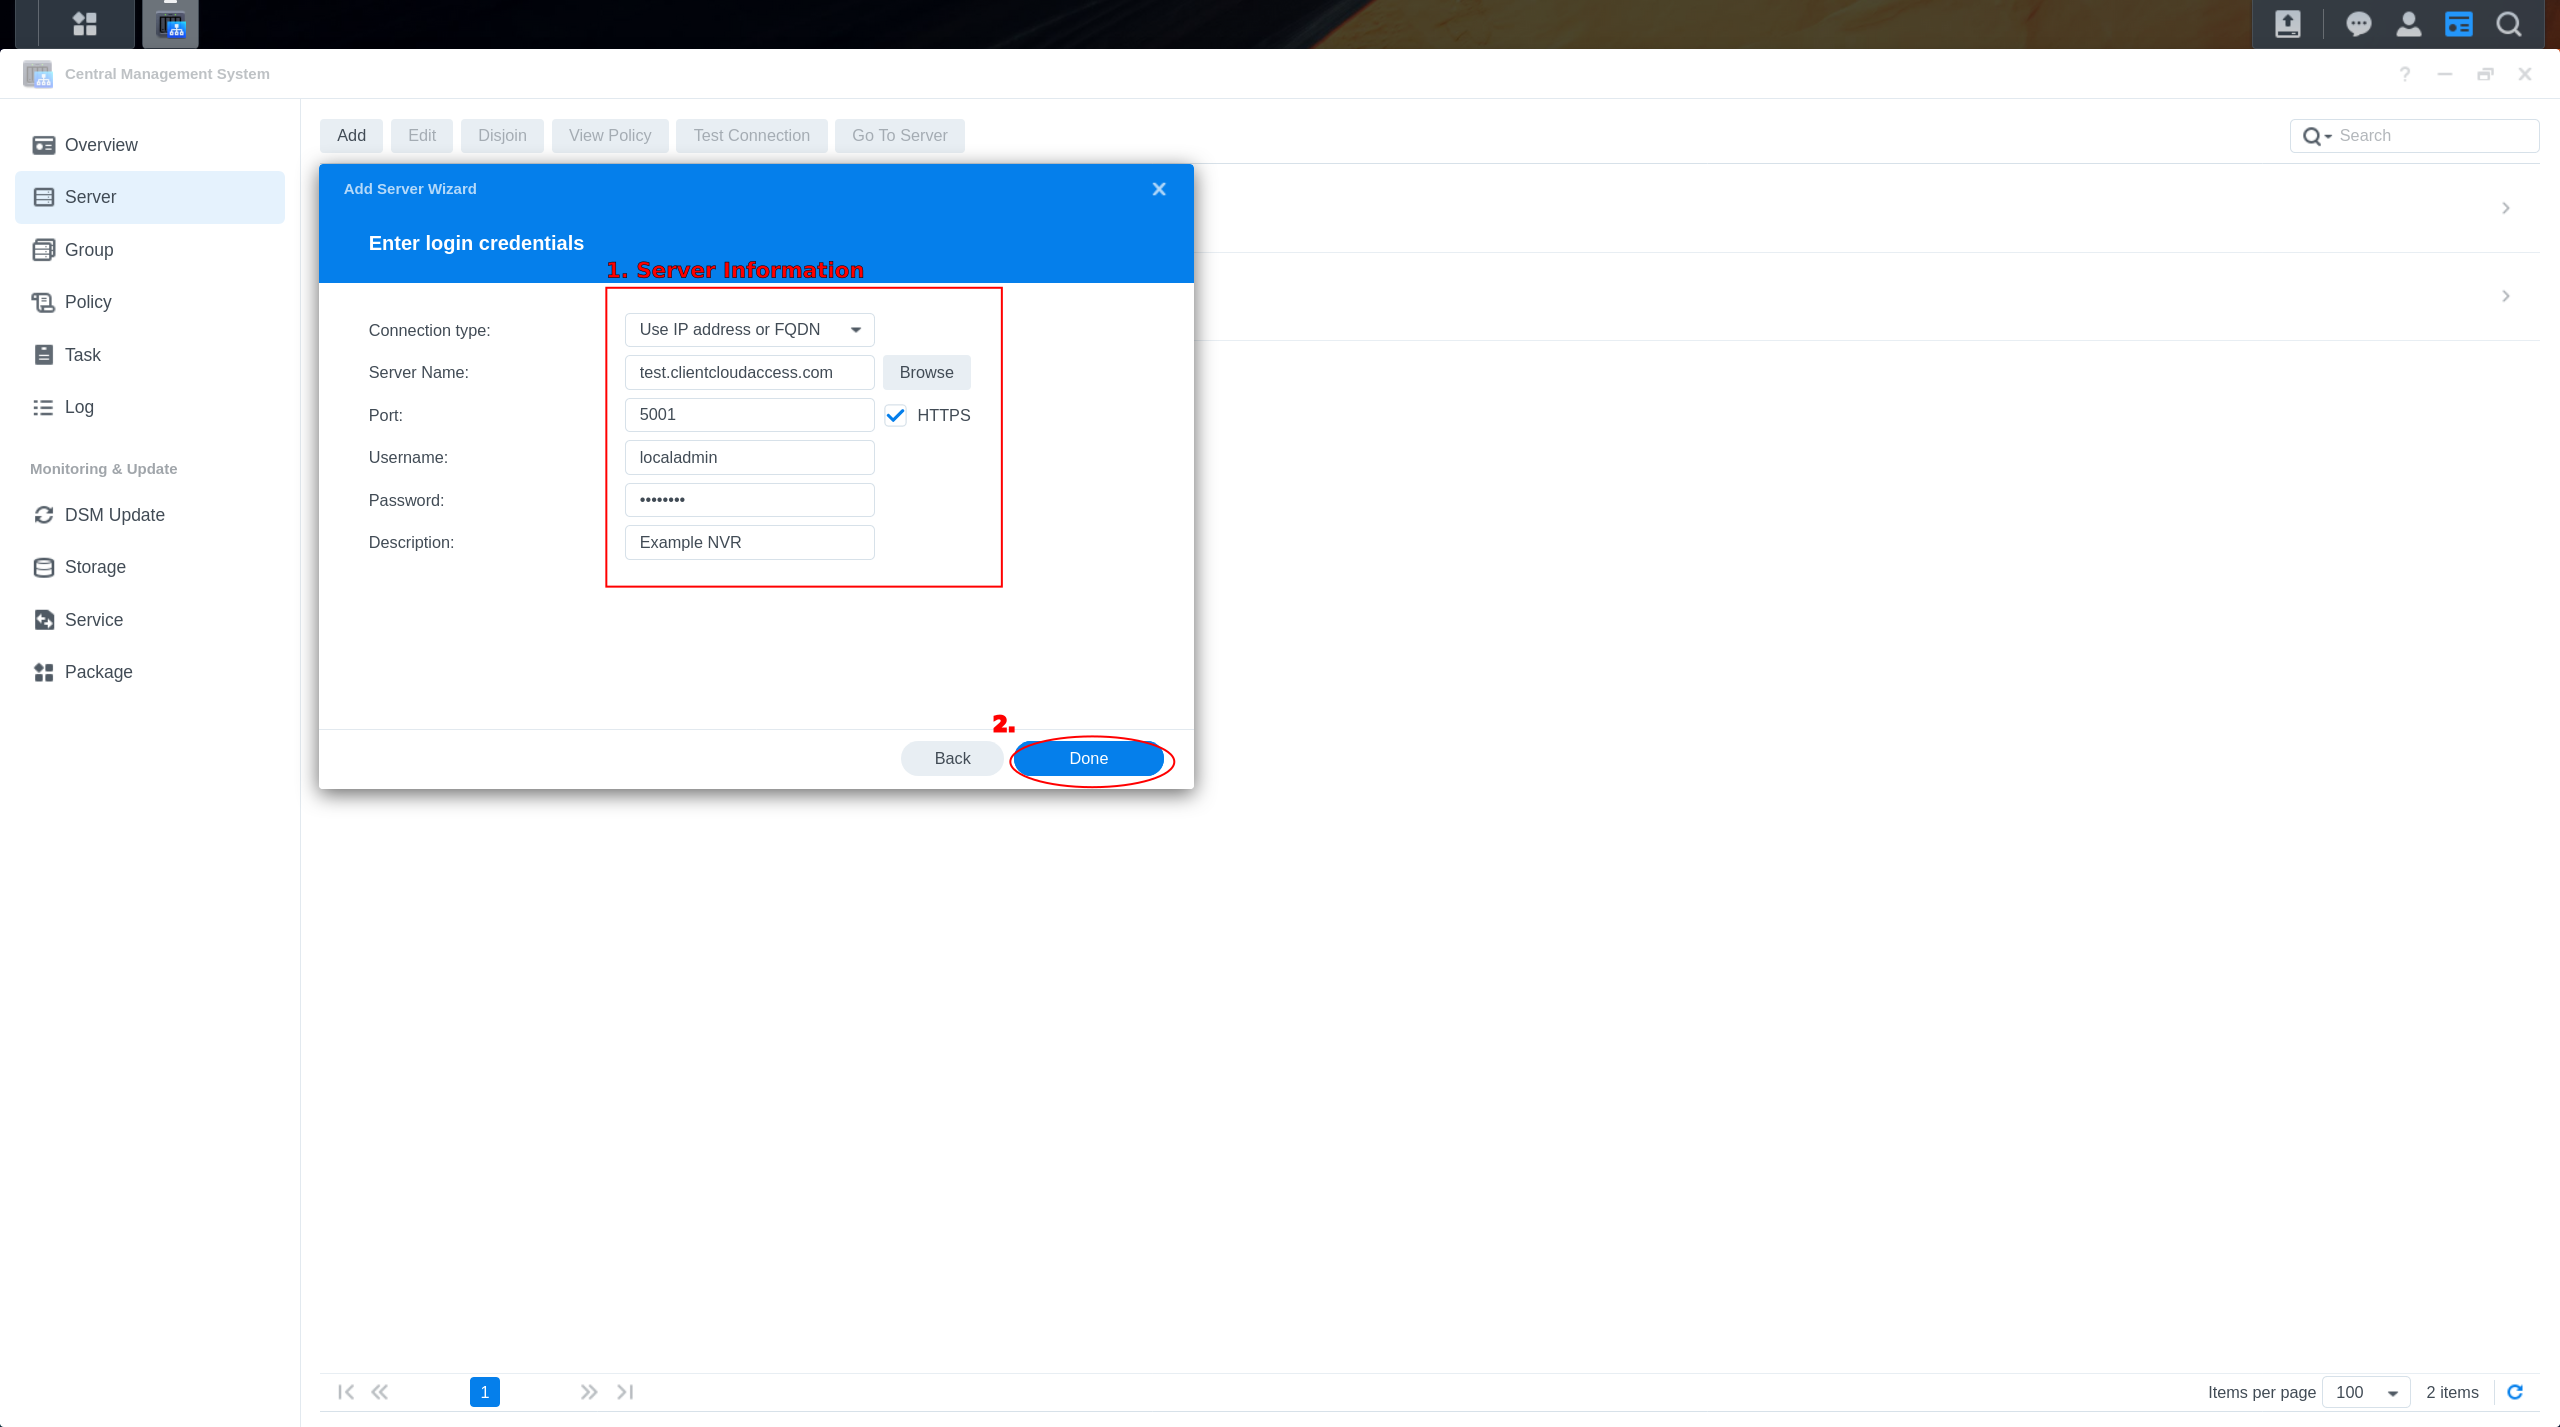
Enter the server information and then click Done
-
Click on application menu in the upper left hand corner and and Open Surveillance Station.
-
Open Application Center
-
Ensure that CMS is installed and running and then Click open

-
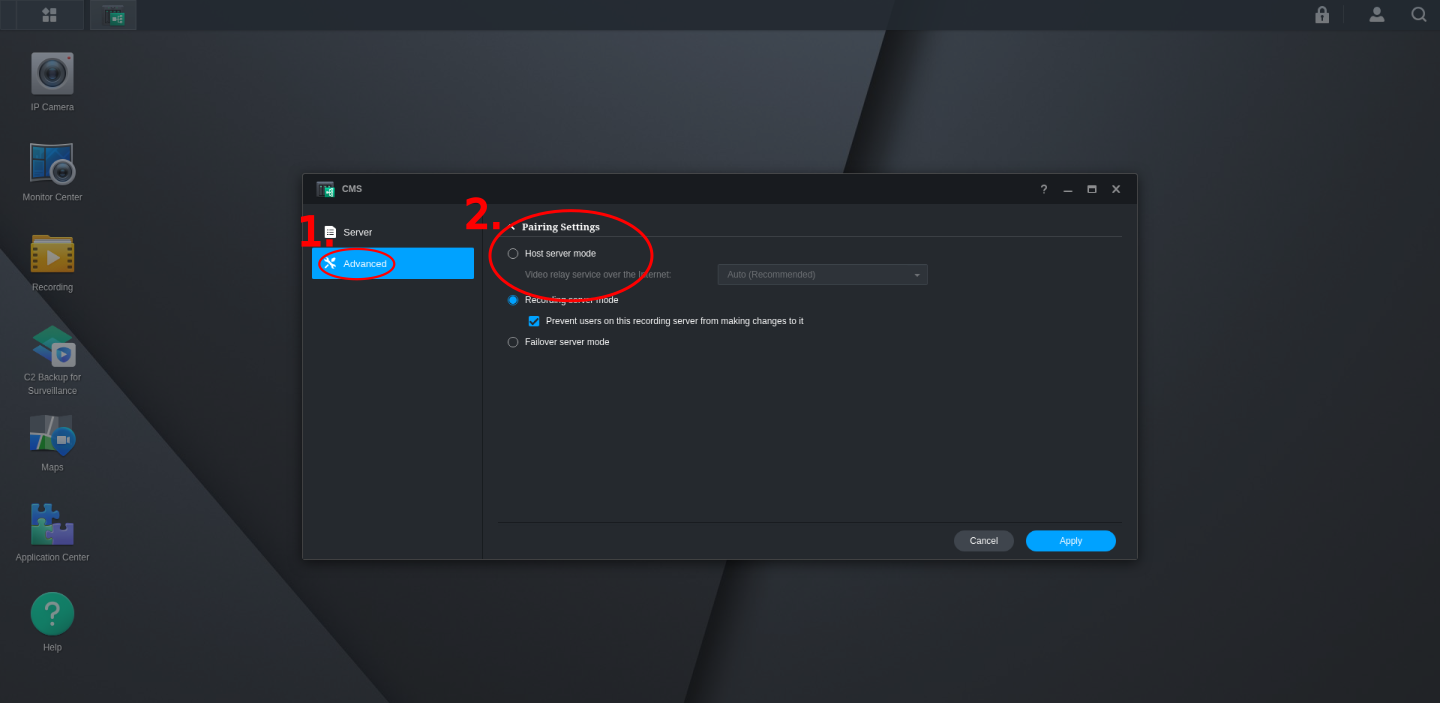
Click on the Advanced tab and Make sure that the NVR is set to Host and then hit Apply
-
Click the Start Button in the upper left hand corner and Select CMS
-
Select Recording Server in the left menu and Click Add
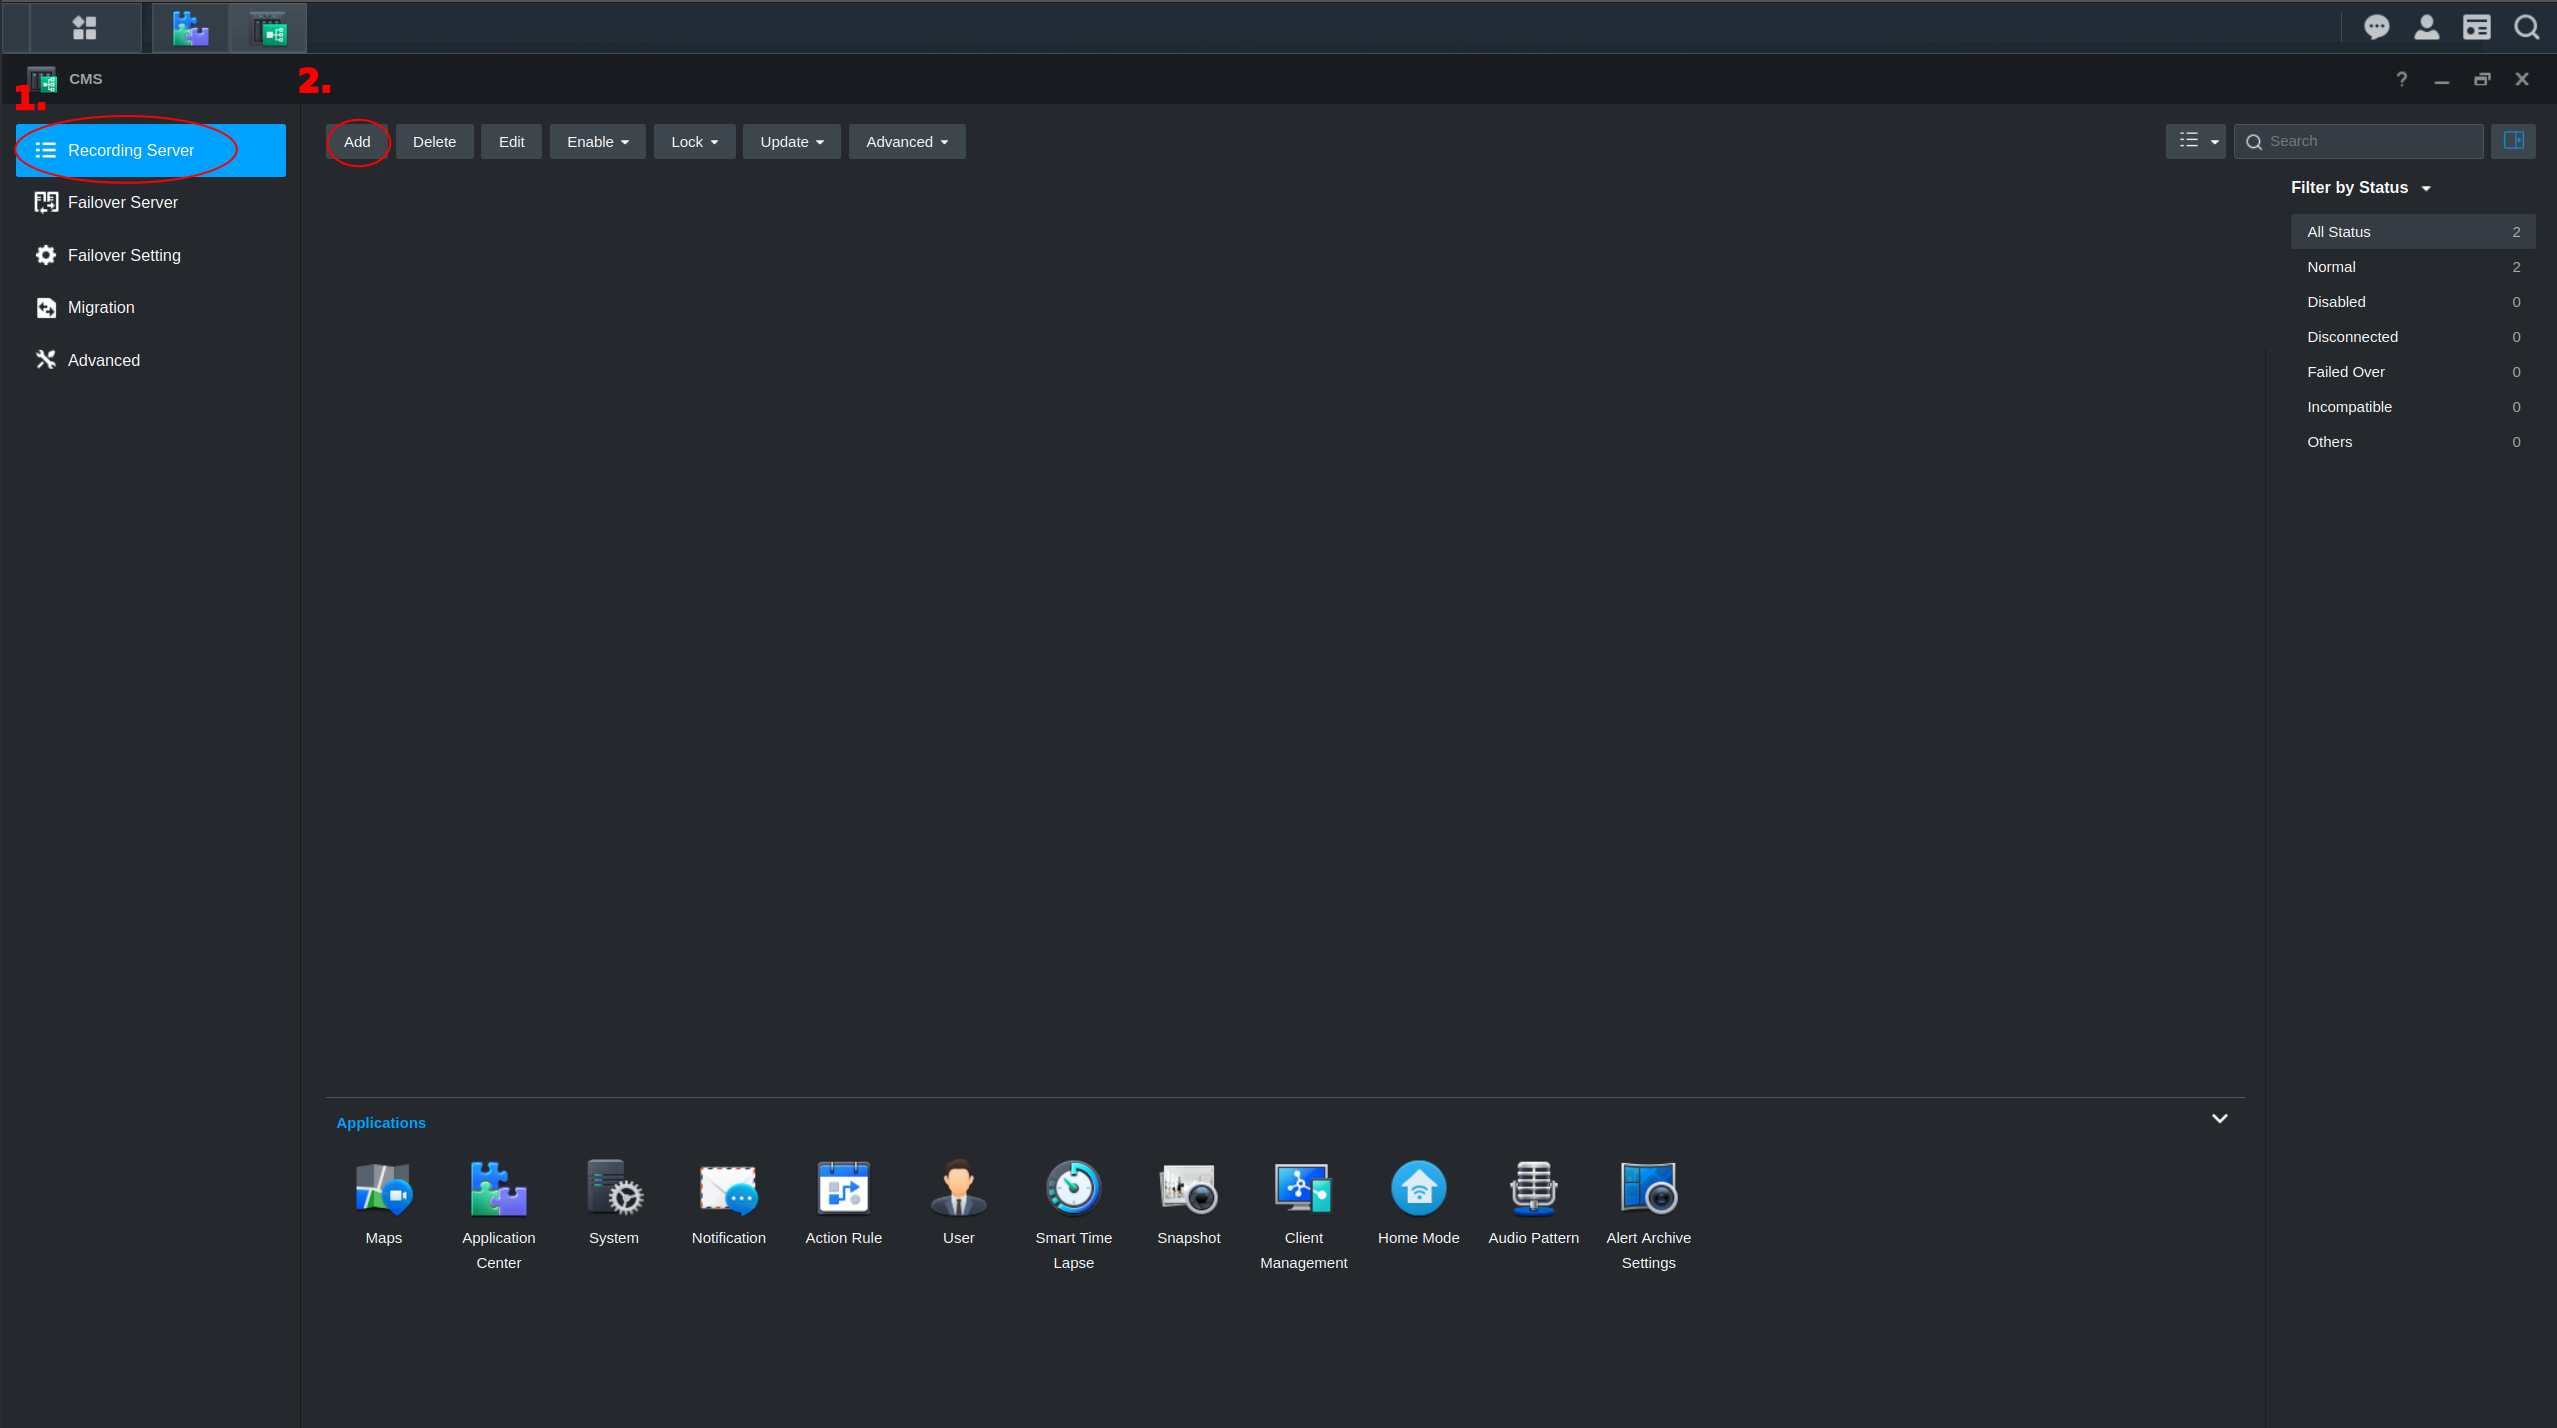
-
Click on Add manually
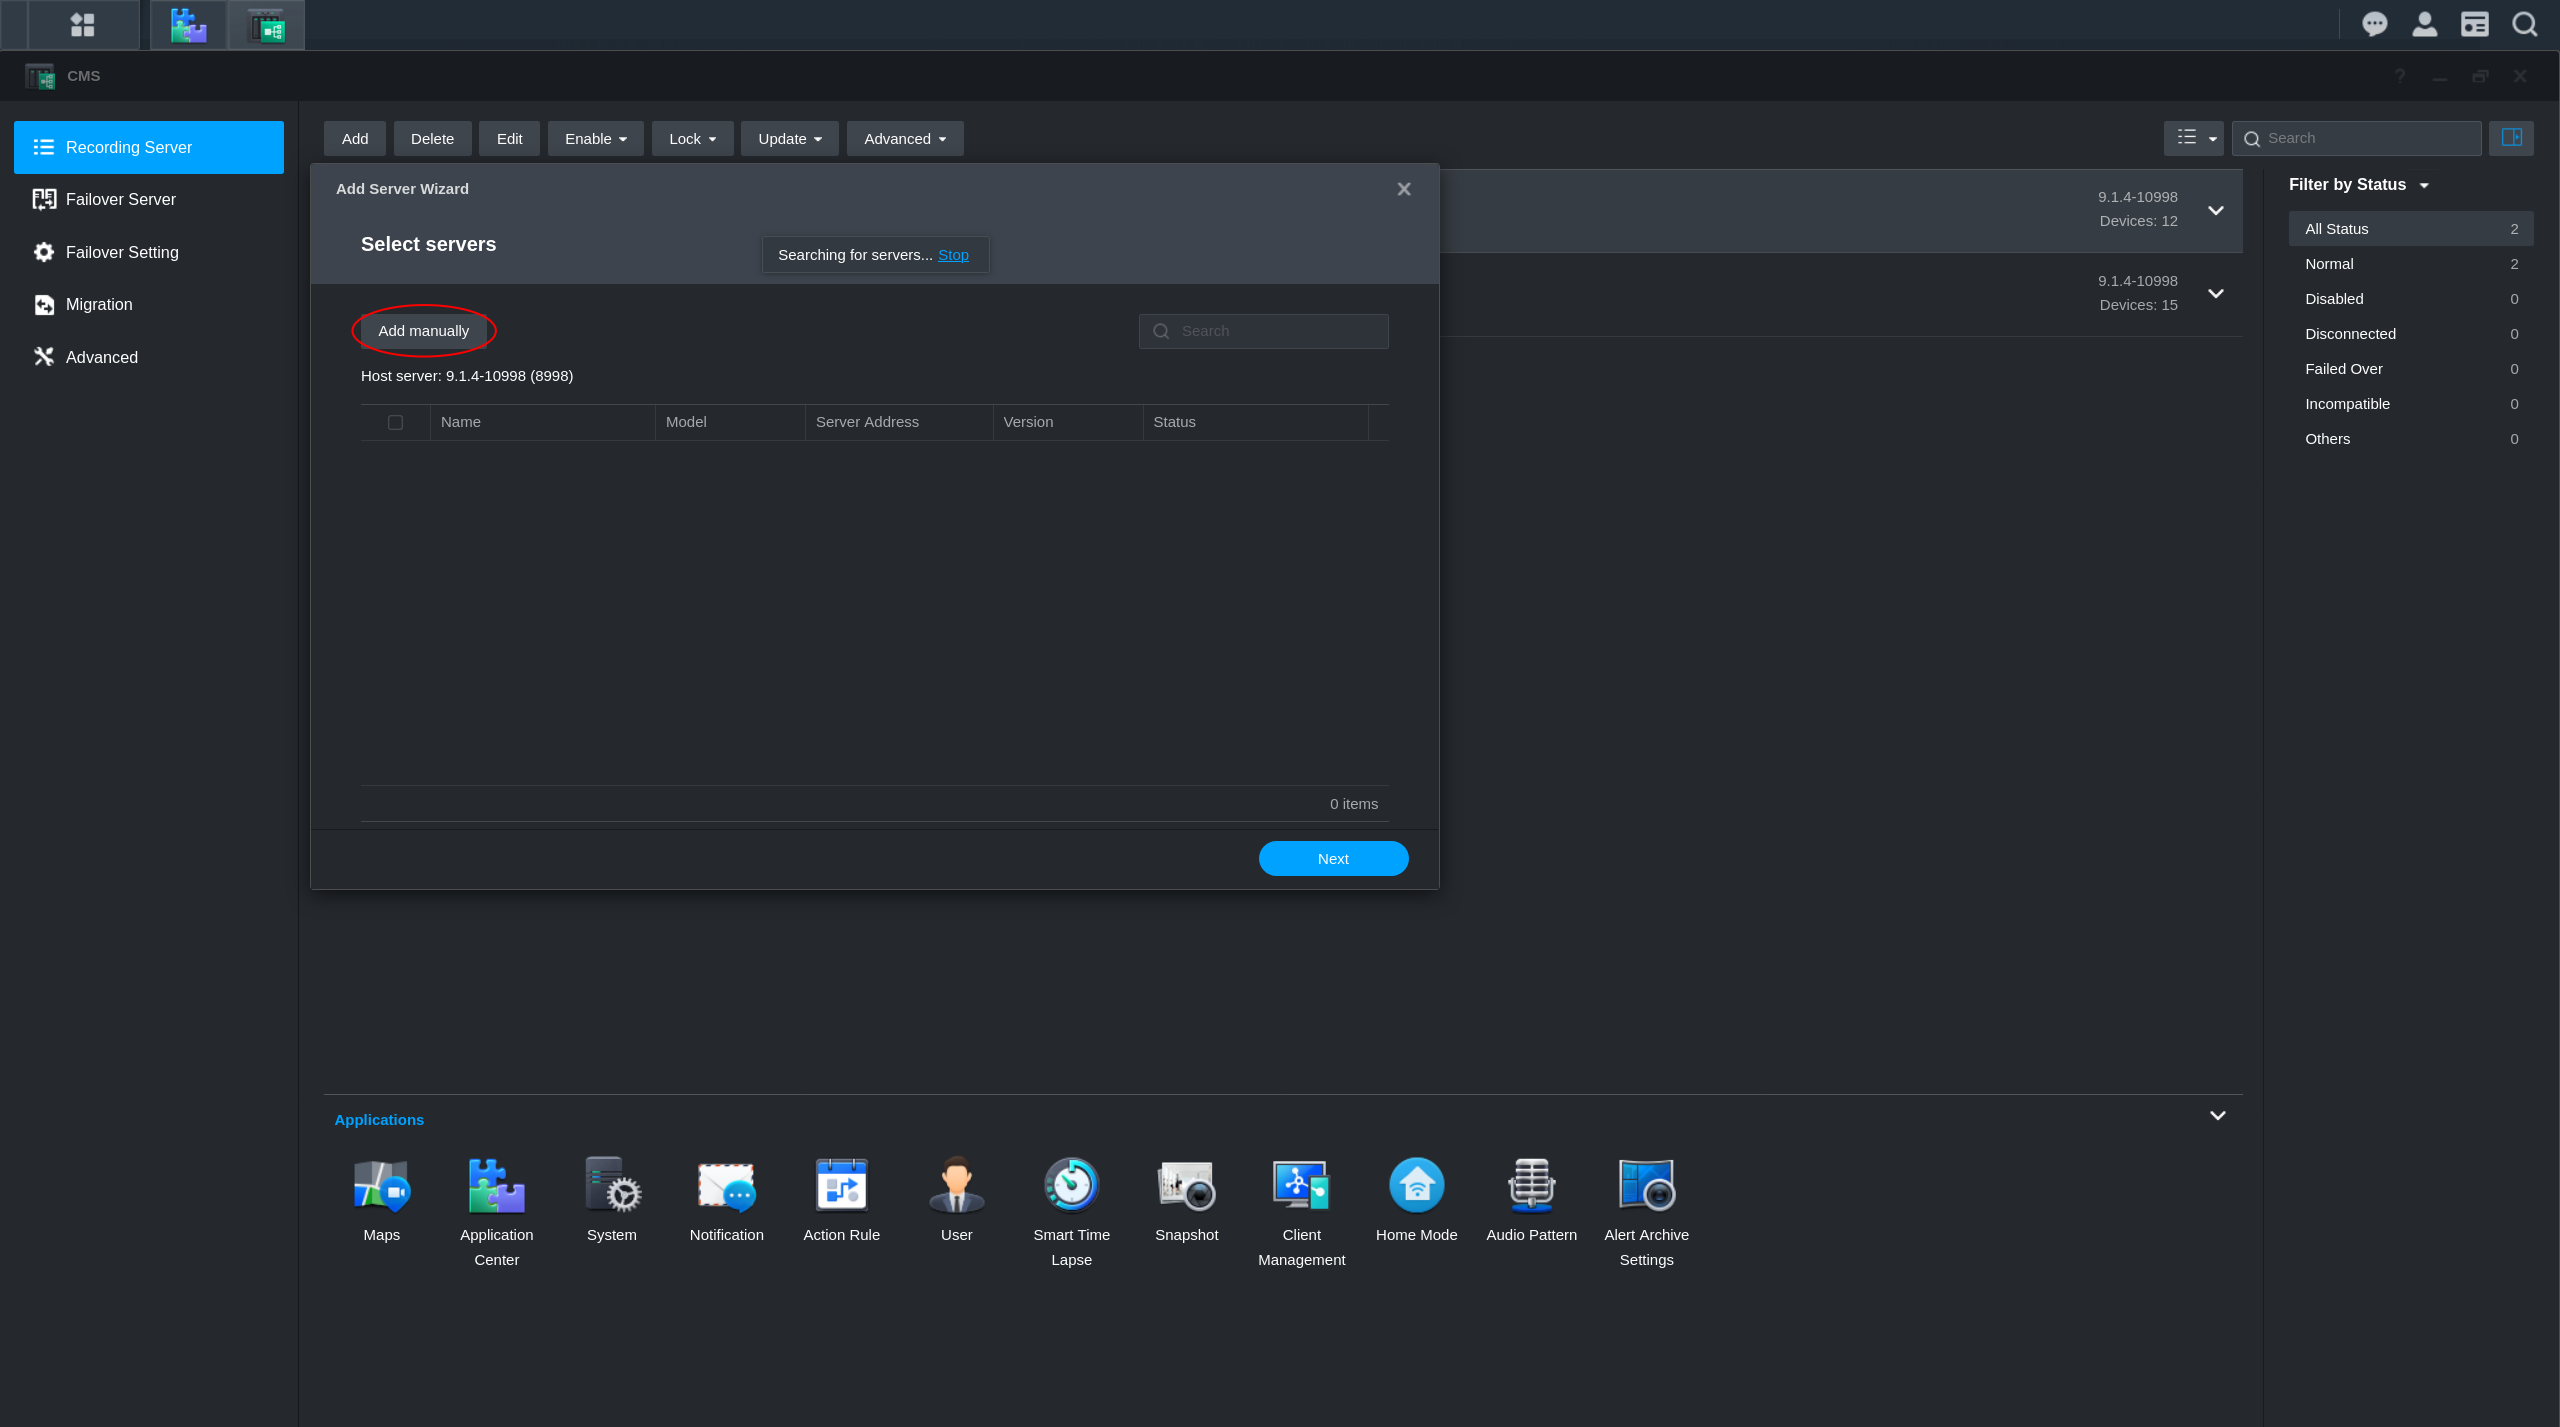
-
Select Use IP Address or FQDN and fill in the server info of the client Synology device. Then click Add to finish adding the client device to the CMS host.
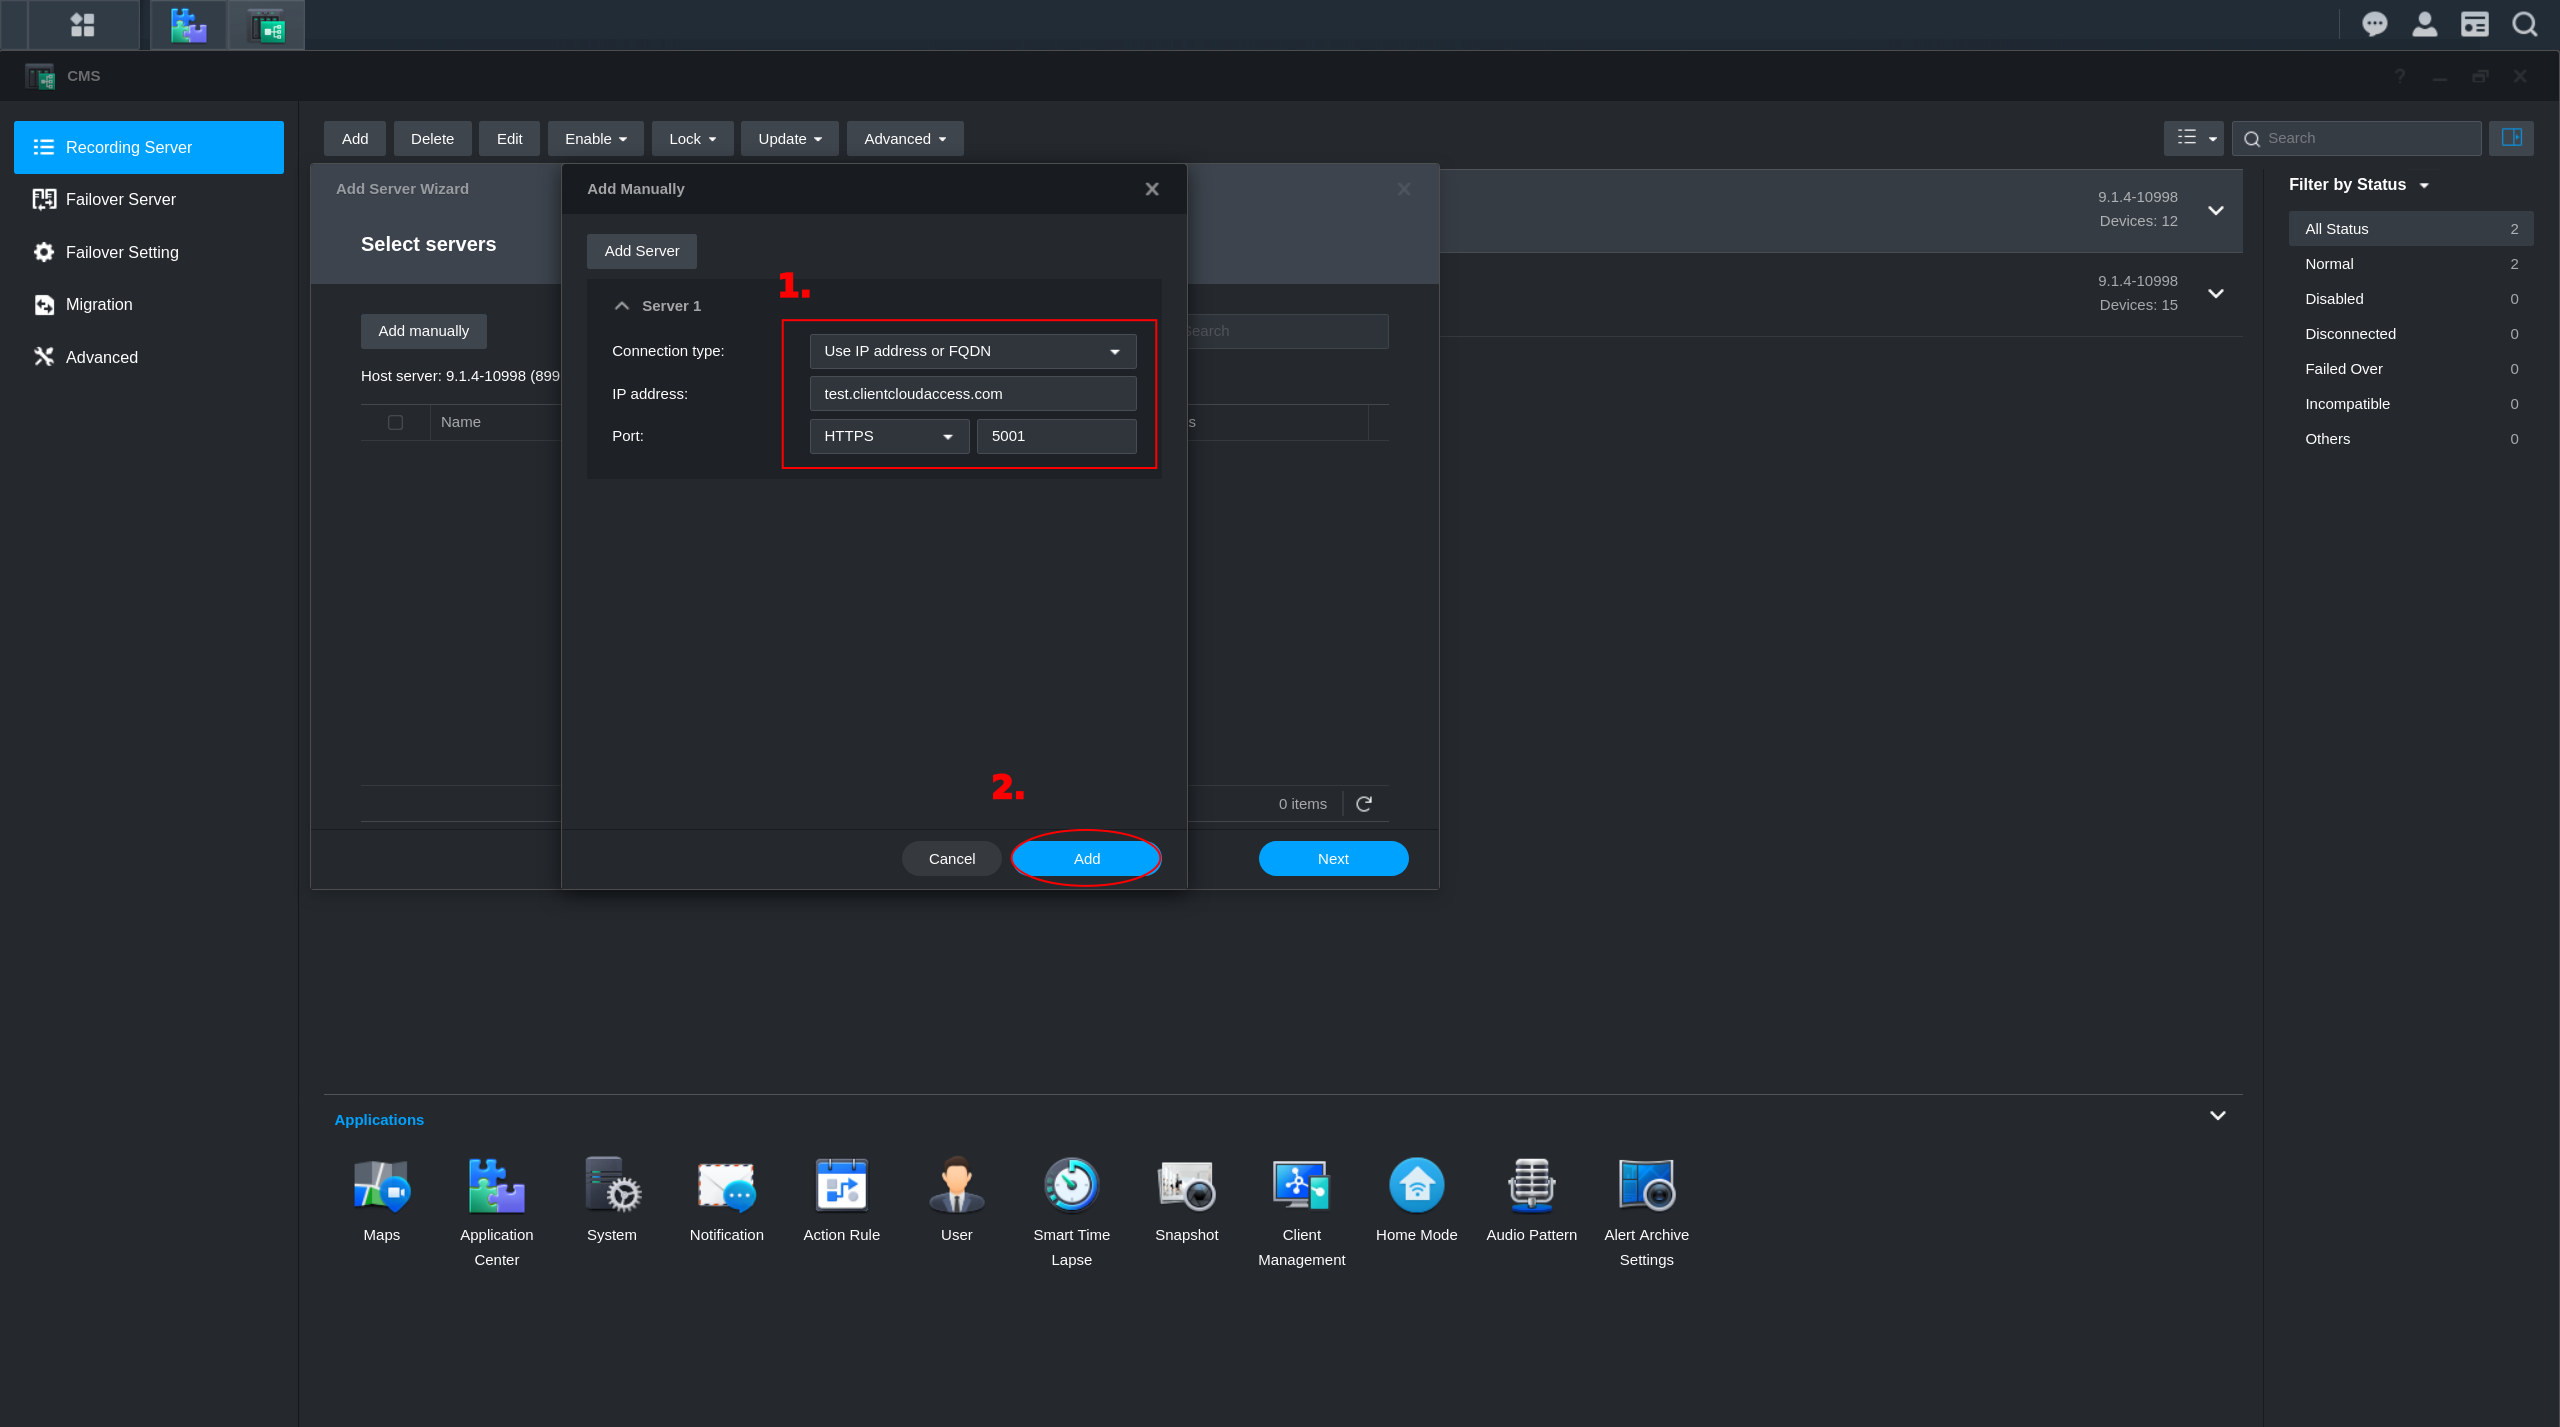
-
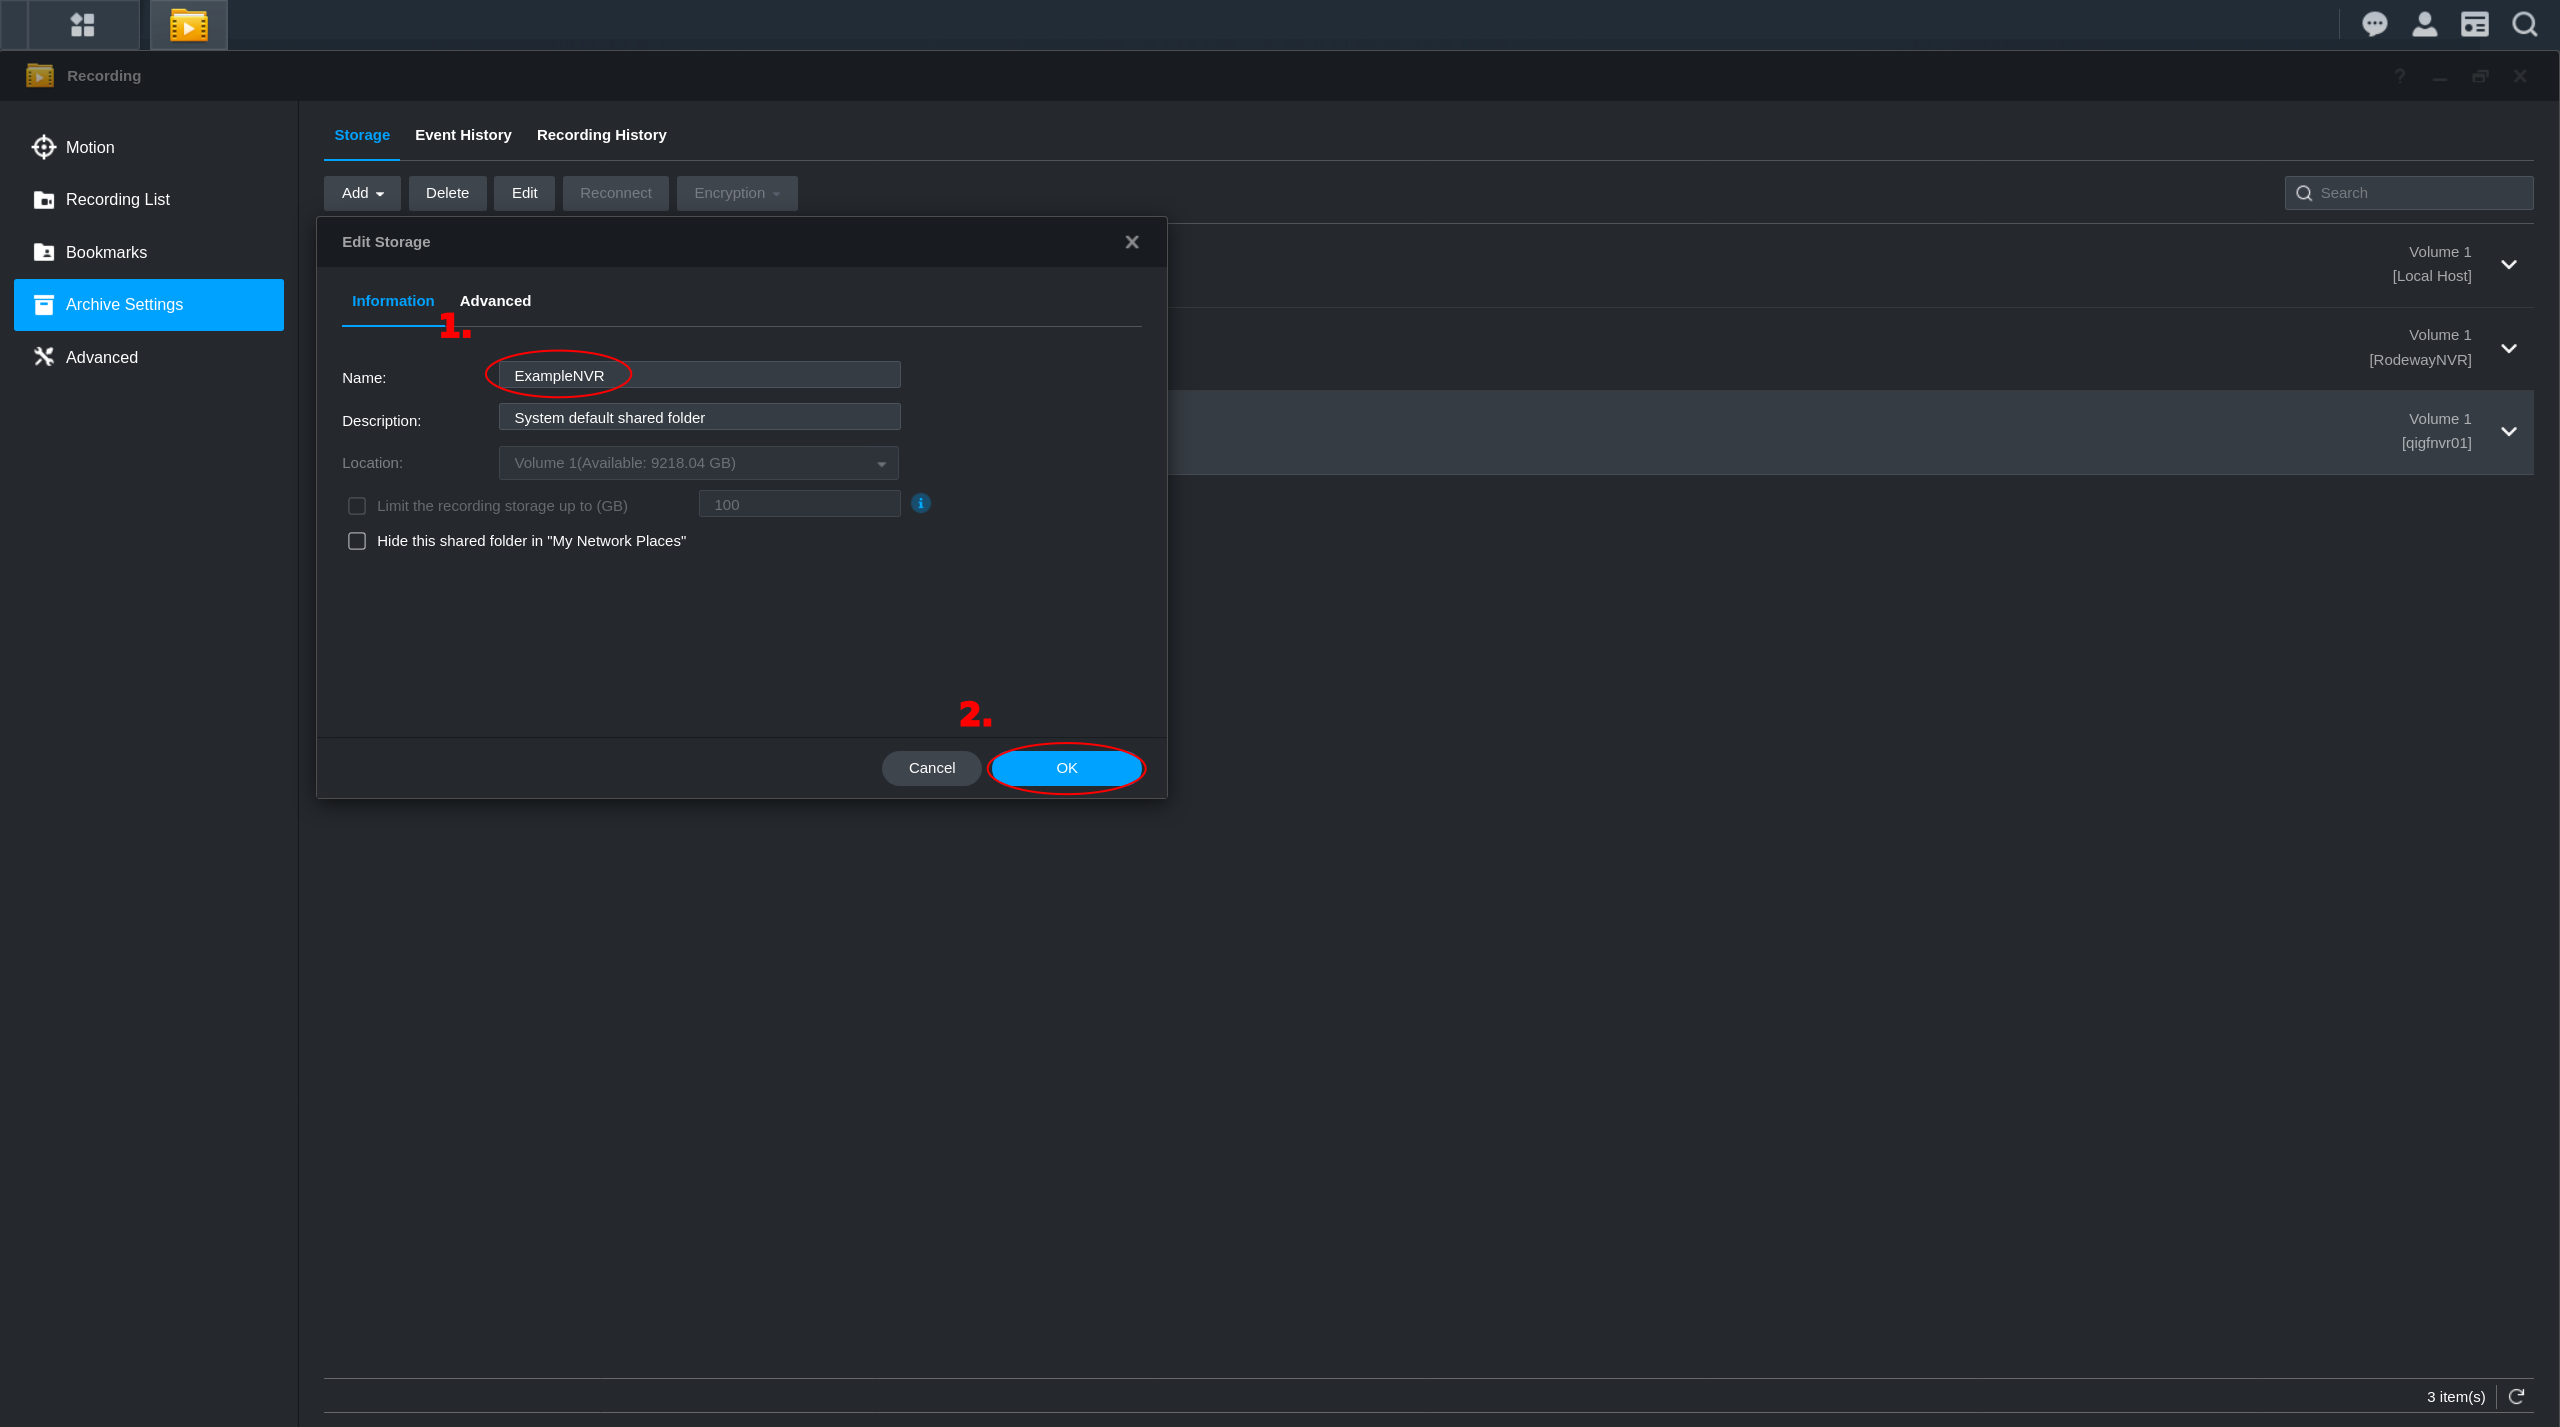
Click on application menu in the upper left hand corner and open the Recording app.

-
Select Archive Settings for the menu on the left.

-
Look at the hostname on the right side and select the NVR you just added. Then click edit.
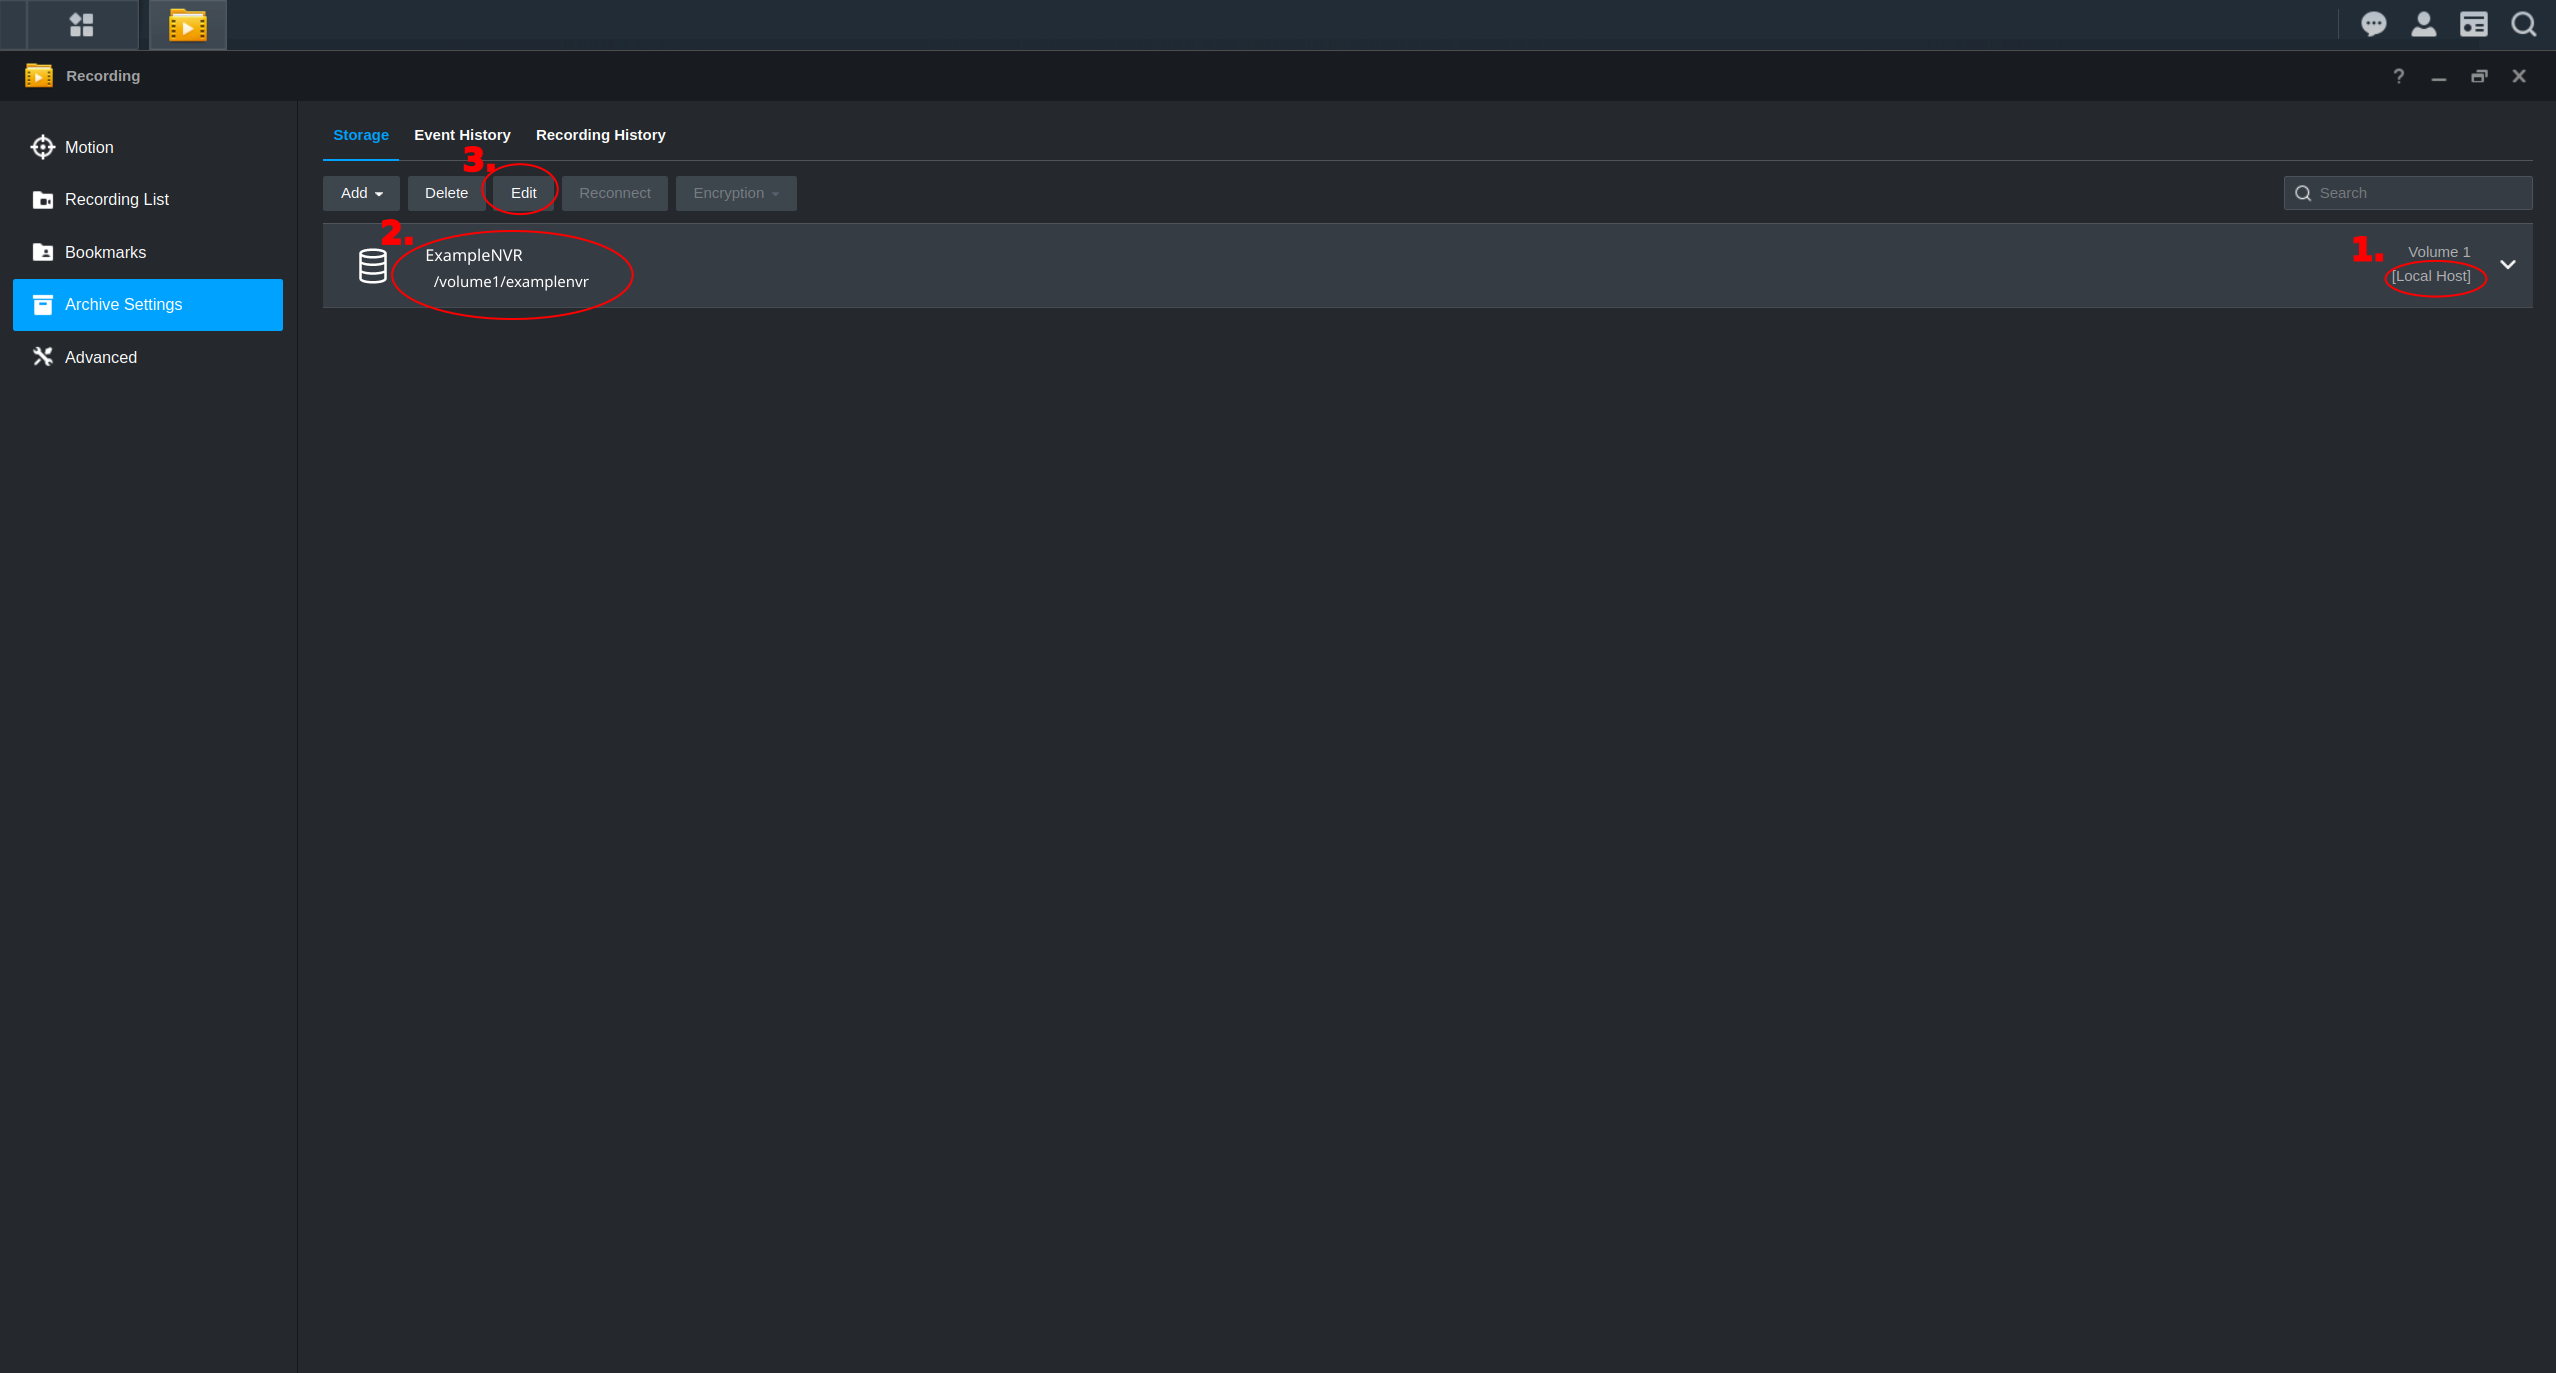
-
Set the name to be something memorable and unique like company name followed by NVR (i.e. AltispeedNVR). Then click Ok.
Setting up a Camera
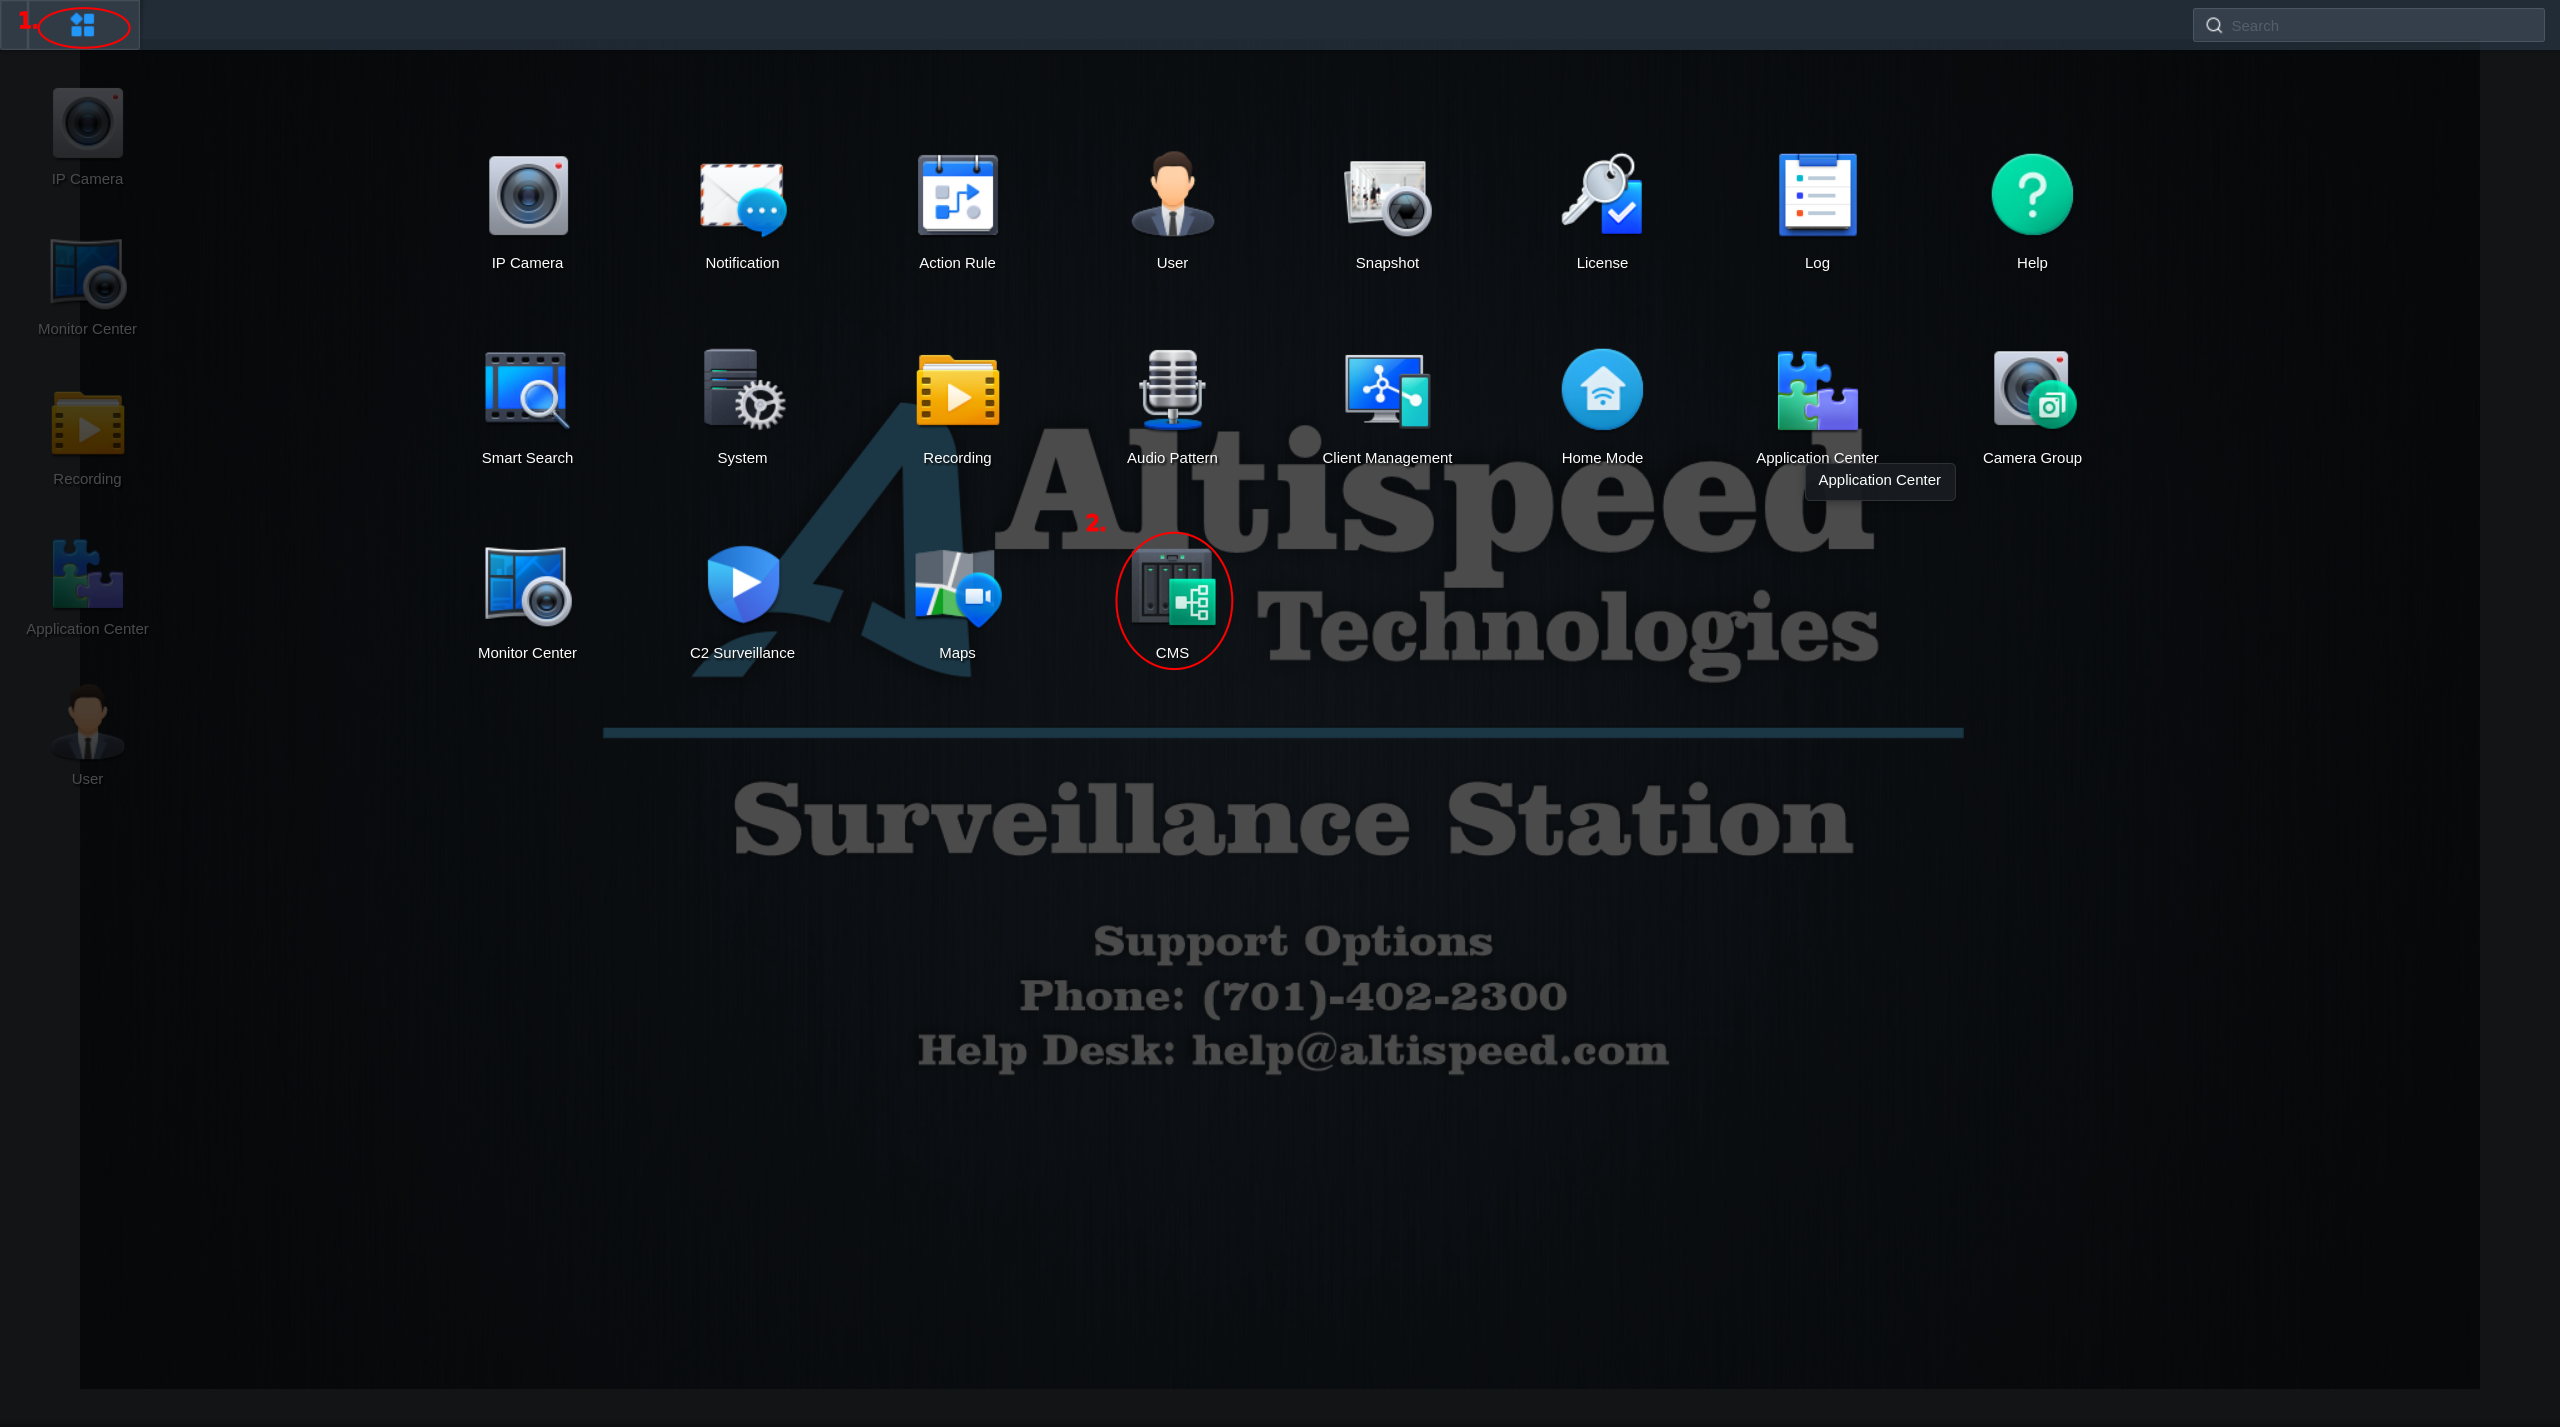
-
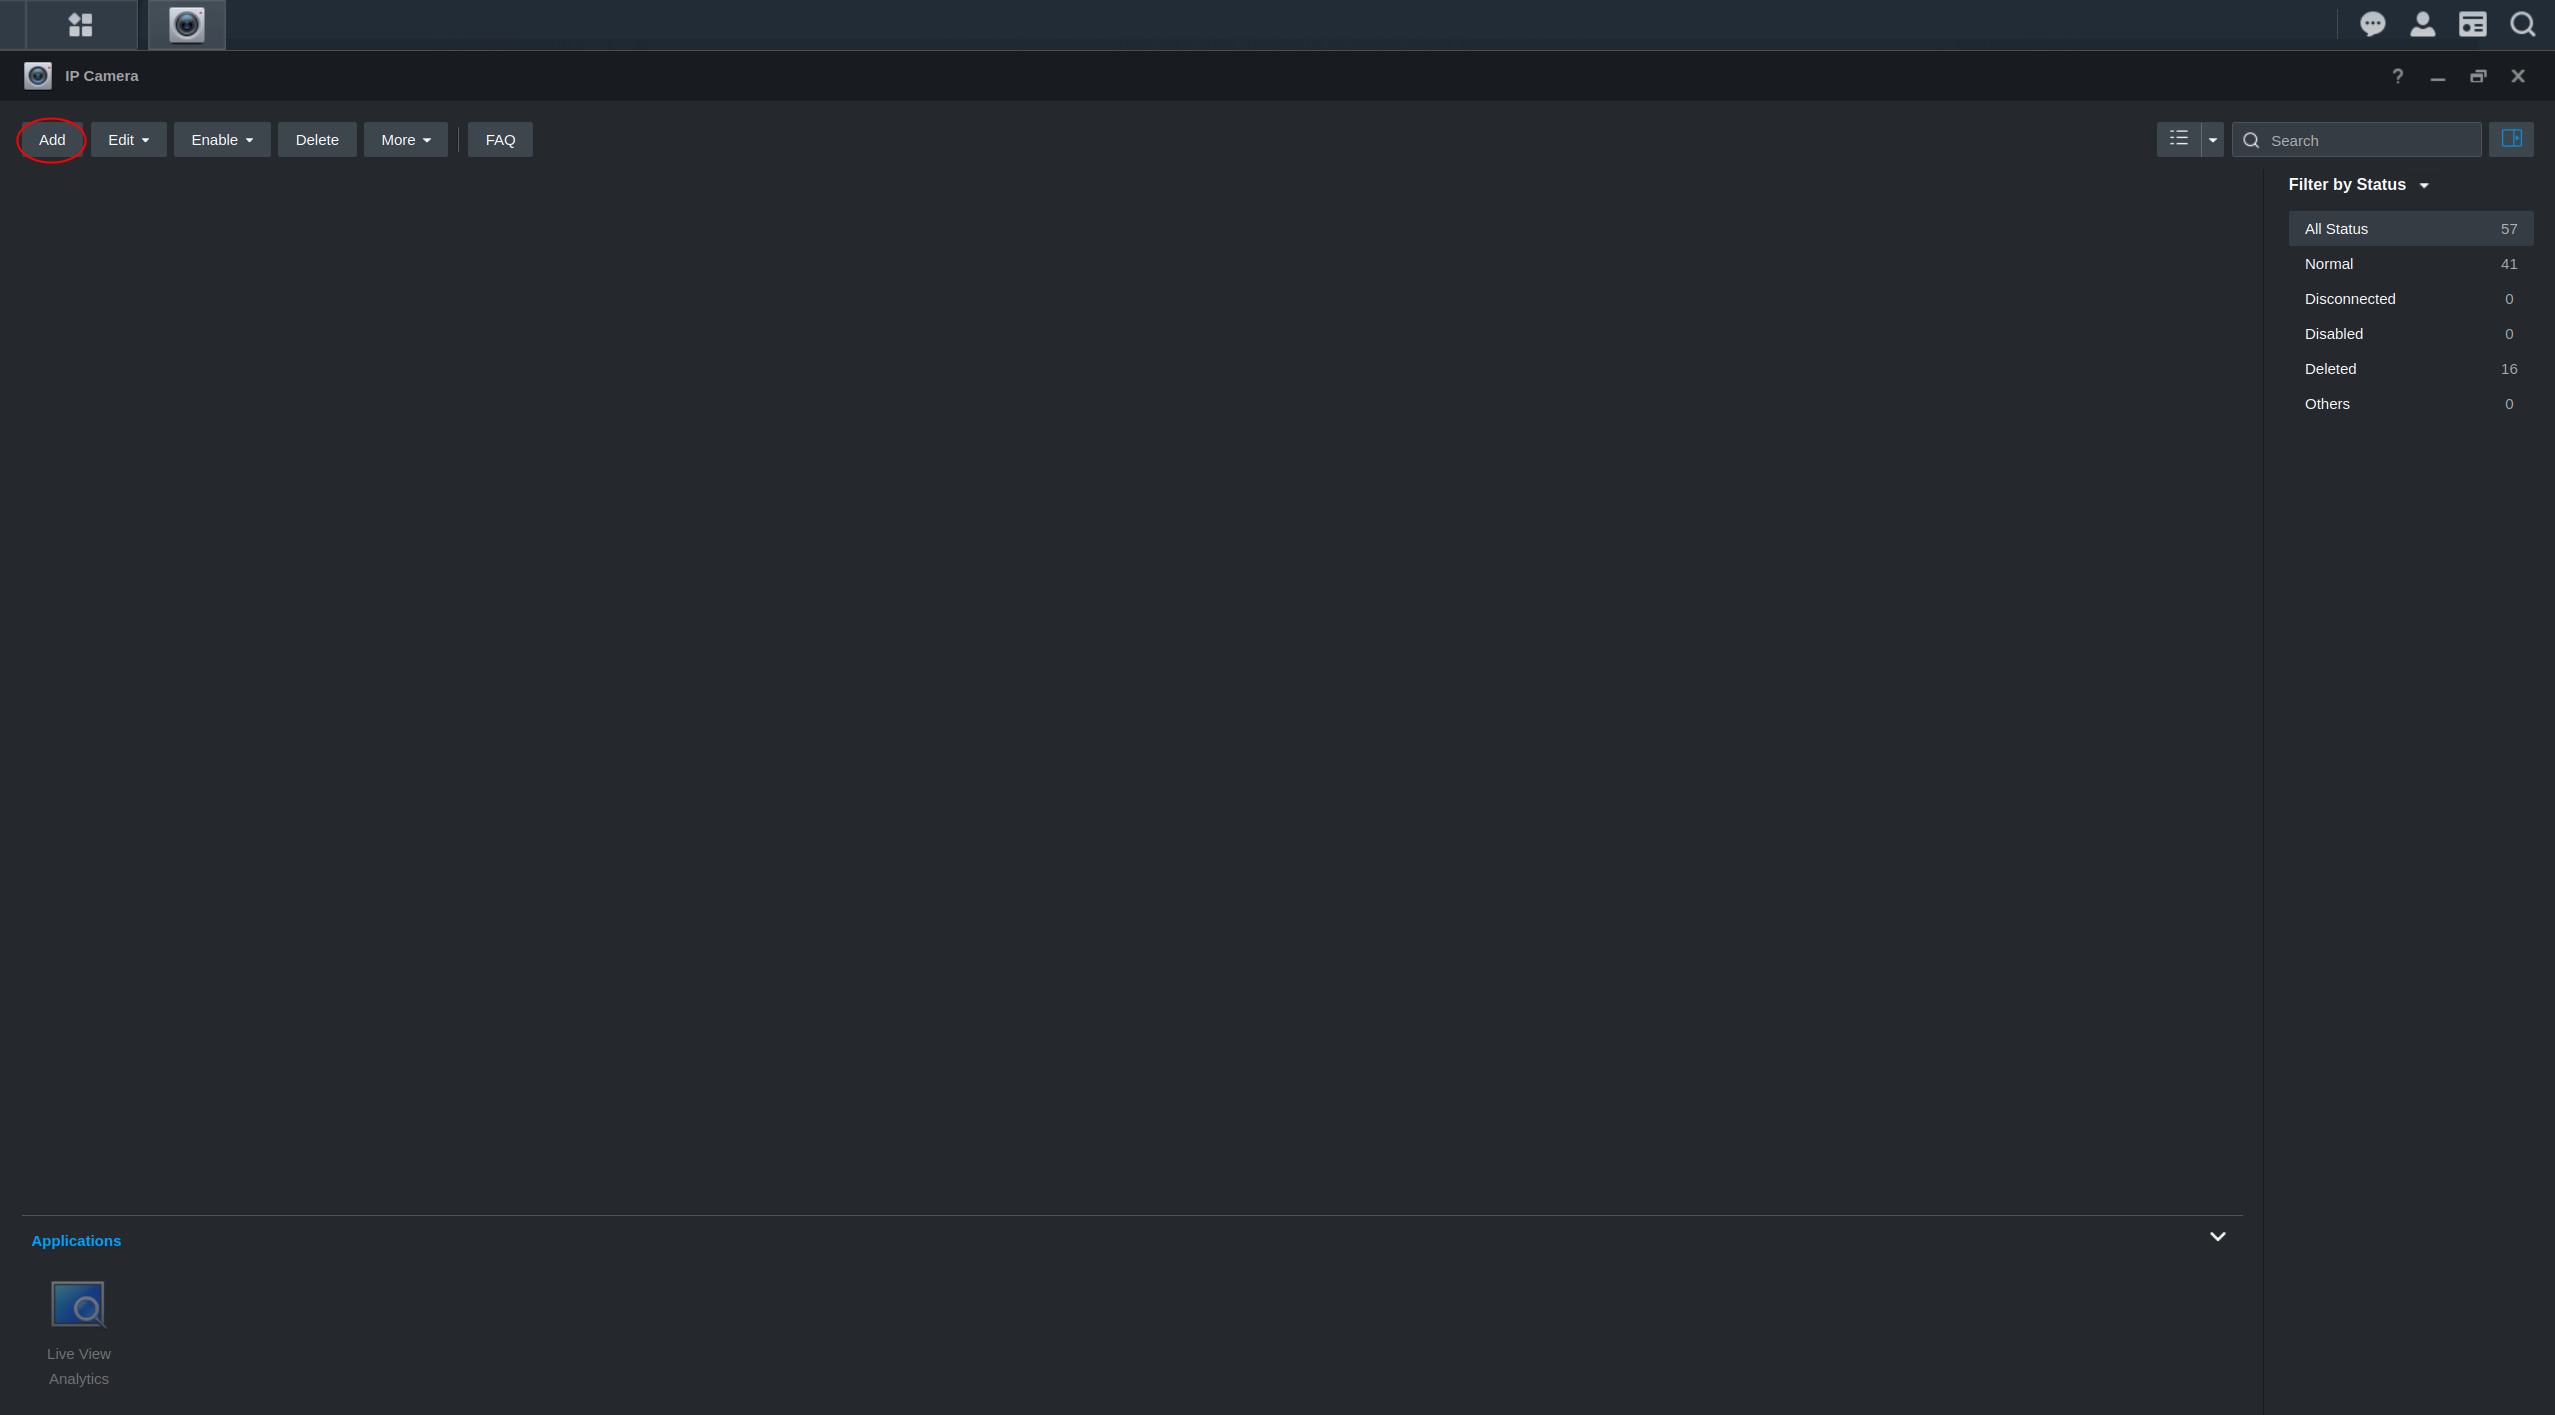
Click on application menu in the upper left hand corner and open the IP Camera app on the CMS host.
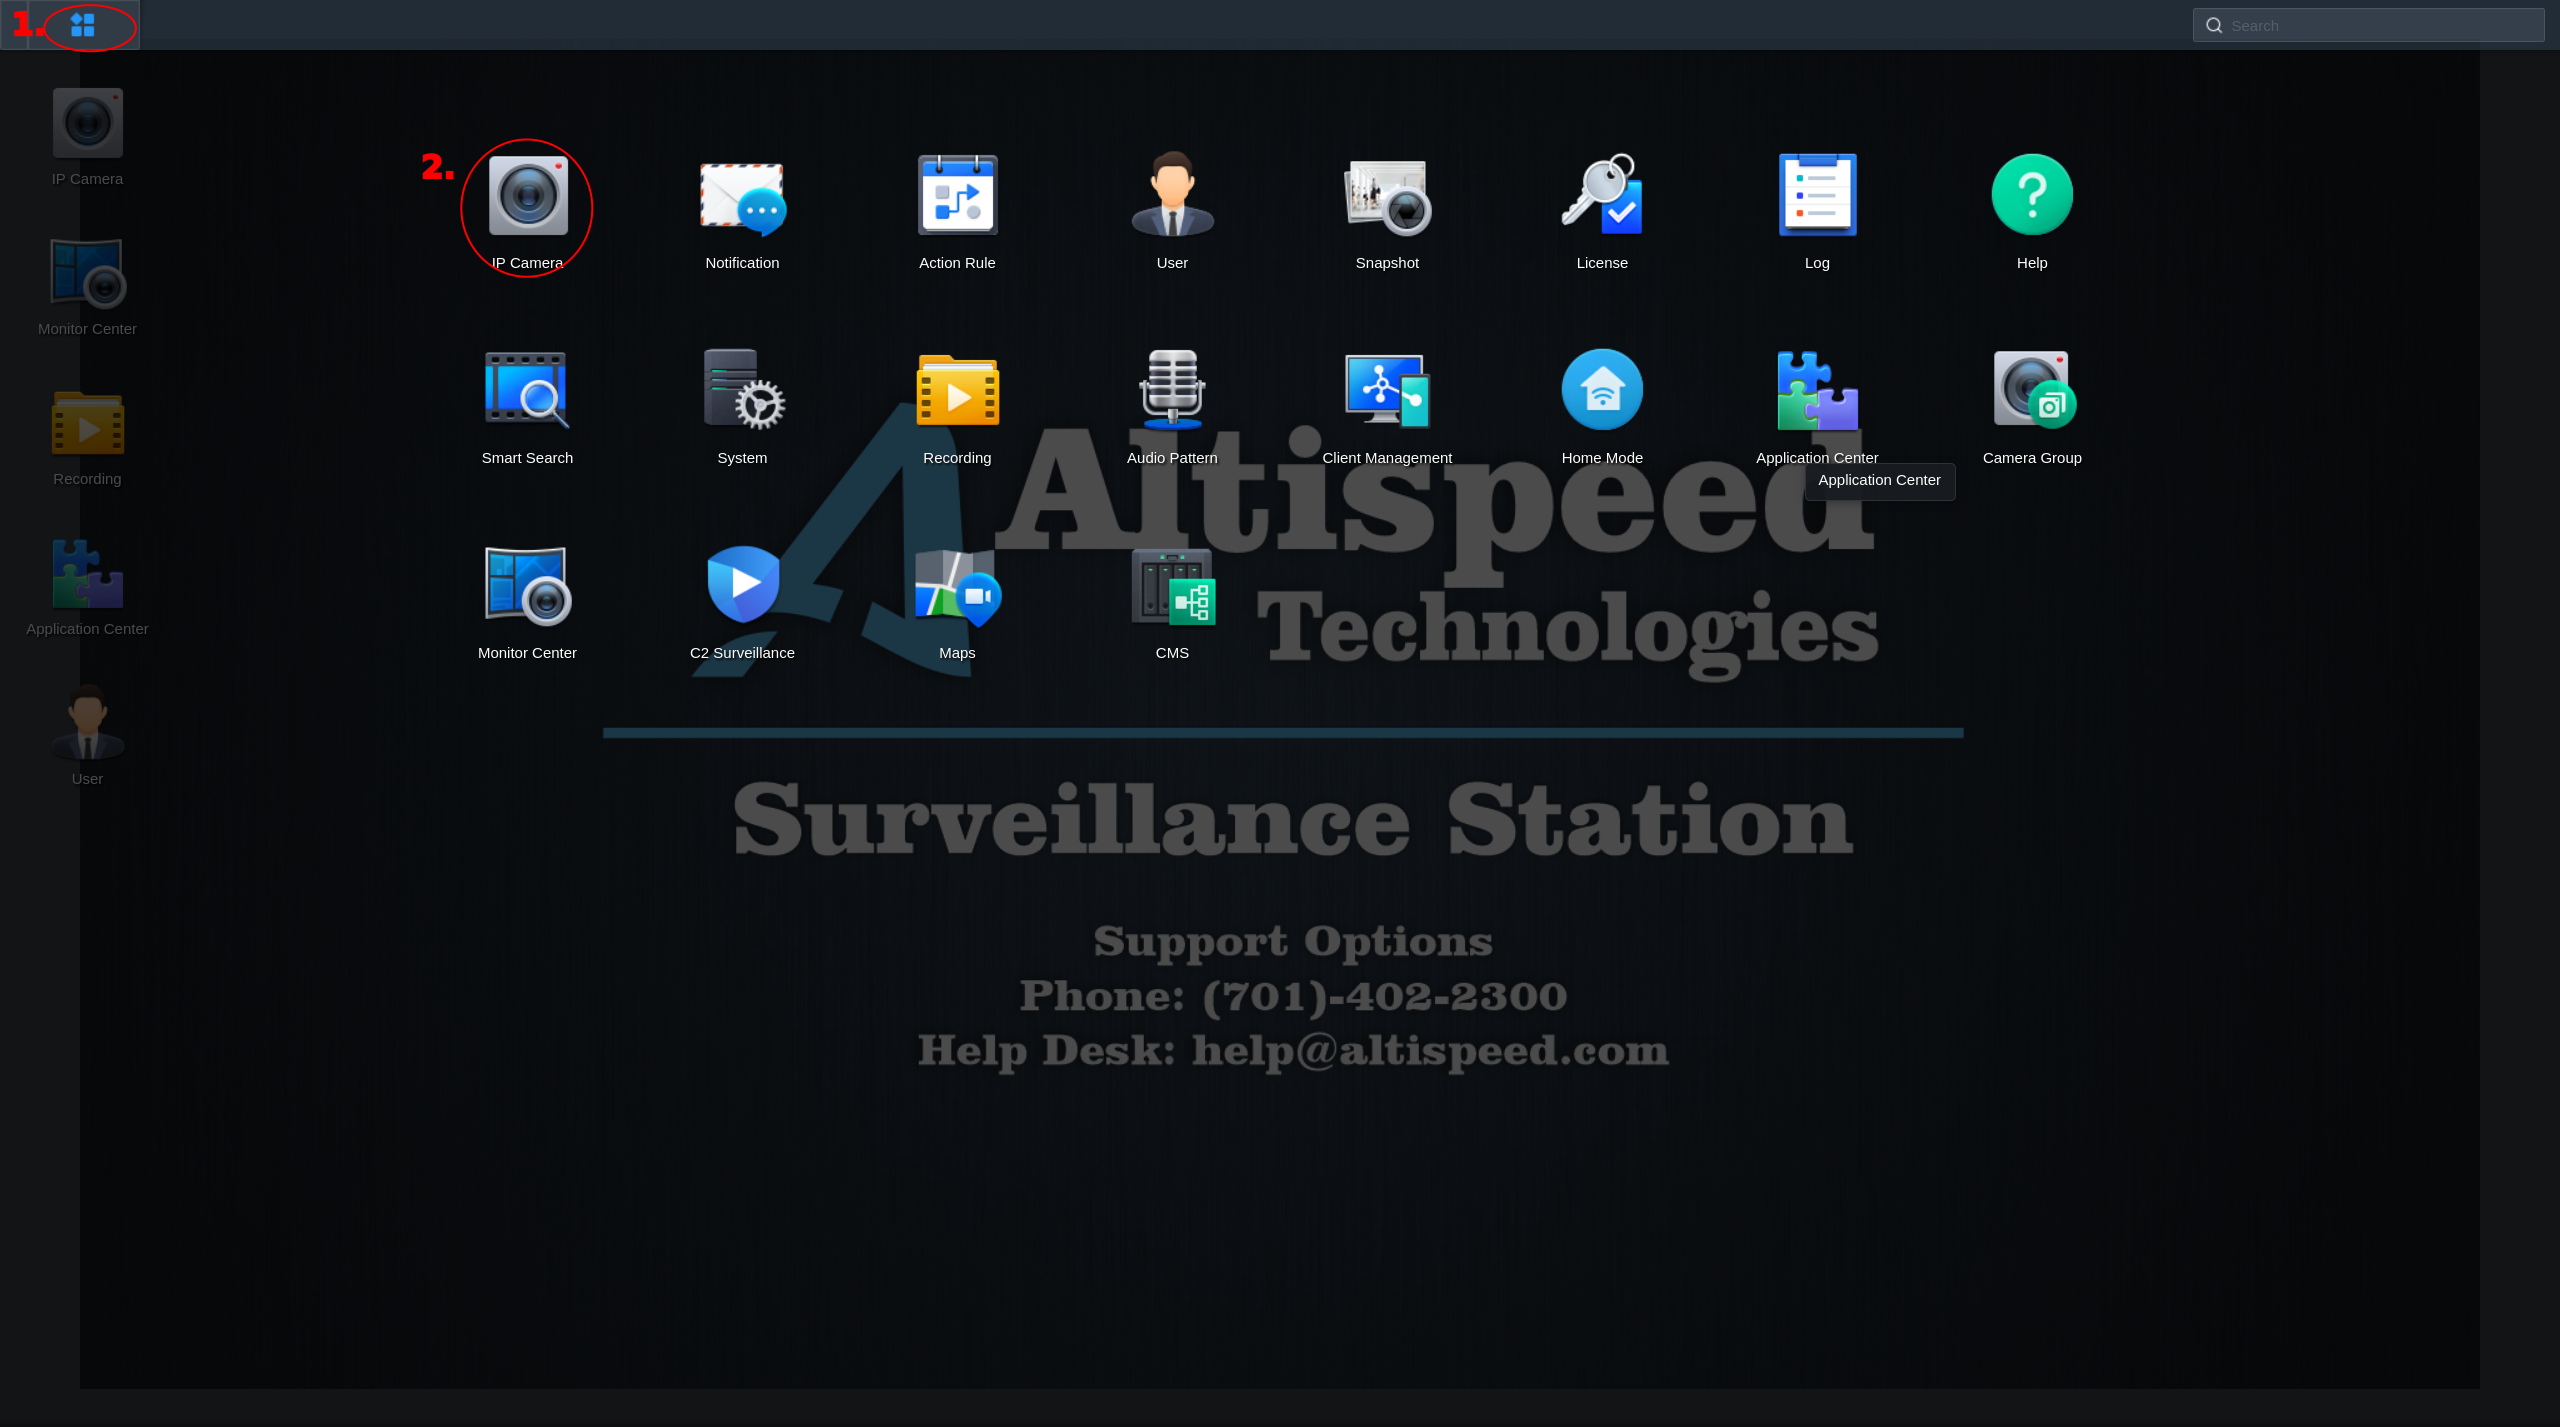
-
Click Add.
-
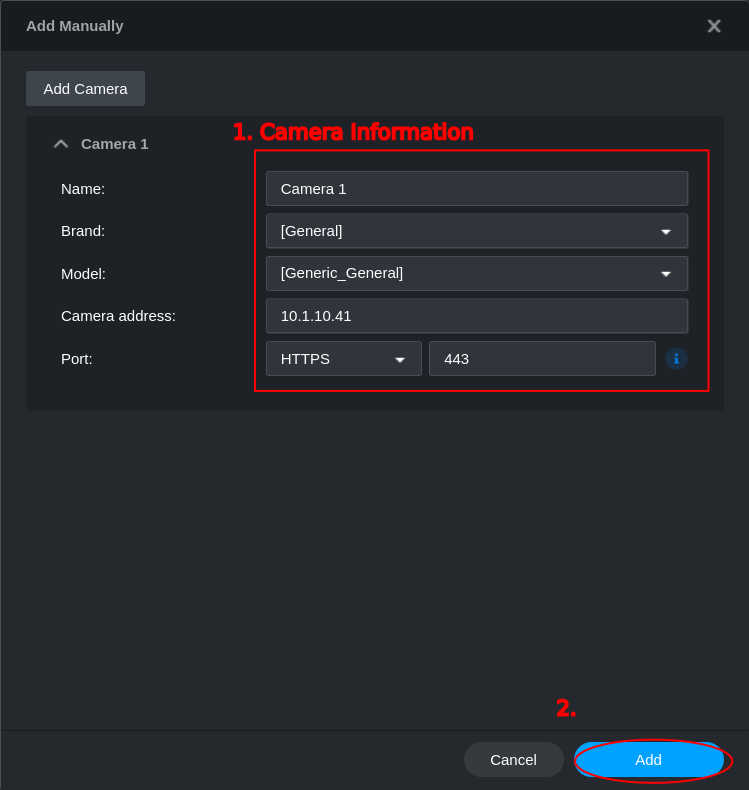
Click Add Manually.
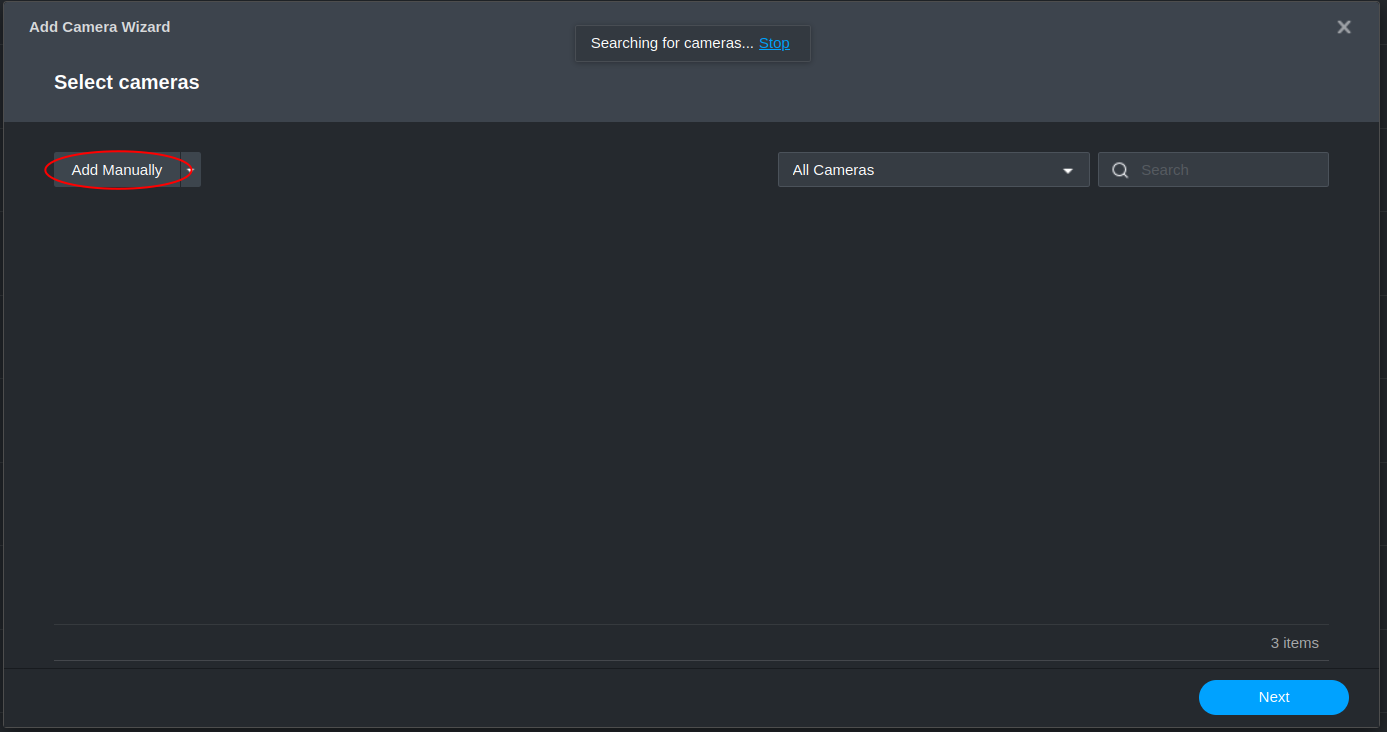
-
Enter the camera information and click Add Camera. Repeat this until all the cameras have added to list.
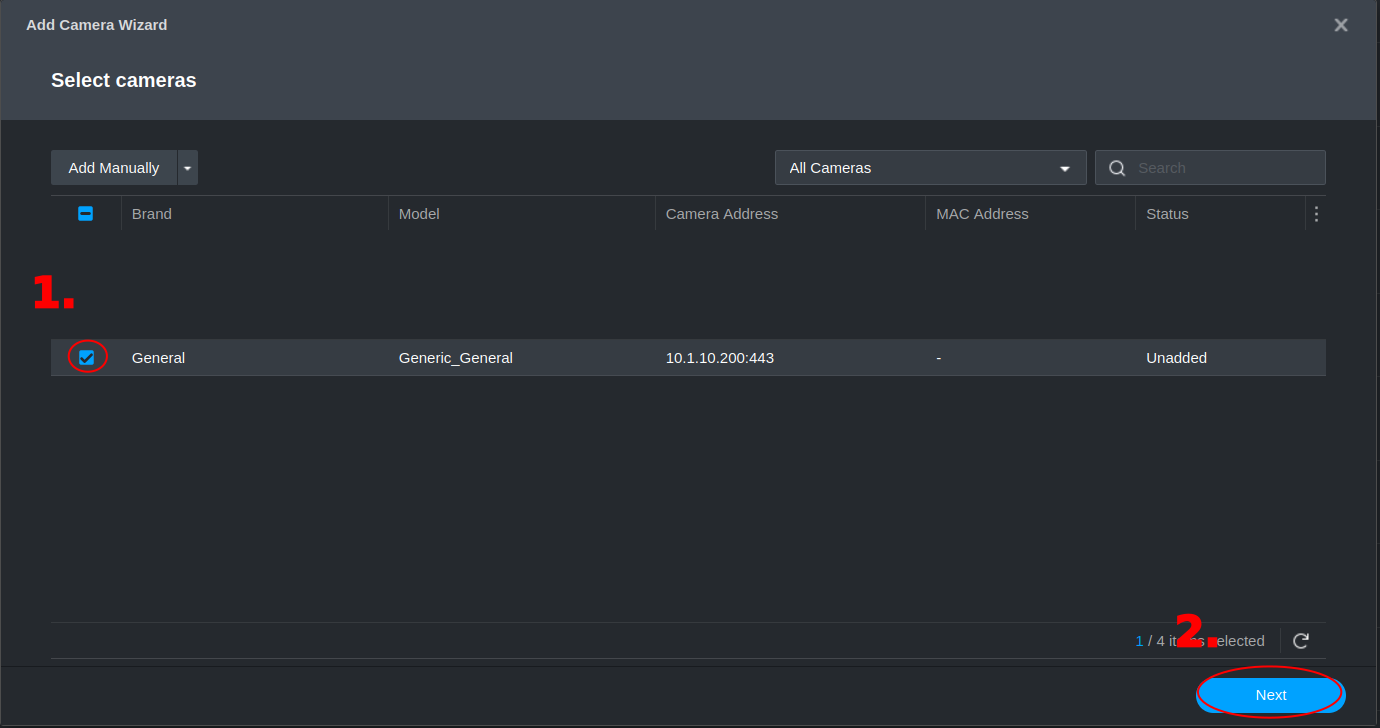
-
Ensure that all cameras that you want to add have been selected using the checkbox and then click Next.
-
Ensure that each cameras has the correct Server/Storage selected and that it has been authenticated. The Batch Manage button can used to configure
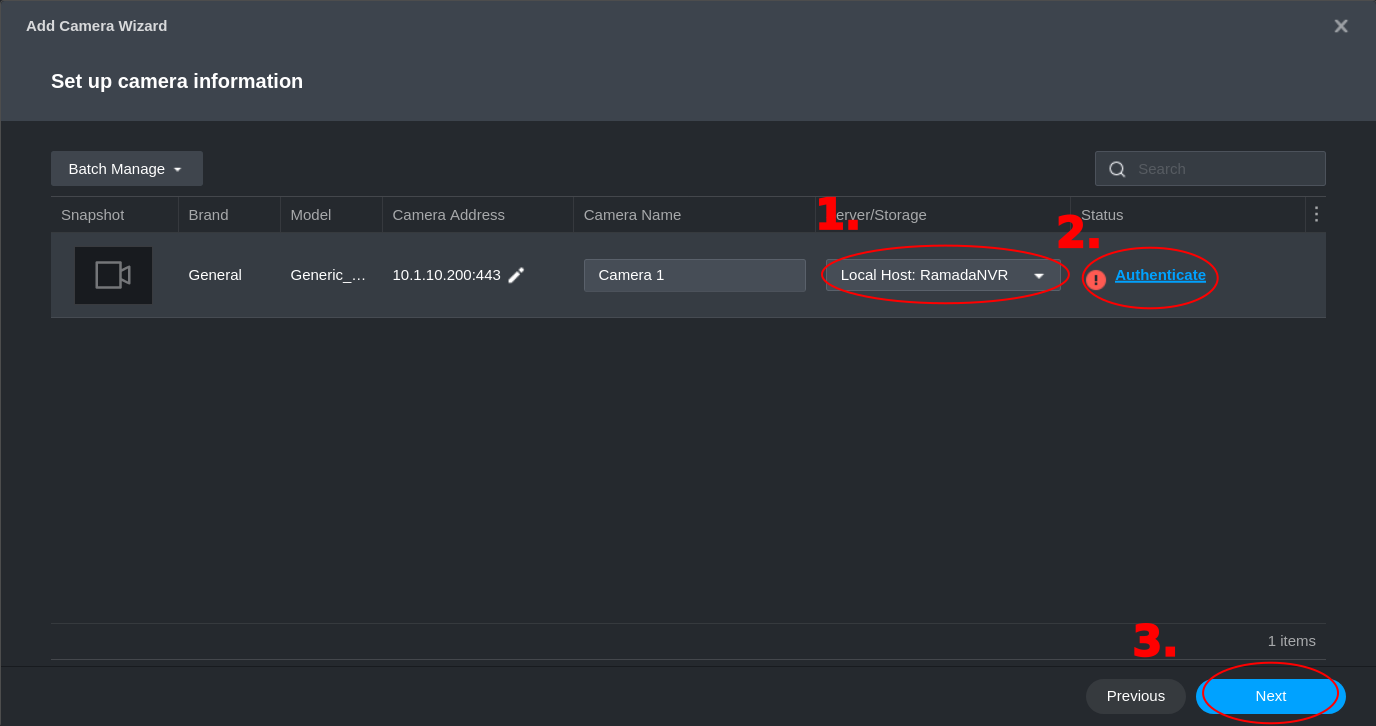
-
Select Camera Settings and then click Next

-
Review changes that will be made and then click Done

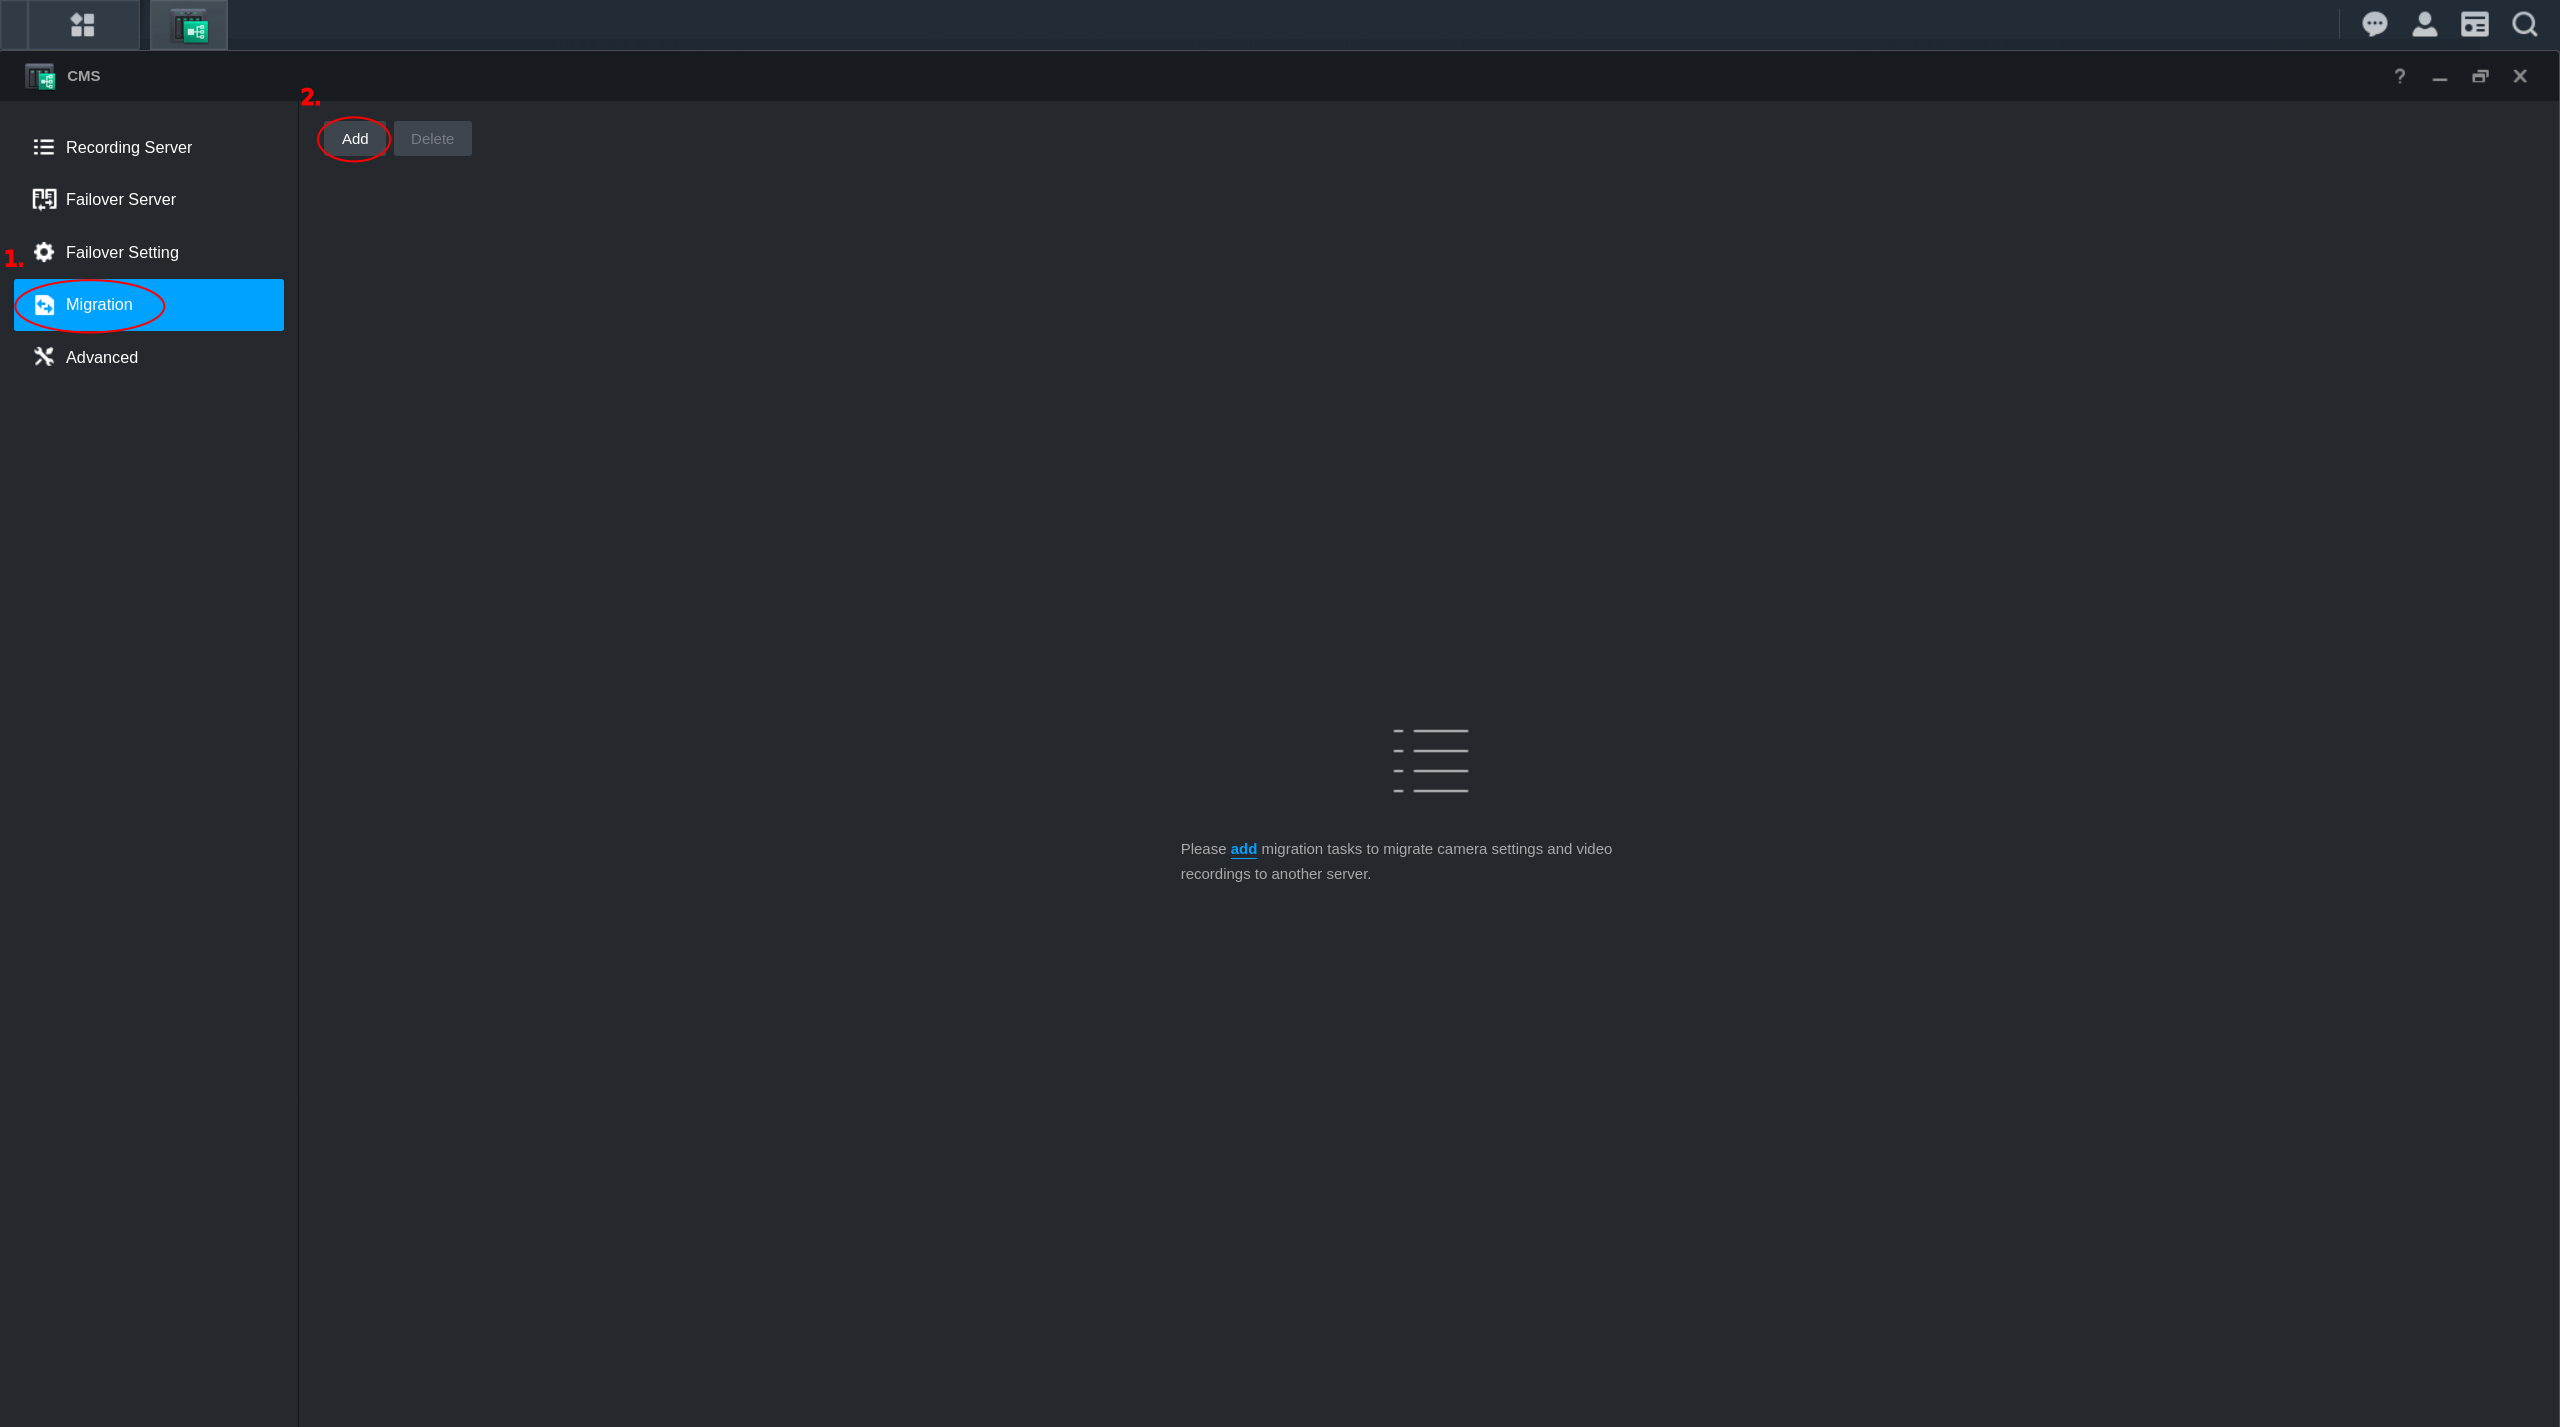
Migrating Cameras from one Synology Server to another Server when managed by CMS
- Click on application menu in the upper left hand corner and open the CMS app on the CMS host.
-
Select Migration from the left menu and then click Add
-
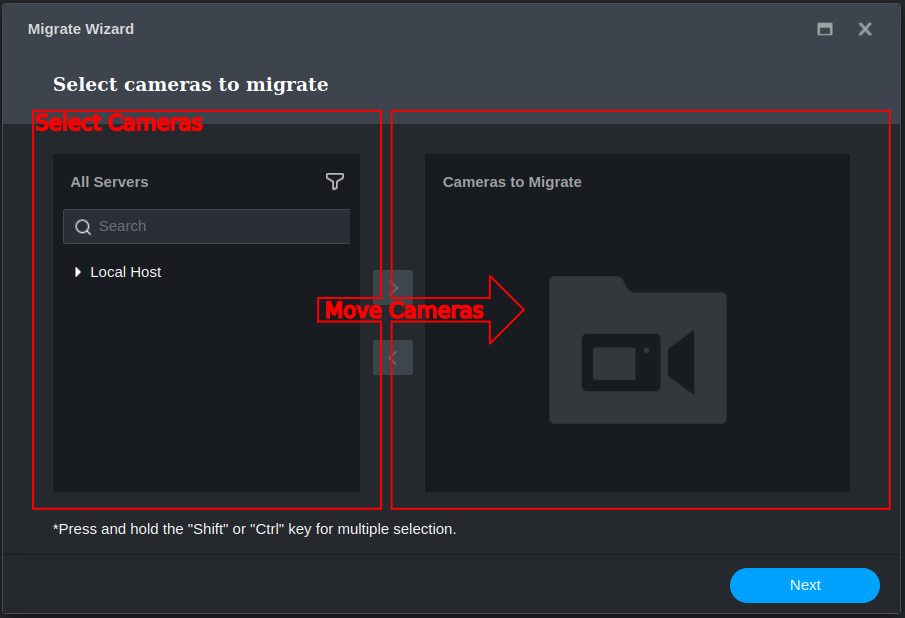
Select the cameras that you would like to migrate from the All Servers menu and move them to the Cameras to Migrate menu.
-
Select the destination server onto which you want to migrate cameras.
- Select the camera's recording storage after the migration is completed.
- Choose whether to keep camera recordings after migration. You can keep all camera recordings, delete them, or move the recordings together with the cameras.
- When you have finished the steps above, migration will start immediately and you will be able to see the progress in the Status column. (Source)